
Create an Abandoned Checkout Email Automation
Follow the steps below to create an Abandoned Checkout Email Automation for your customers:
-
Navigate to the Automations section from the sidebar.
-
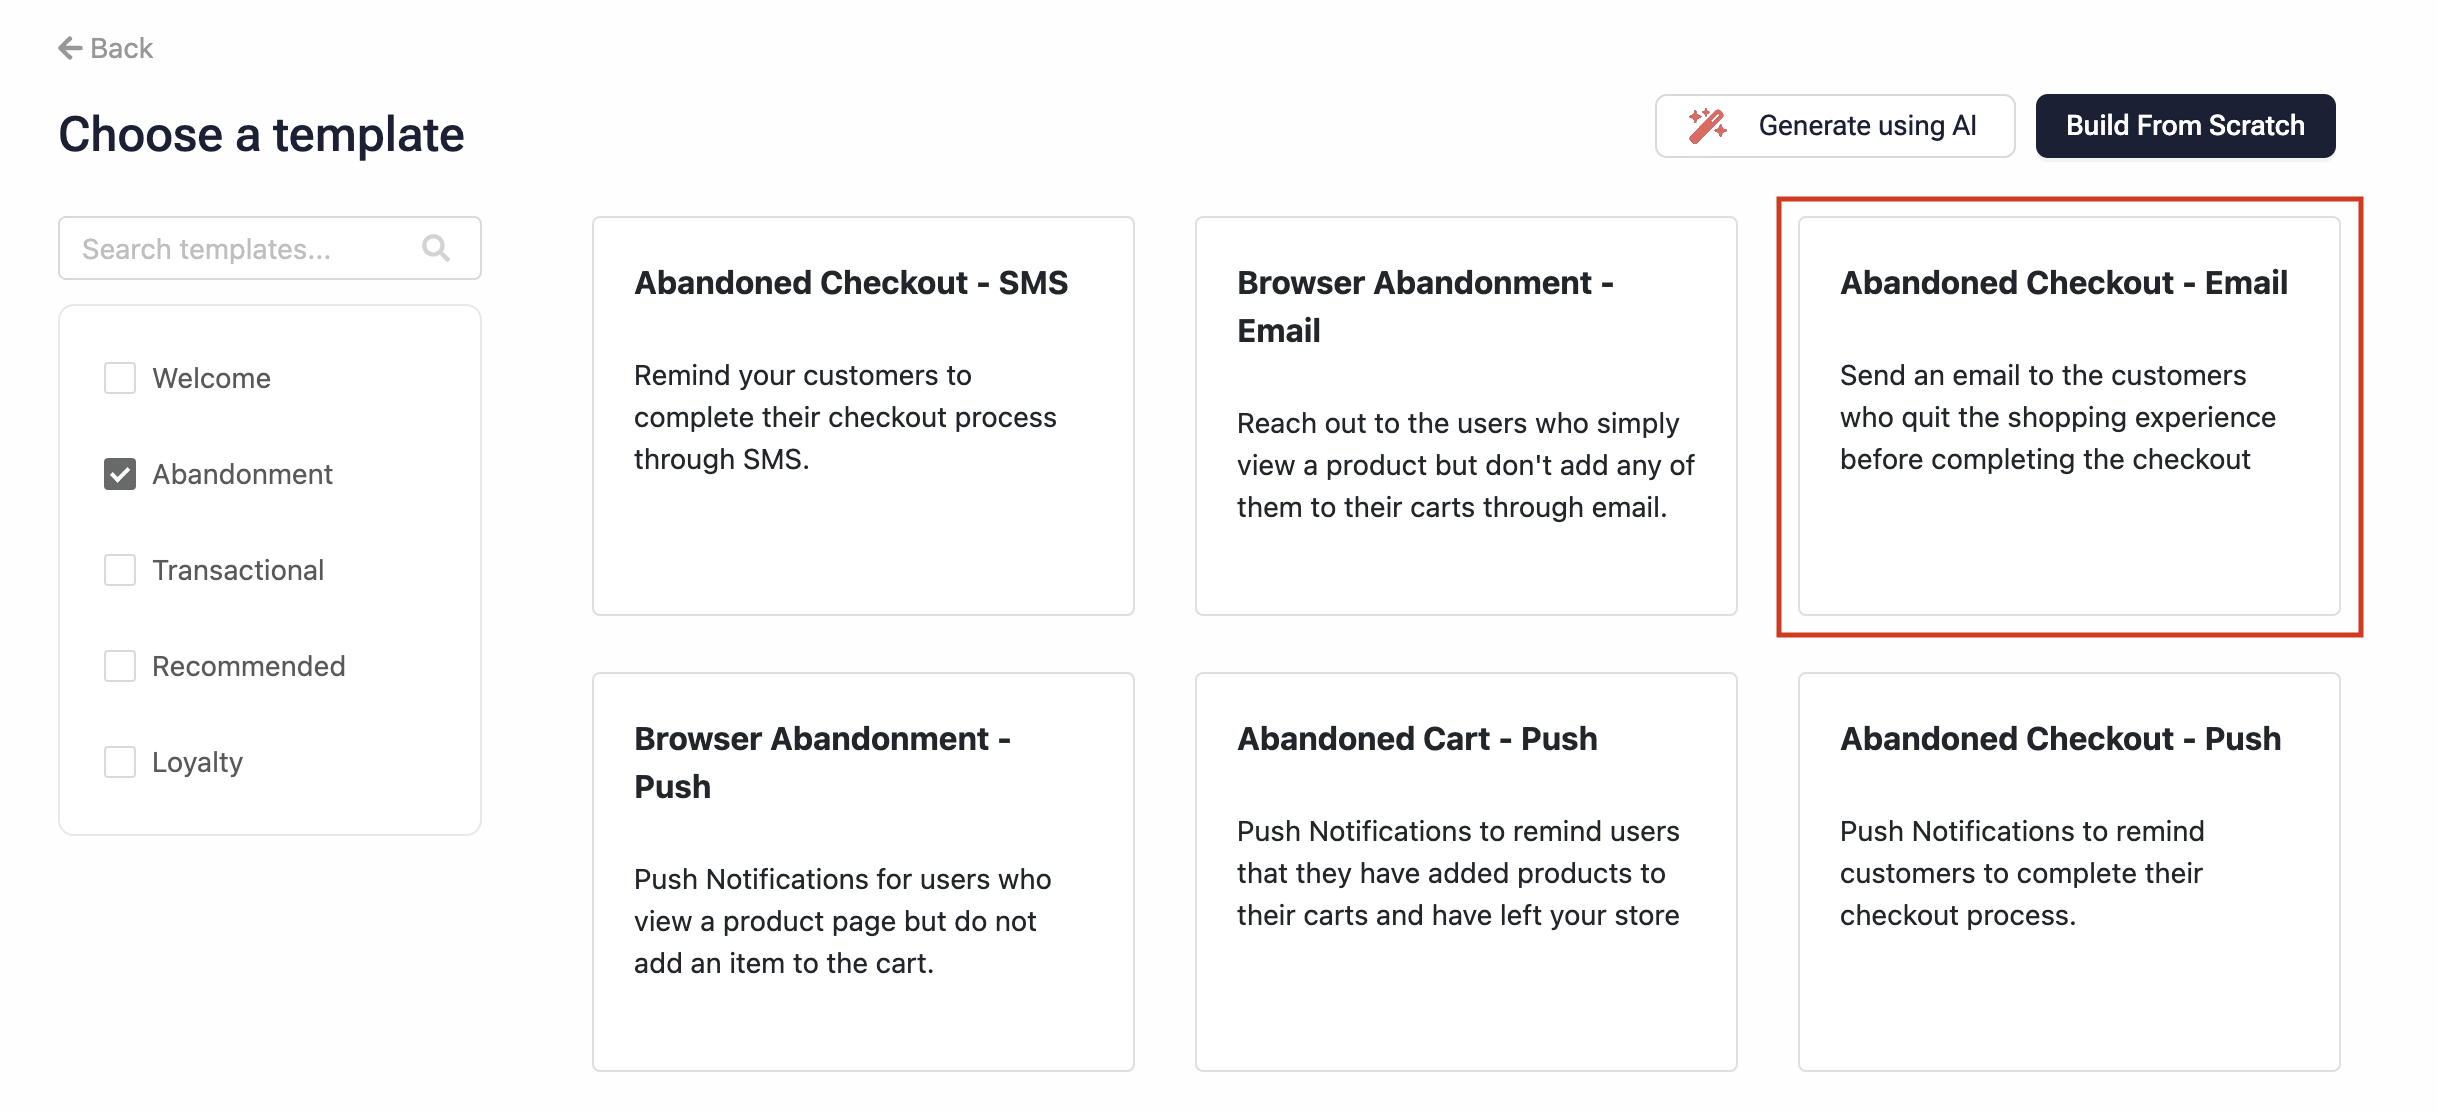
On the Automations page, click the Create Automation button. You would land on the Choose a template page.
-
On the Choose a template page, search and select the Abandoned Checkout - Email template.
-
Click Use Template on the template preview modal. It opens the Automation editor preloaded with the selected template.
Configure each block as per your use case. Each block is explained in detail below:
Template blocks
-
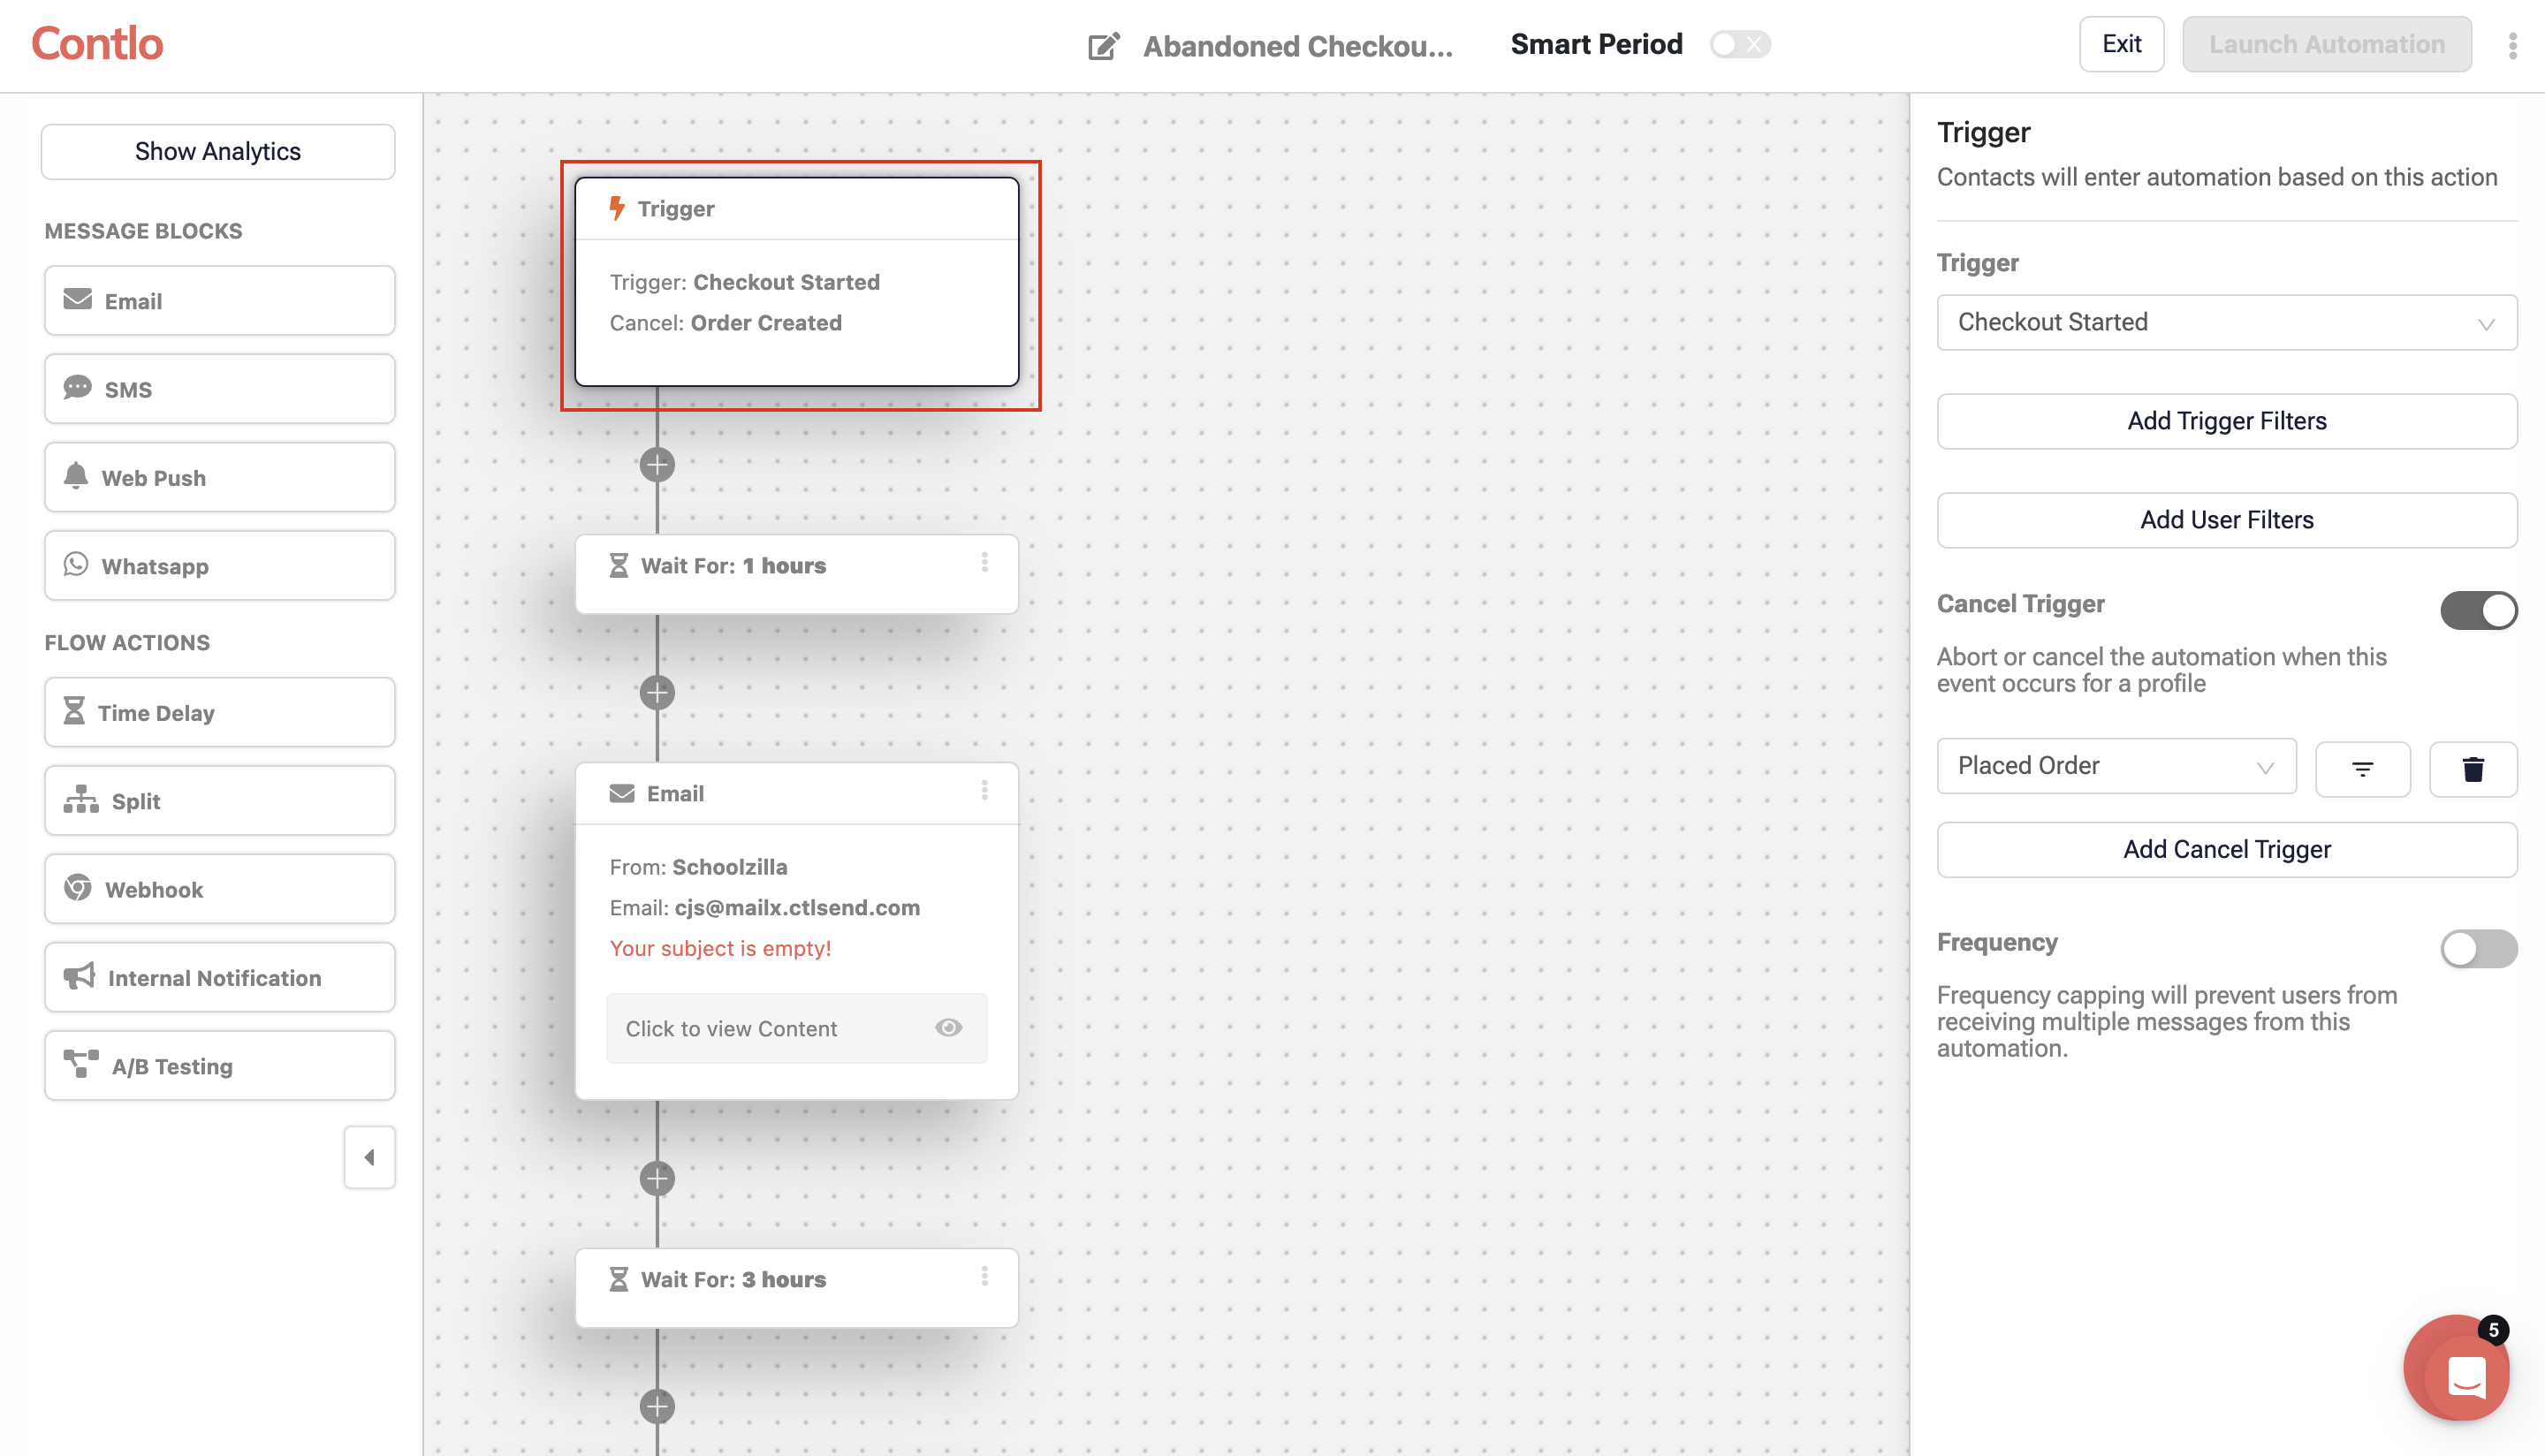
Trigger: A trigger is an event that starts or stops the automation. To set up a trigger for the Abandoned Checkout, follow the steps below:
-
Trigger: Select the Trigger block and set the trigger event on the right pane from the Trigger dropdown. In this template, it is set to Checkout Started, an event fired when a user initiates the checkout process for their cart on your platform.
-
User Filter: This filter defines what category of customers should receive this message. For example, by adding the user filter set to country Argentina, the Automation workflow triggers only for customers that provide this country at the checkout page or subscribe to the Signup form that determines your customers' location automatically.
-
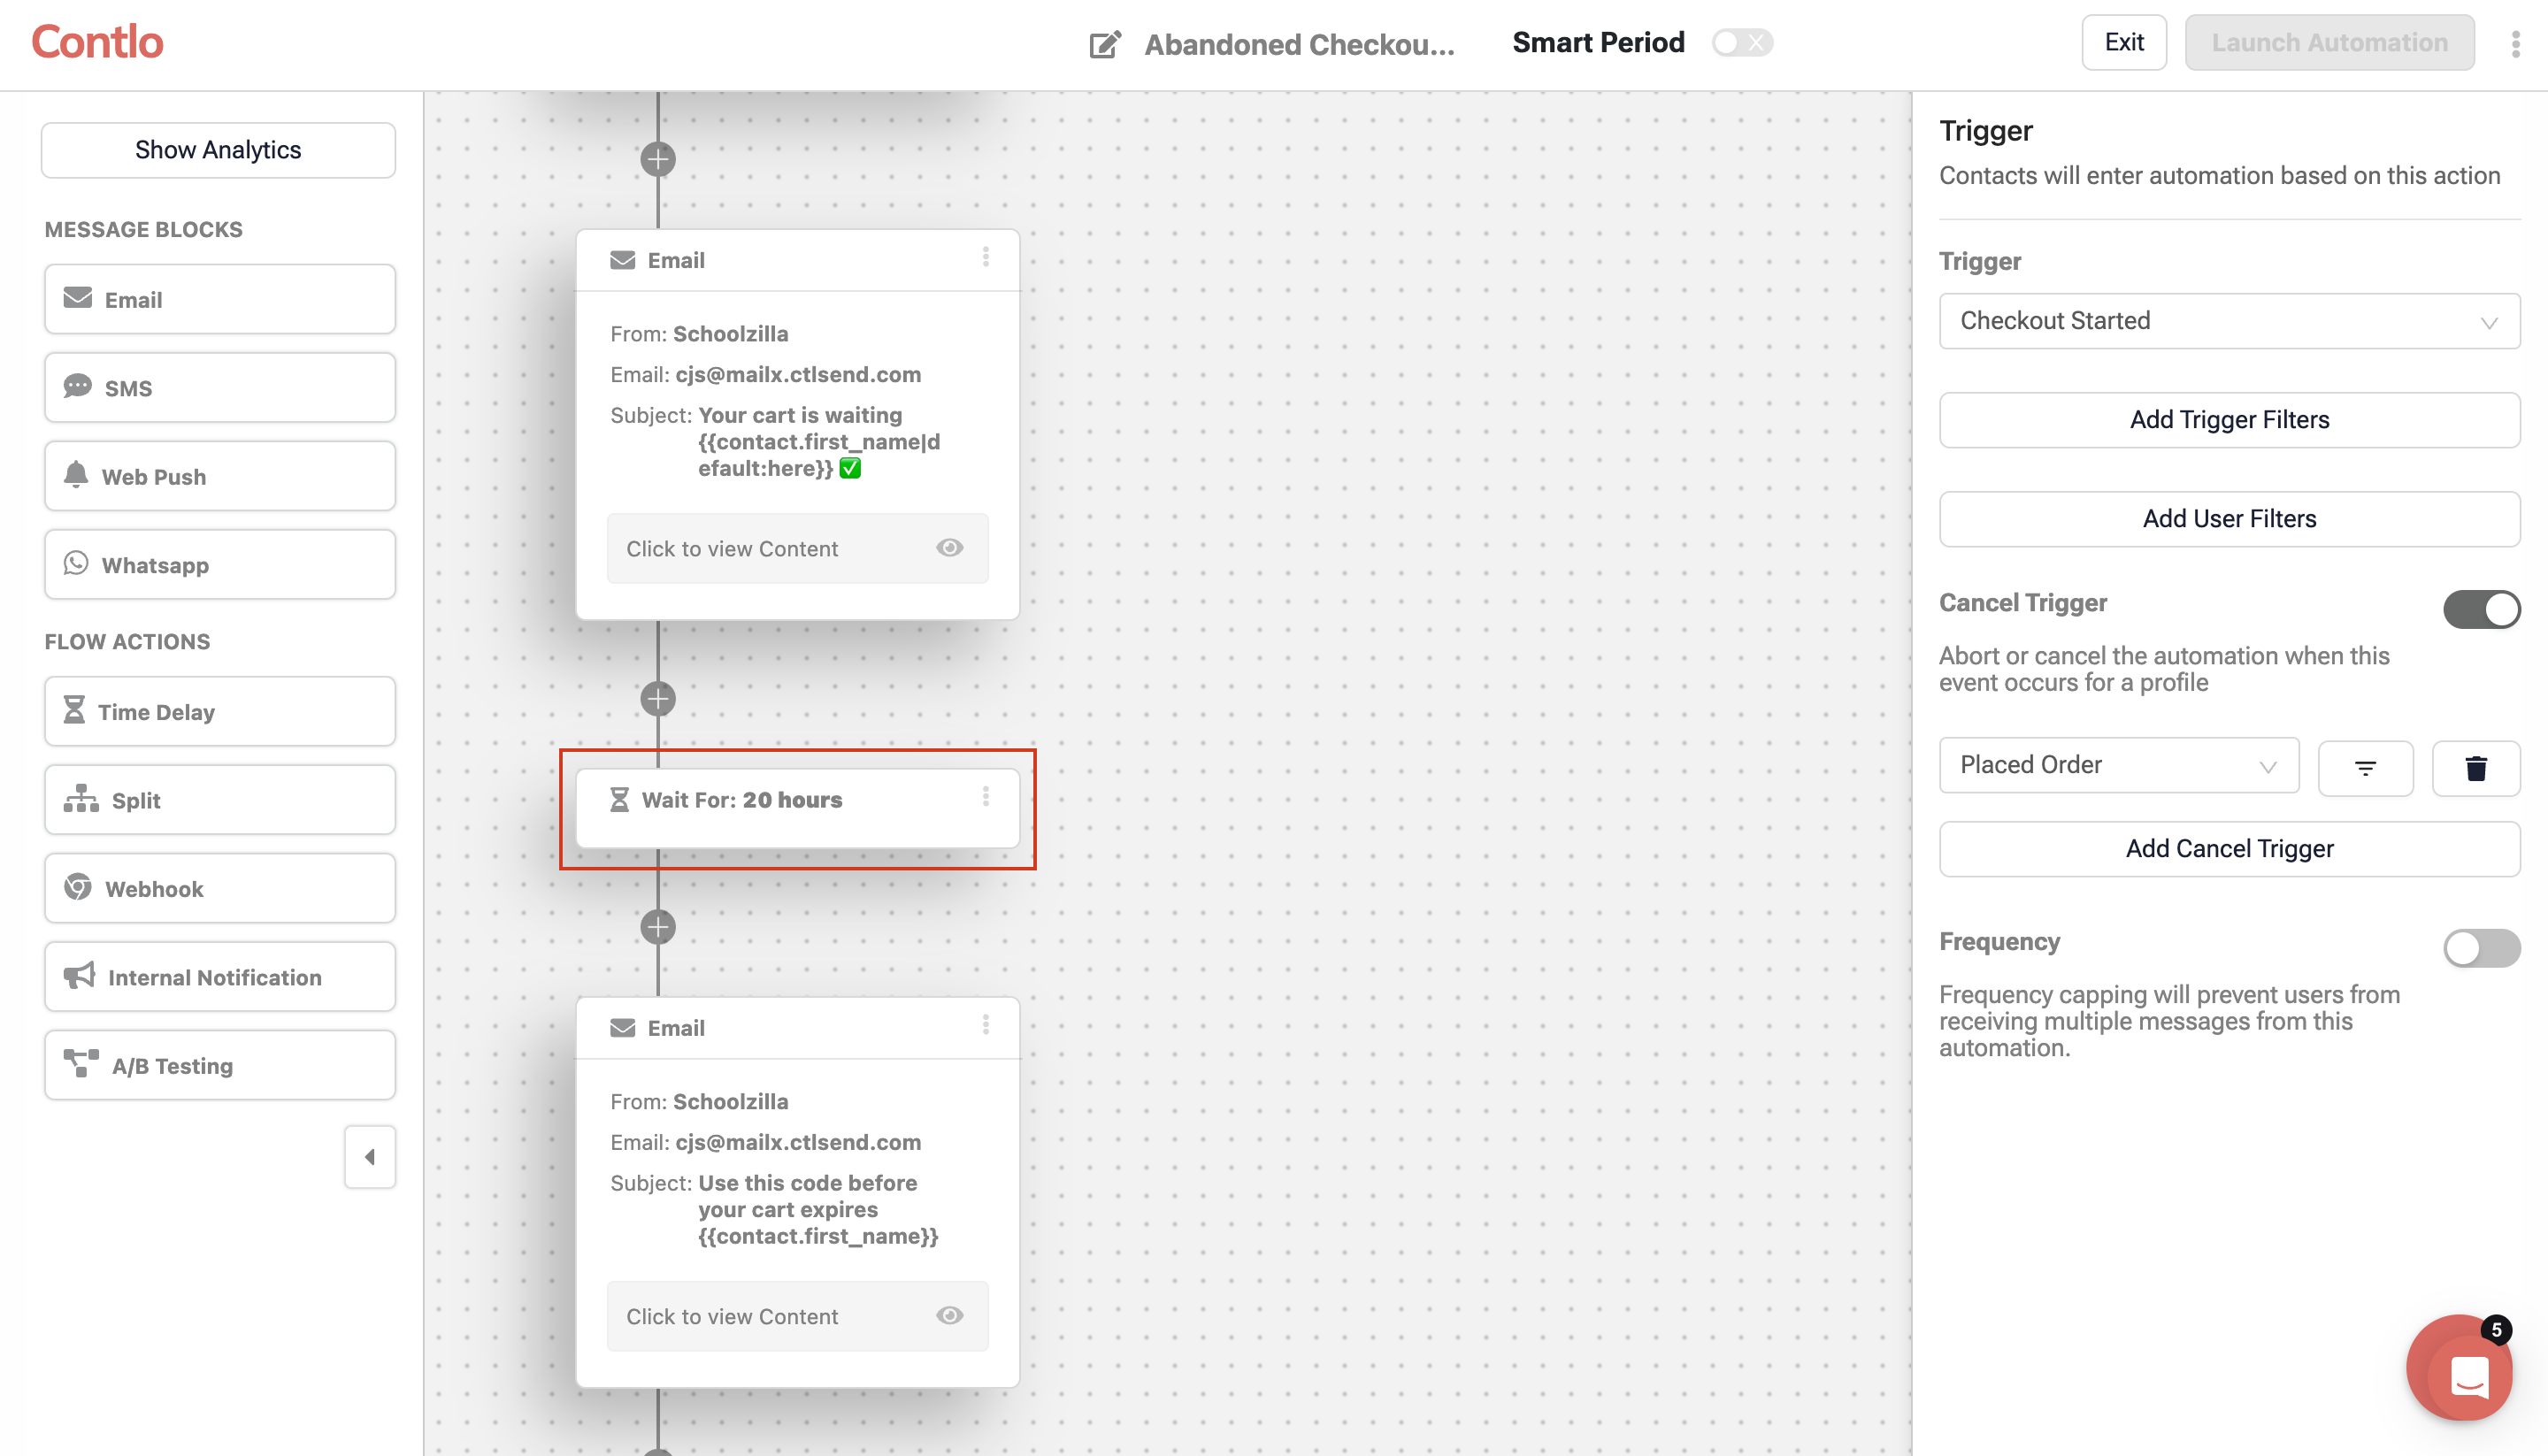
Cancel Trigger: Set an event in the Cancel Trigger section to stop the automation. In this template, it is set to Placed order, an event fired when a customer places an order on your platform.
-
-
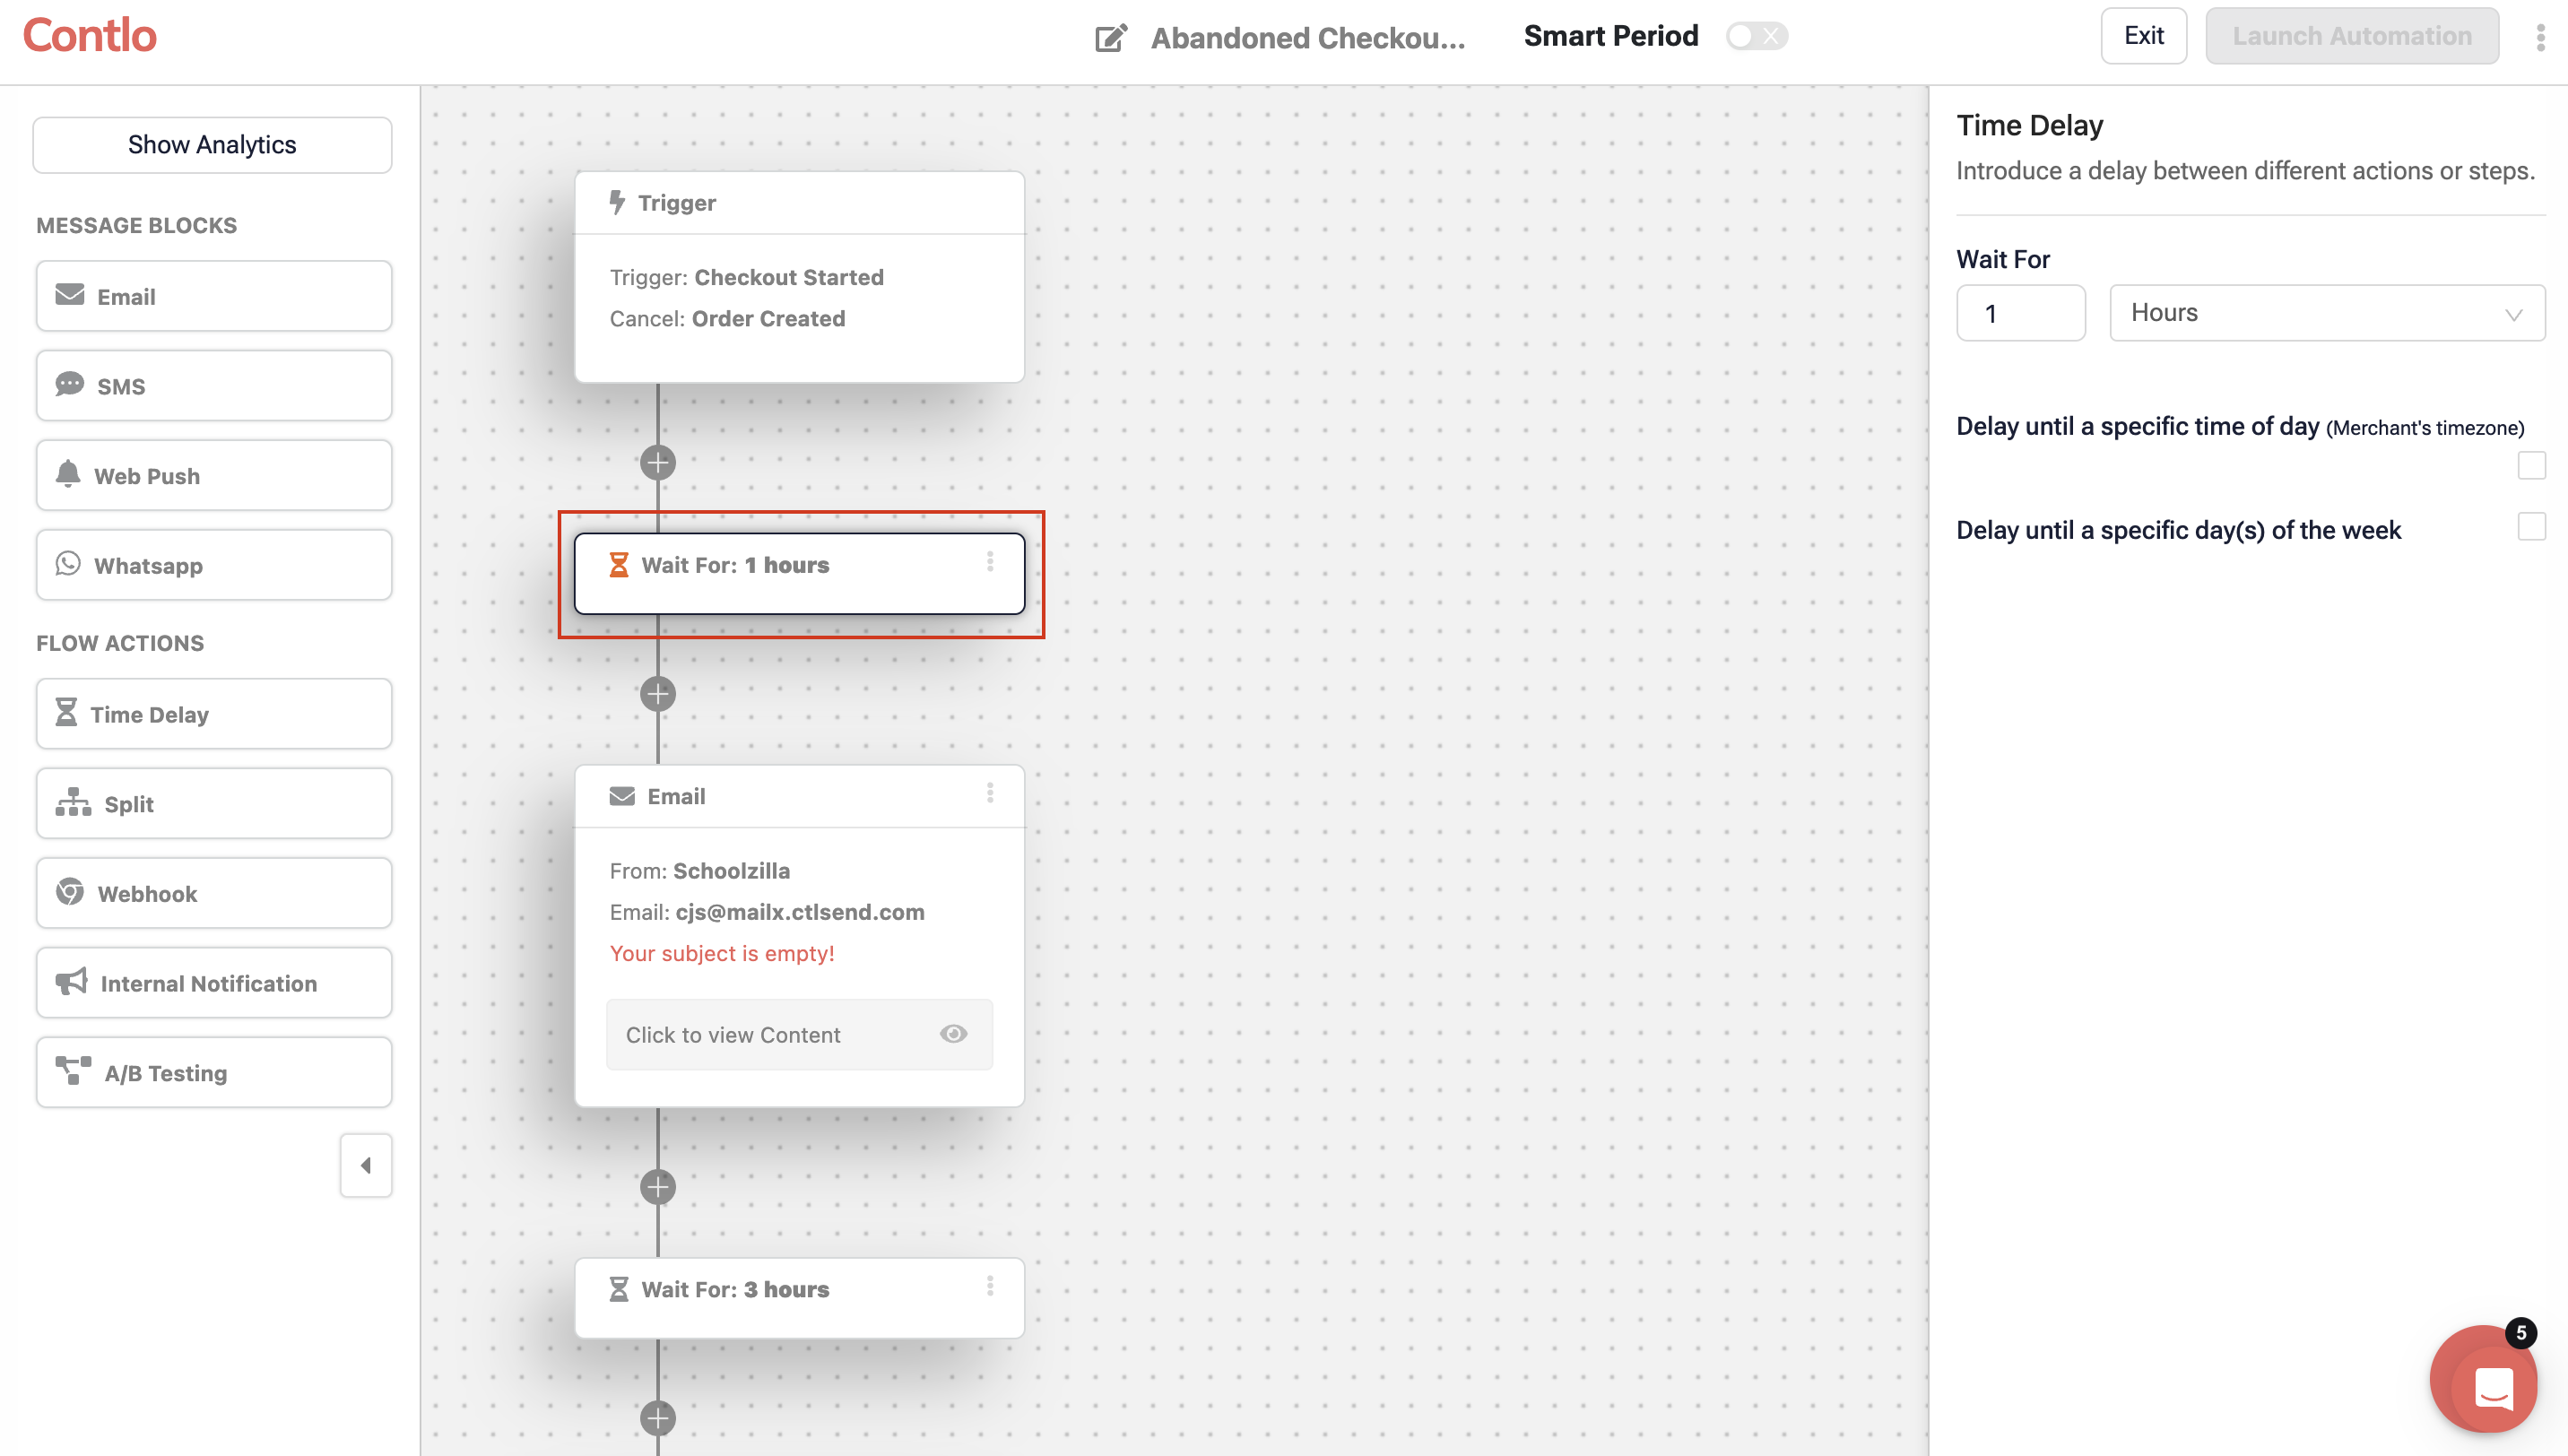
Time Delay for First Email:Time delay, a flow action, is the waiting time for the upcoming block to work if the trigger activates. In this case, when the trigger gets fired, the wait time is set to 1 hour, which means the upcoming Email block activates after 1 hour of activation.
-
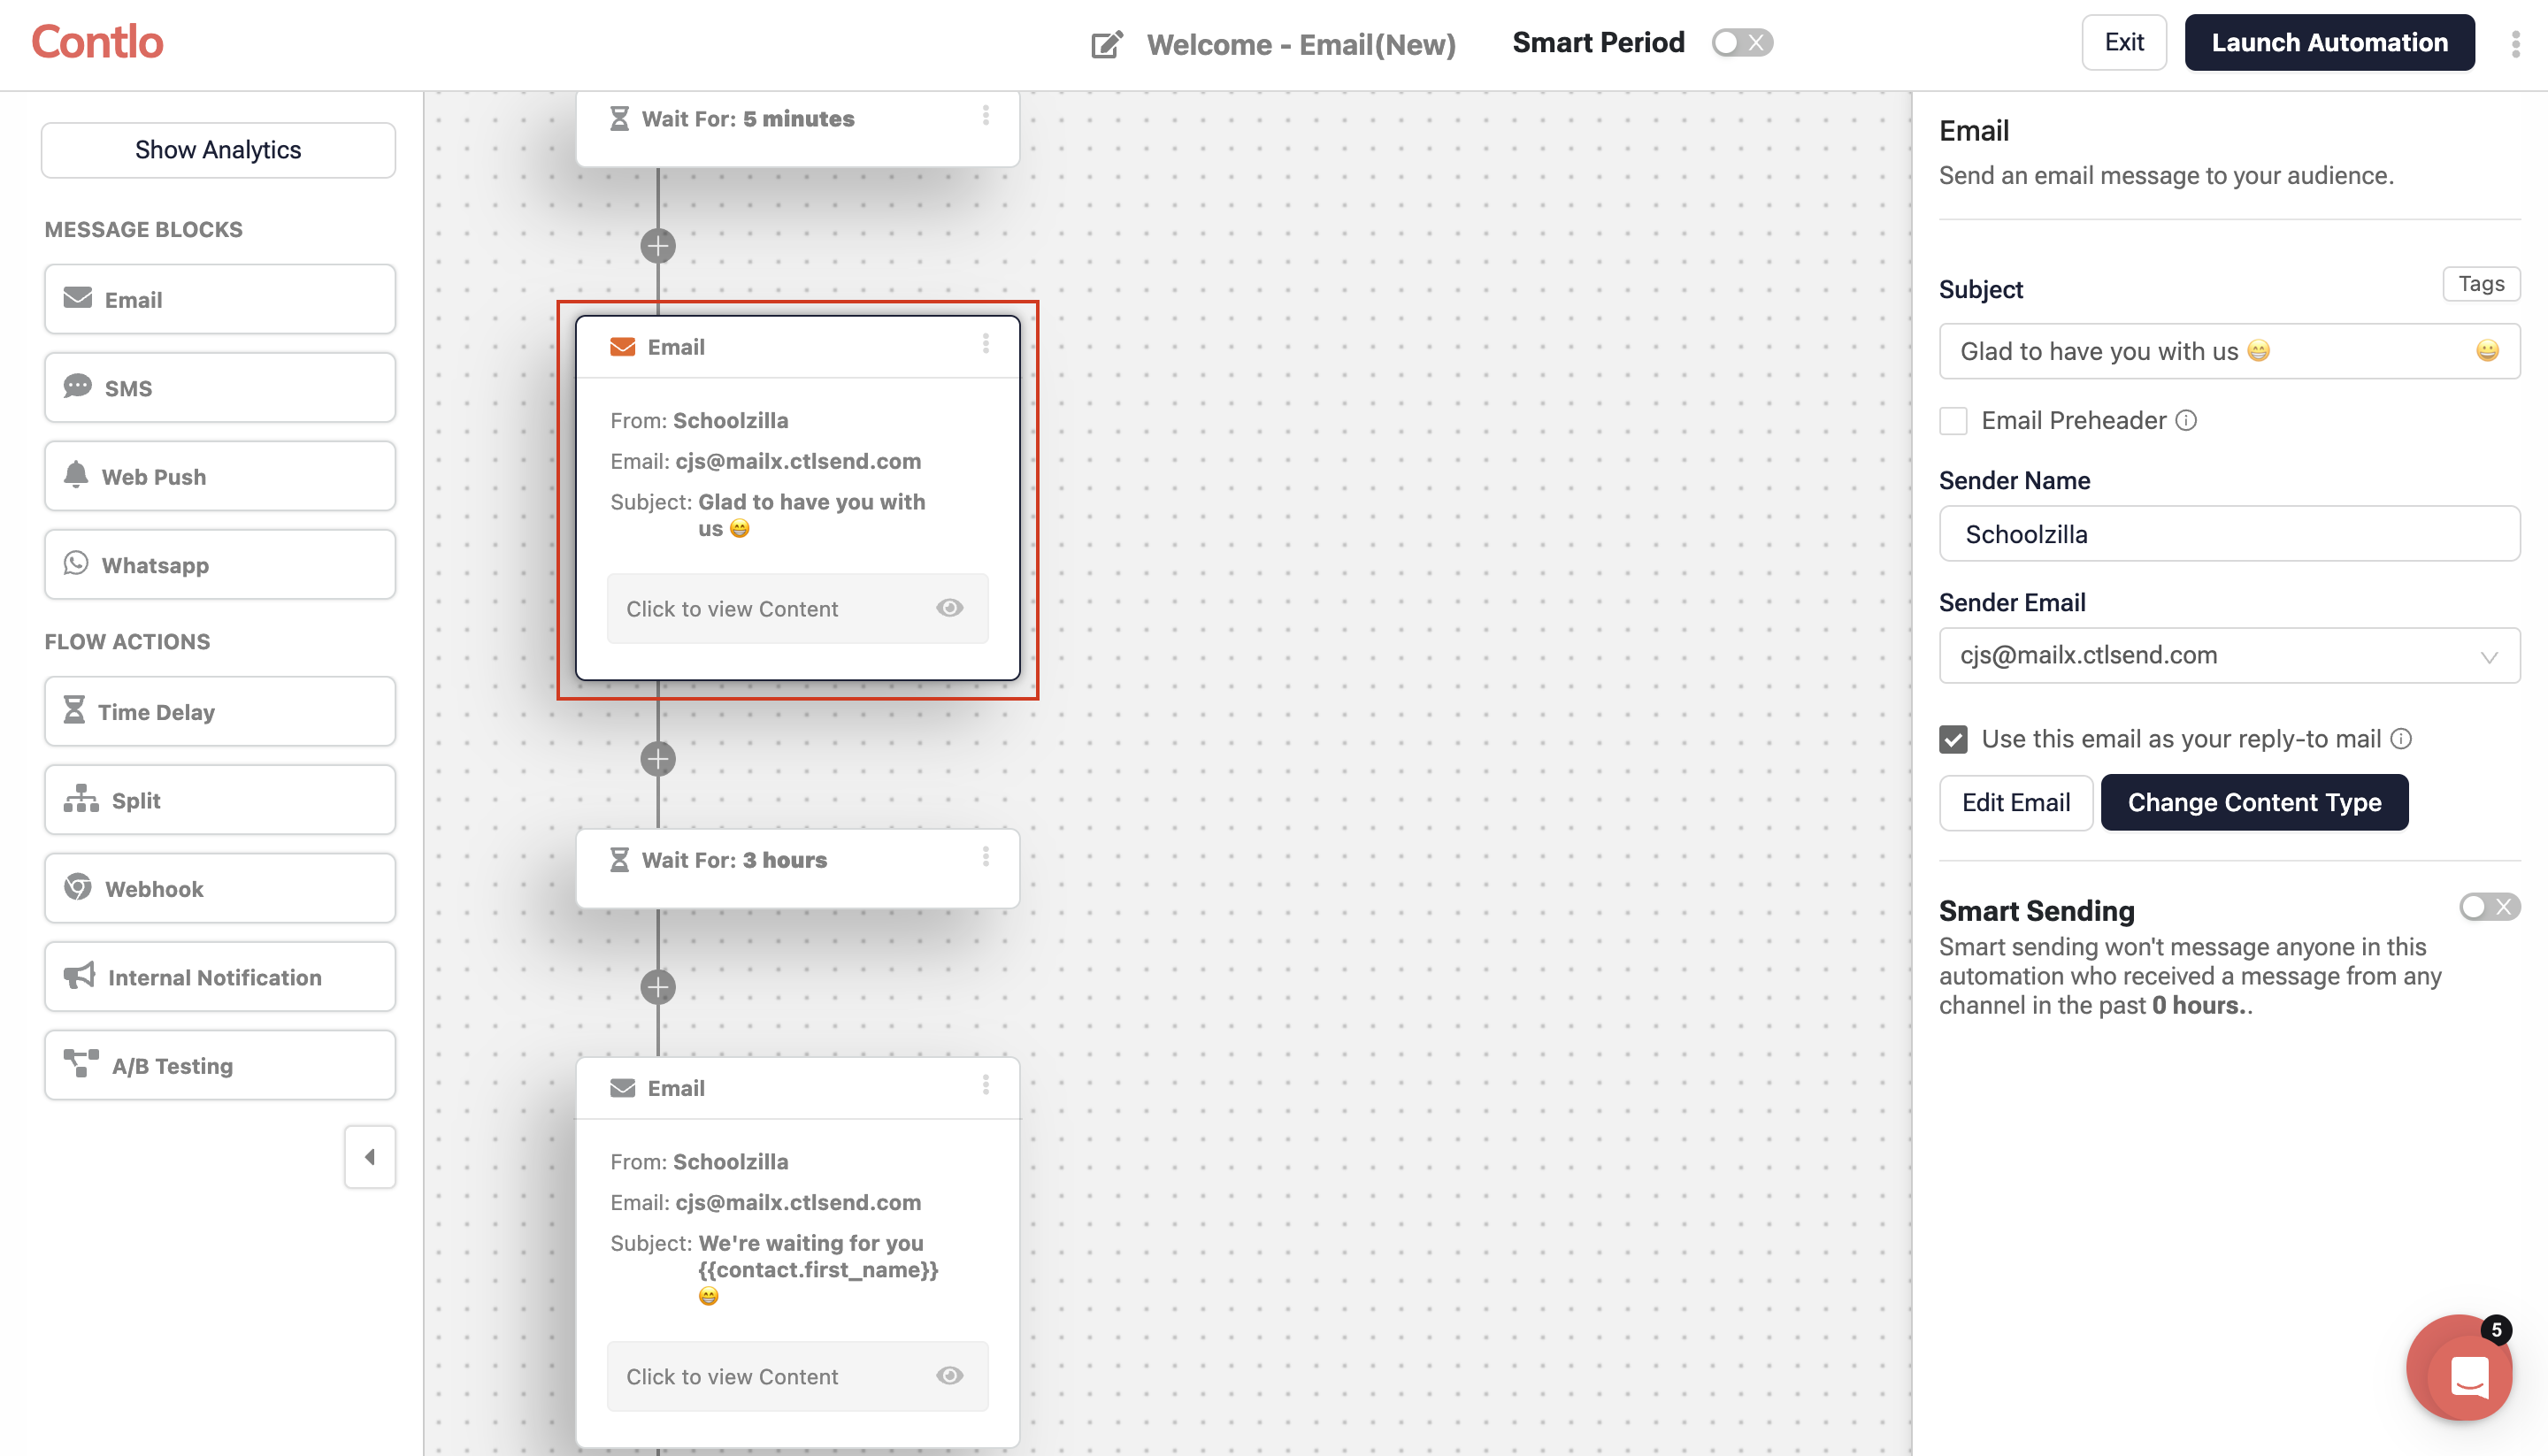
Email :This block gets activated after 1 hour of trigger activation. In this block, define the details of your Abandoned Checkout Email. Select the block and configure the following on the right pane:
-
Subject: Enter the subject of your Email.
-
Email Preheader: Select this checkbox to add an Email preheader that appears along the subject in the customer's inbox.
-
Sender Name: Enter the sender's name that appears on the mail.
-
Sender Email: Select the Email ID you want to send the mail. Select Use this email as your reply-to mail checkbox if you want the same Email ID to receive customer replies.
-
Edit Email: Update the information on the pre-selected Email template. It opens up the Email editor. Add your Logo, company introduction, and a personalized message to nudge the customer to complete placing the order.
-
Change Content Type: if you don't want to use the pre-selected Email template, click this button and create an Email from scratch.
-
Once configured, the drafted Email is sent to the customer on trigger activation.
-
-
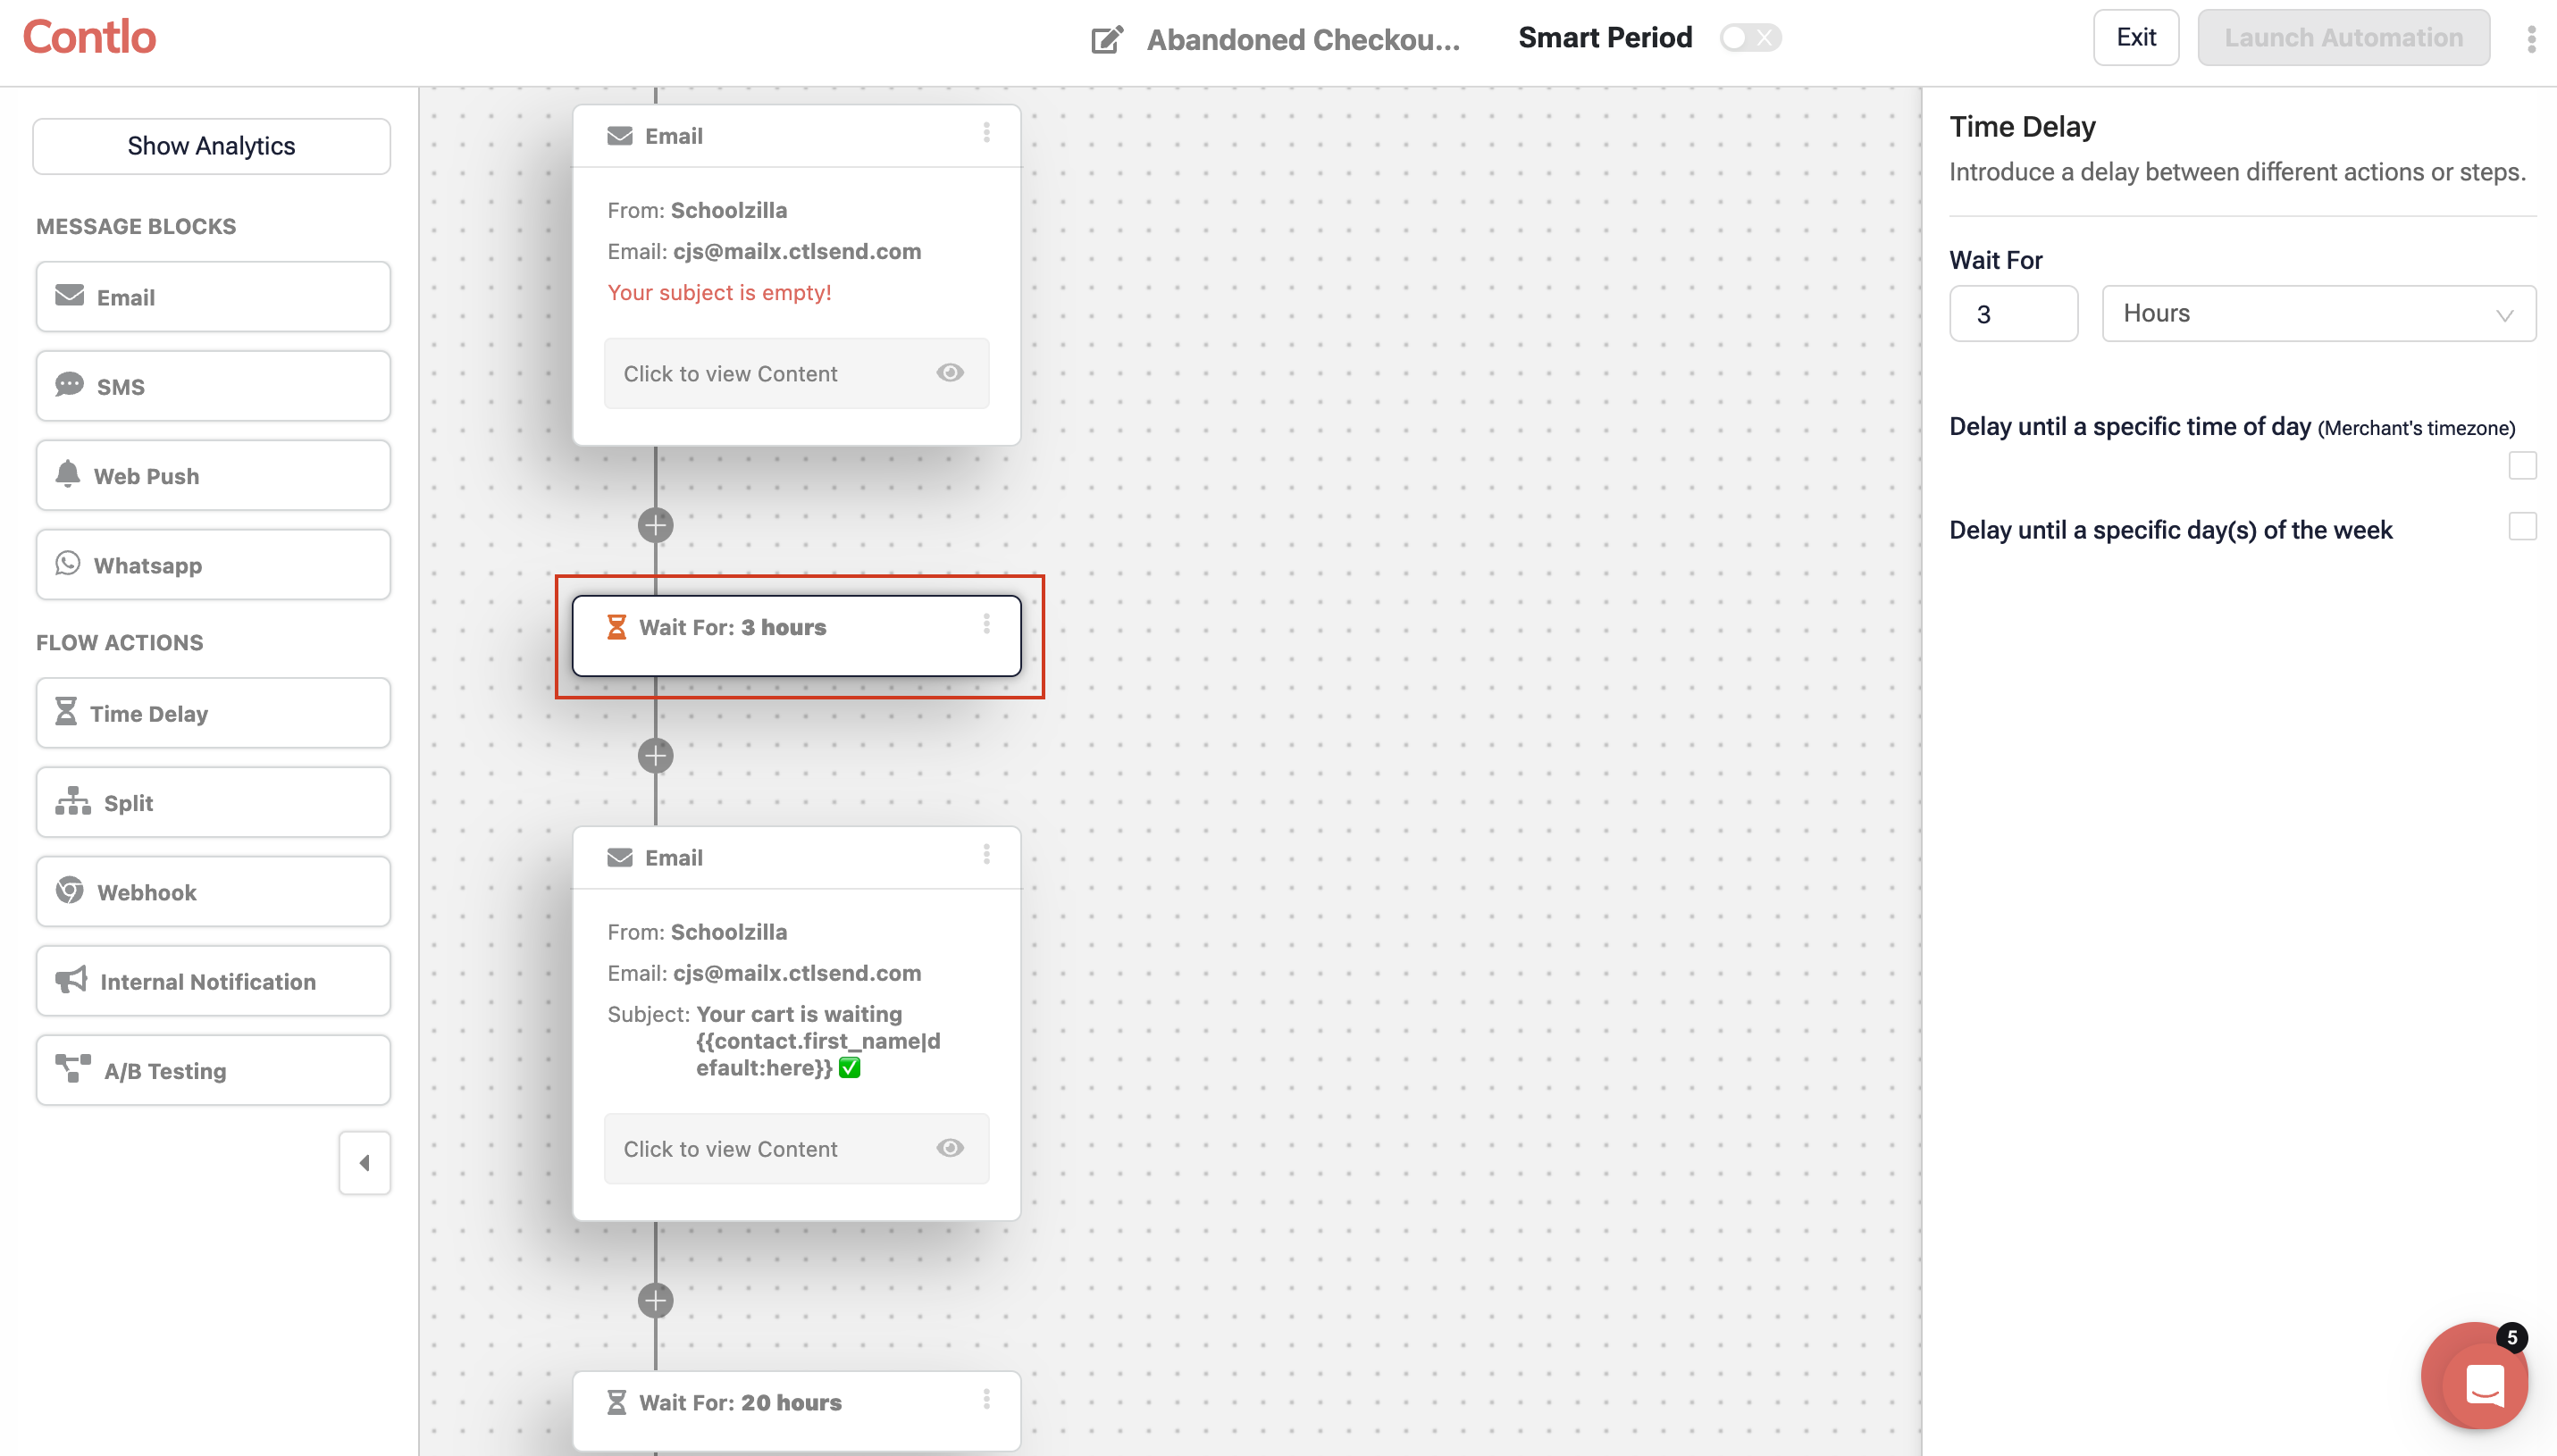
Time Delay for Follow-up Email: After sending the first Email to your customer, set a time delay before sending the follow-up Email.
-
By default, it is set to 3 hours, but you can edit it as per requirement.
-
If the cancel trigger event gets activated during this Time delay, the automation skips the further steps and exits.
-
-
Follow-up Email: This Email block gets activated if the trigger is still active and the time delay of 3 hours is completed. Define the parameters and edit the Email content to nudge the customer to place the pending order.
-
Time Delay for Last Email: This flow action sets the time between the follow-up Email and the last Email you send to your customer for acquisition.
-
By default, it is set to 20 hours. It is recommended to wait longer before sending your final email to allow the customer ample time to decide on purchasing the product.
-
If the cancel trigger event gets activated during this Time delay, the automation skips the further steps and exits.
-
-
Last Email: This Email block gets activated if the trigger is still active and the time delay of 20 hours is completed. This Email is the final attempt to nudge your target customer to complete the purchase on your platform.
Updated 2 months ago