Send a Web Push Campaign
Contlo Web Push Campaign allows you to send notifications to one's desktop.
Follow the steps below to create a Web Push Campaign:
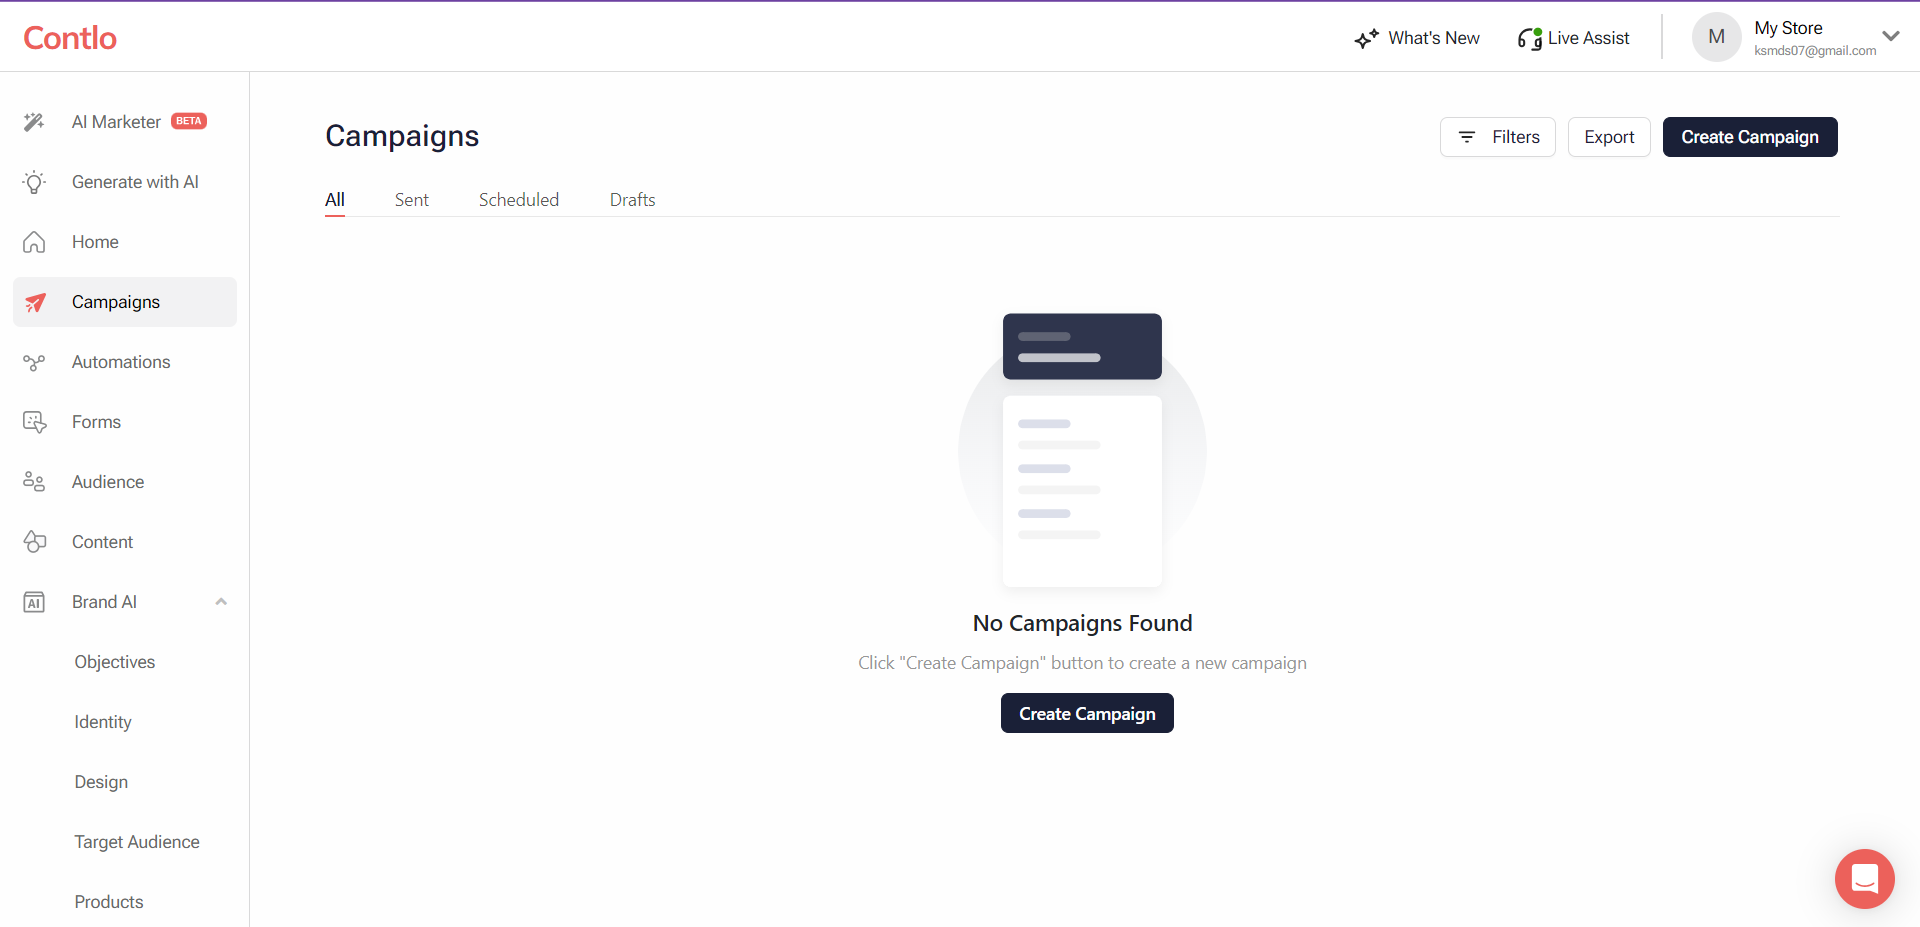
- Open your Contlo dashboard, and click Campaigns on the sidebar.
- On the Campaigns screen, click the Create Campaign button.

- On the Create Campaign screen, click the Create Web Push button.
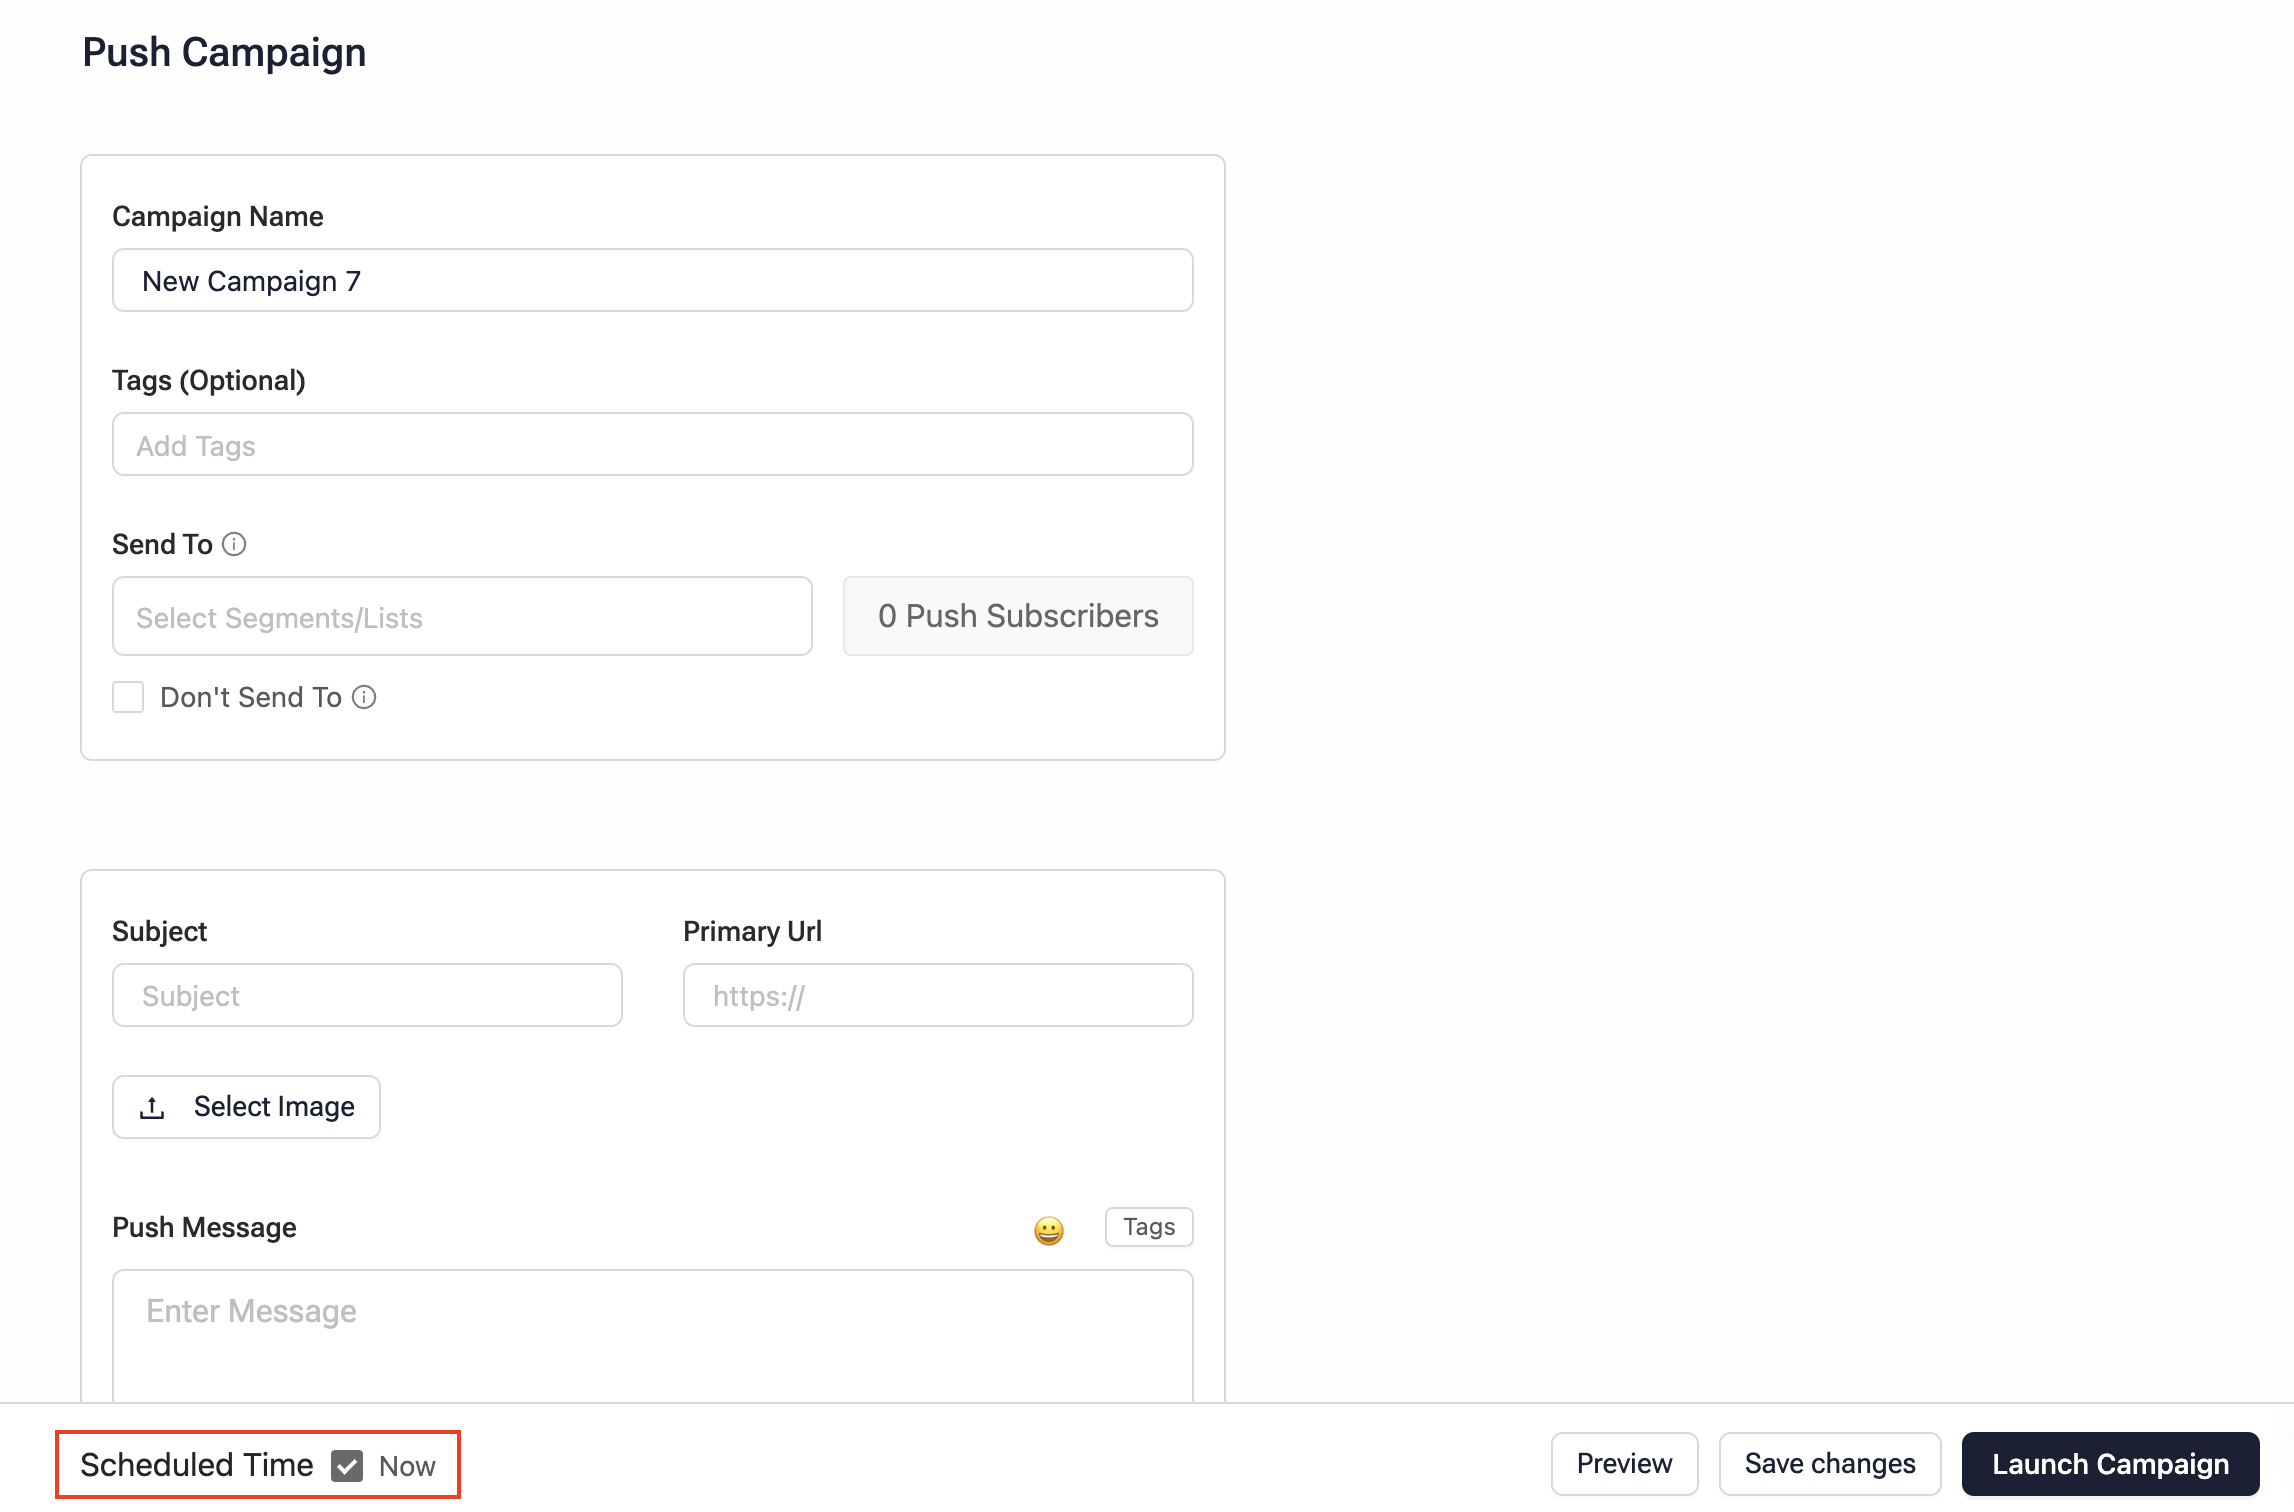
- On the Web Push Campaign screen, fill in the required details.
- Campaign Name*: Add the name of your Campaign.
- Tags: Add the desired tags for the Campaign.
- Send To*: Select the Segments or lists of users to whom you want to send the Push notification.
- Don't Send To: If you don't want to send the push notification to a set of customers, select this checkbox and the respective segment/list from the dropdown below.
- Subject*: Add the notification header here.
- Primary URL*: Add the URL for deep-linking in the notification that opens on a user's click.
- Select Image: Upload an image that would be displayed in the notification. Appears in large format when the notification is expanded and a preview when the notification is collapsed.
- Push Message*: Enter the message that appears on the user's lock screen.
- Add Expiry Date: Specify the duration till which Contlo attempts to deliver the notification
- Add Button: Adds buttons to your push notification. You can add up to 2 buttons.
- Button Text: Enter the button text.
- Button Destination Url: Add the URL that opens when the user clicks the button.
- Click Save Changes to save your configuration.
- Specify the launch time for your Campaign using the Scheduled Time option. Choose Now if you want to send the Web Push immediately. If you prefer to schedule it for later, uncheck the Now checkbox and set the desired time using the date picker.

- To preview the push notification before launching the Campaign, click Preview on the bottom bar to receive a test notification on your browser.
- Click Launch Campaign to send the Web Push to the target customers.
Updated 2 months ago
