
Web Push
The Web Push Notification is a high-engagement notification that lets you capture your visitors' attention, drive opt-ins, re-engage dormant customers, send out updates, recover carts, boost conversions, and carry contextually personalized messages after collecting user consent. You can engage the customers by sending out notifications even if they are inactive. These notifications can be sent to a user's desktop, mobile, or tablet through a website or web app.
Set up Web Push
Follow the steps below to set up Web Push on Contlo:
-
On the Contlo dashboard, go to App Market > Channels > Web Push and install the Web Push application.
-
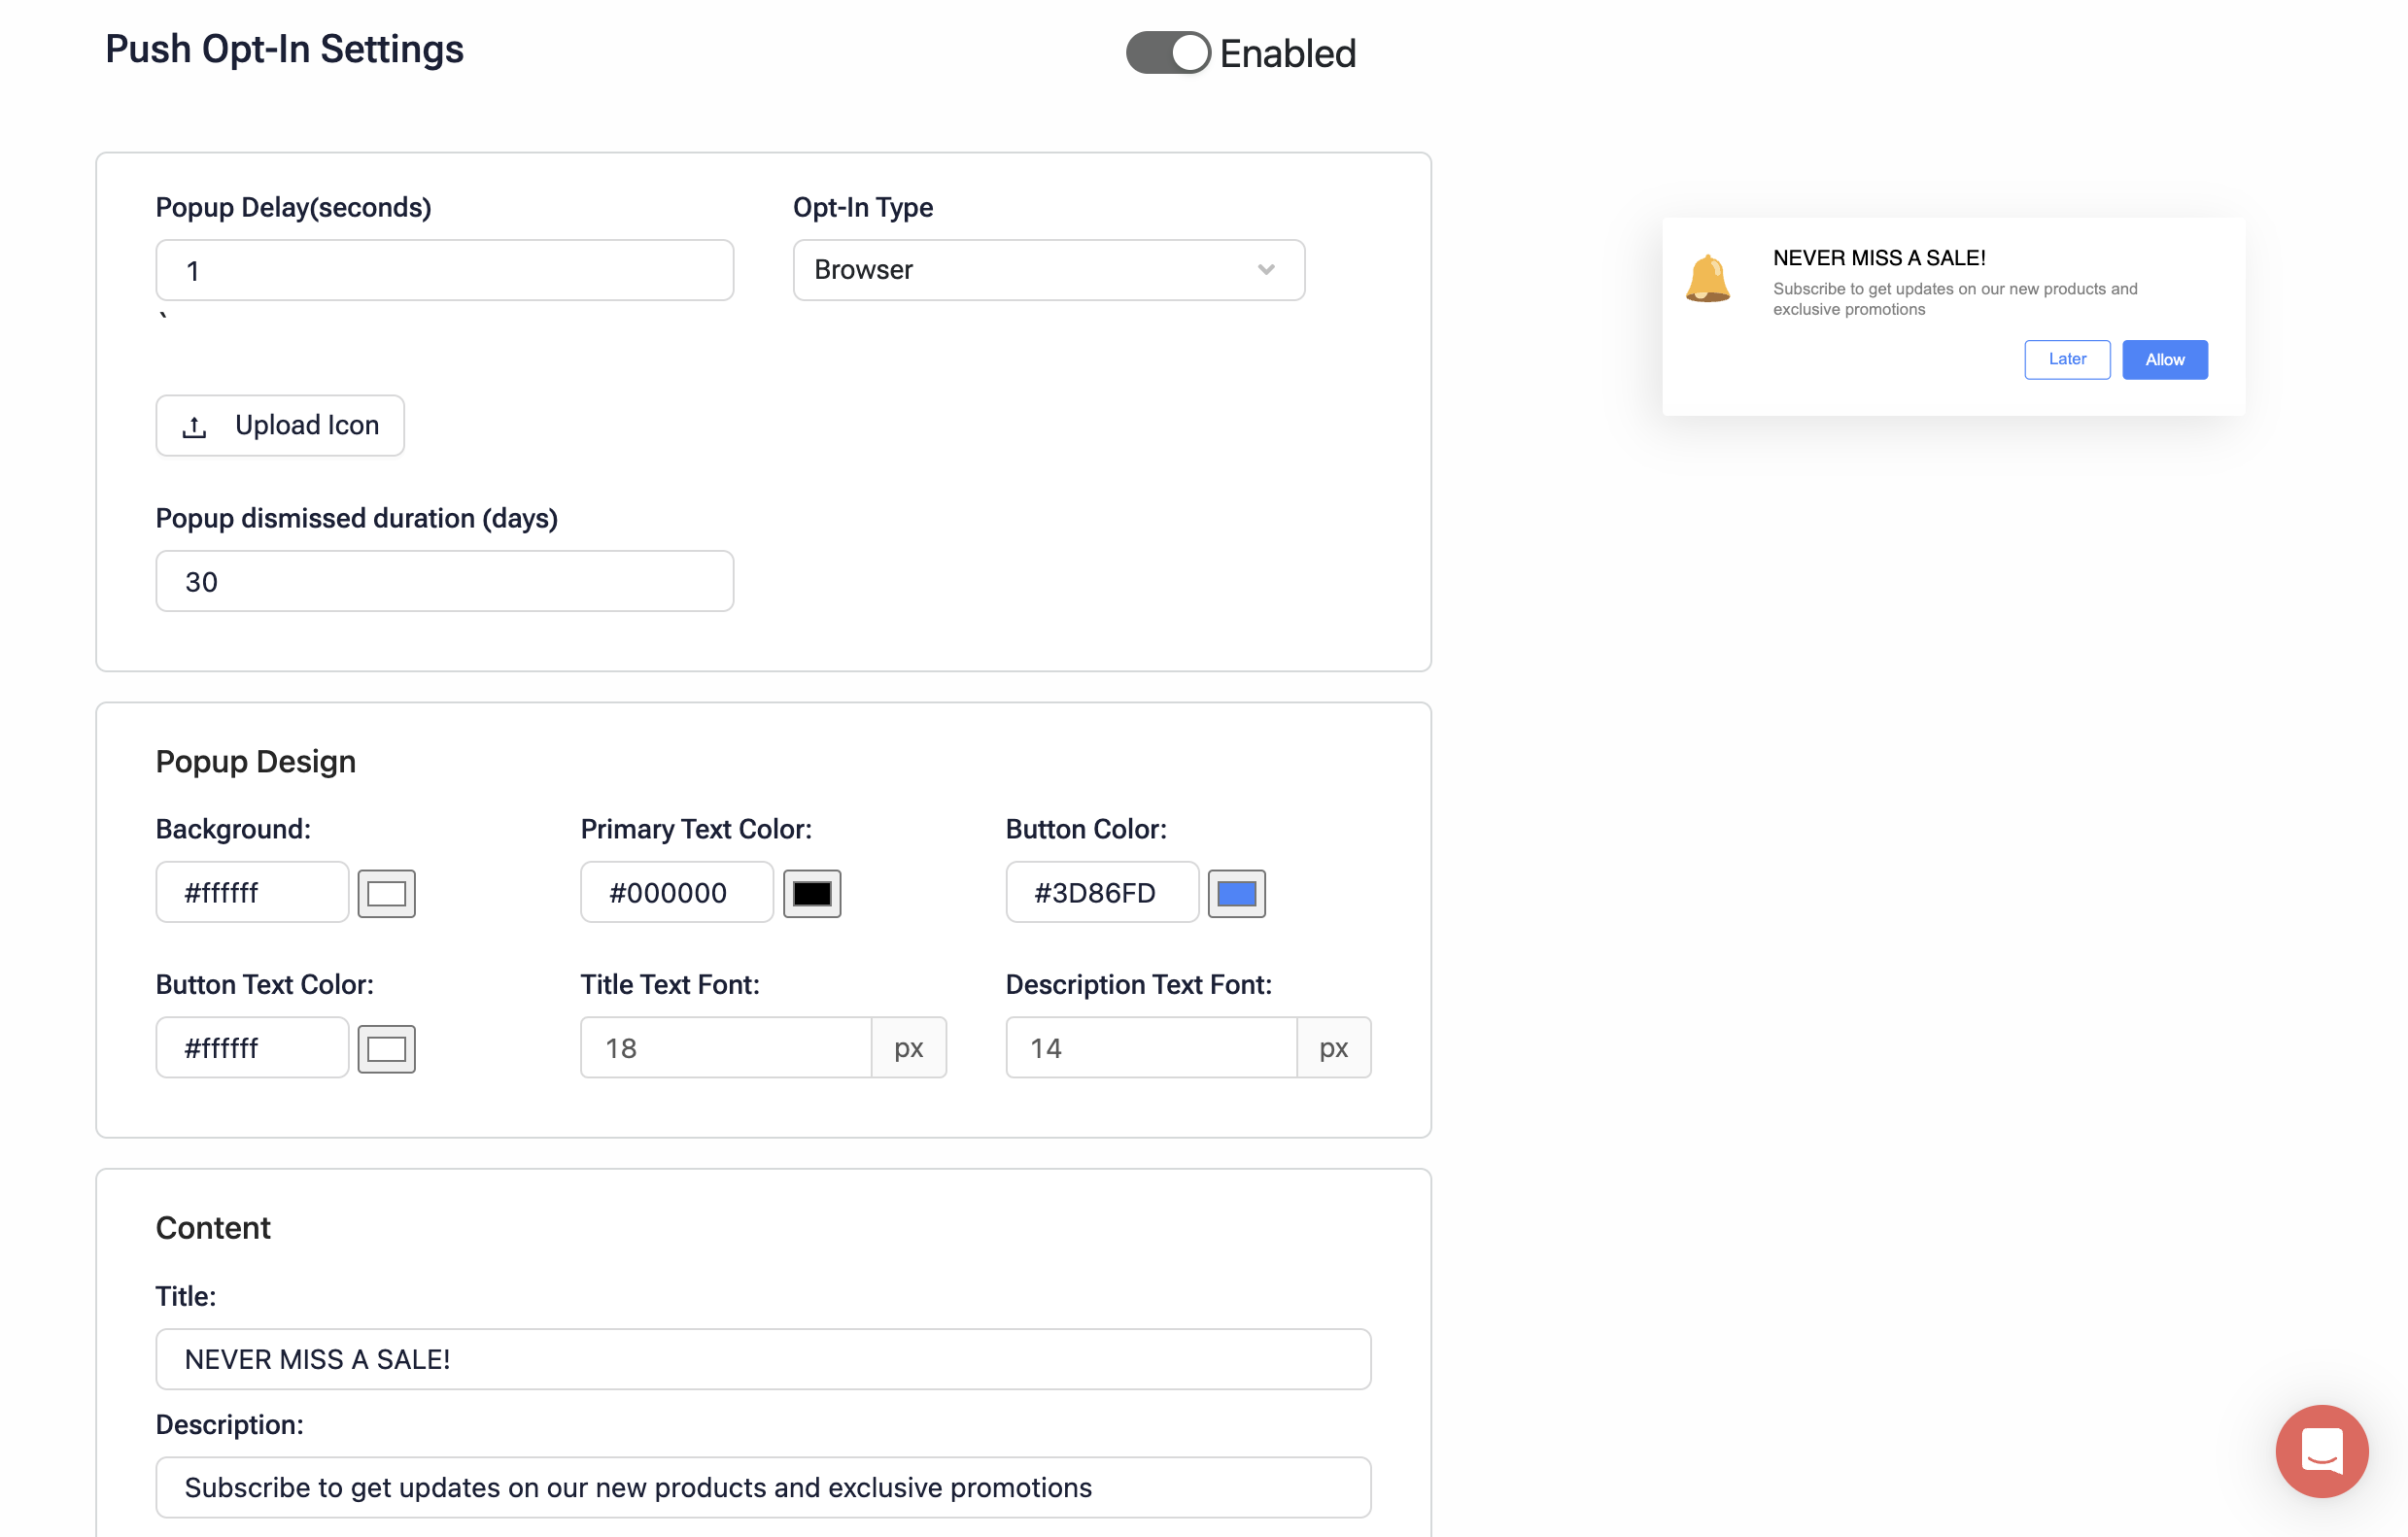
Upon installation, Push Opt-In Settings opens. It contains configurations to design and define the behavior of the Web Push opt-in pop-up as described below:
-
Popup Delay(seconds): Time to display the Web Push opt-in pop-up after the page loads.
-
Opt-In Type: Select the design for the Web Push opt-in pop-up - Browser or Custom
- Browser: Display the opt-in pop-up as the browser's default.
- Custom: Customize the opt-in pop-up as per your requirement.
-
Upload Icon: Add an icon image that would be displayed on the Web Push permission pop-up.
-
Popup dismissed duration (days): The duration to display the opt-in pop-up again if the customer dismisses it.
-
Popup Design: This section enables you to design your custom opt-in pop-up.
- Background: Sets the background color of the pop-up.
- Primary Text Color: Sets the text color of the permission pop-up.
- Button Color: Sets the button color in the Web Push opt-in permission pop-up.
- Button Text Color: Sets the color of the button text.
- Title Text Font: Sets the font of the pop-up title.
- Description Text Font: Sets the font of the description on the permission pop-up.
-
Content: This section allows you to add the content for the opt-in permission pop-up.
- Title: Enter the notification header/title.
- Description: Enter the description for the permission.
- Button Text: Sets the text of the button.
- Close Button Text: Sets the text of the button that closes the opt-in permission pop-up.
-
-
You can preview the Web Push opt-in pop-up you designed on the right side of the configurations.
-
Upon successfully configuring the Web Push, You can start sending Web Push Campaign or create Automations using the Web Push channel.
Updated 2 months ago