
Message Blocks
Message Blocks in Automations enable you to choose the channel for reaching out to your customers. You can drag the preferred message block to the automation canvas from the left pane. Each message block has properties that you can configure as per your requirements.
Email
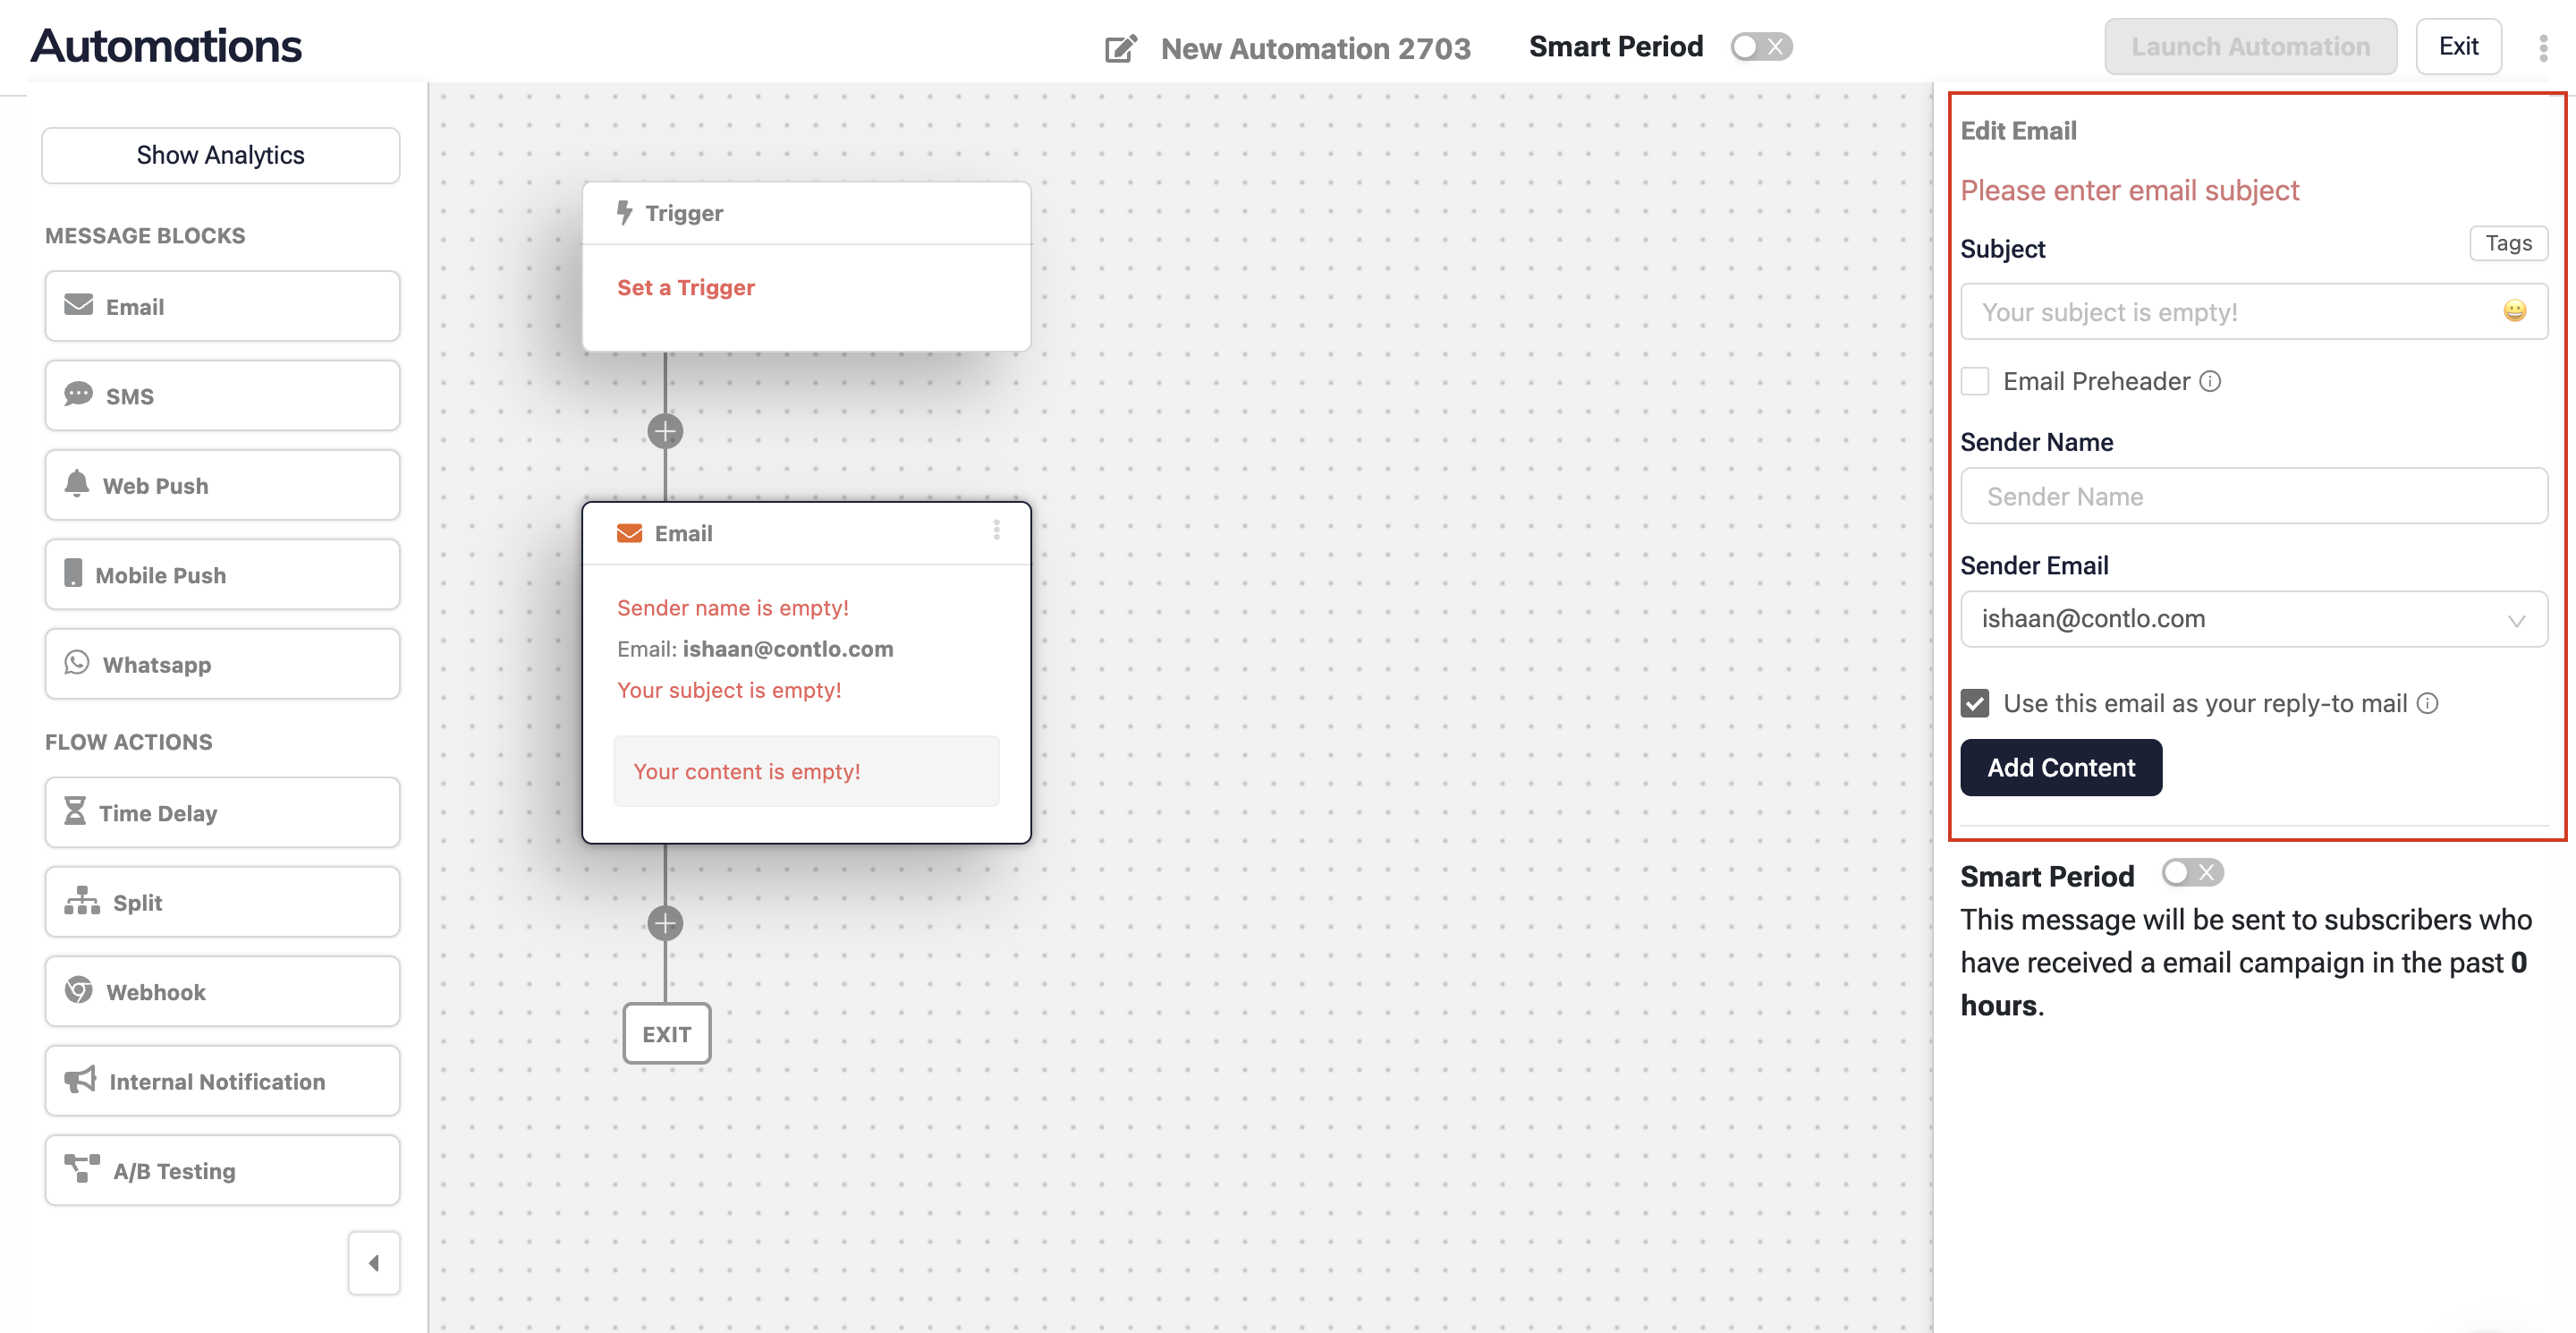
This message block allows you to send an automated email to the customer when the automation trigger is fulfilled. When you drag and select the email block on the canvas, it opens the Email settings on the right pane. Configure those settings as follows:
-
Subject: Enter the subject of your Email.
- Tags: Select a user attribute like First name, last name, etc. to add it to the subject for personalization.
-
Email Preheader: Select this checkbox to add an Email preheader that appears along the subject in the customer's inbox.
-
Sender Name: Enter the sender's name that appears on the mail.
-
Sender Email: Select the Email ID you want to send the mail. Select the Use this email as your reply-to mail checkbox if you want the same Email ID to receive customer replies.
-
Add Content: Add the content for your Email here. It opens the Select an option below to design your email modal. Select your preferred option and add the Email content. For more information, see Email Editor.
-
Smart Sending: This is an Email channel global setting that prevents sending a message from the same channel again until the specified time has passed.
SMS
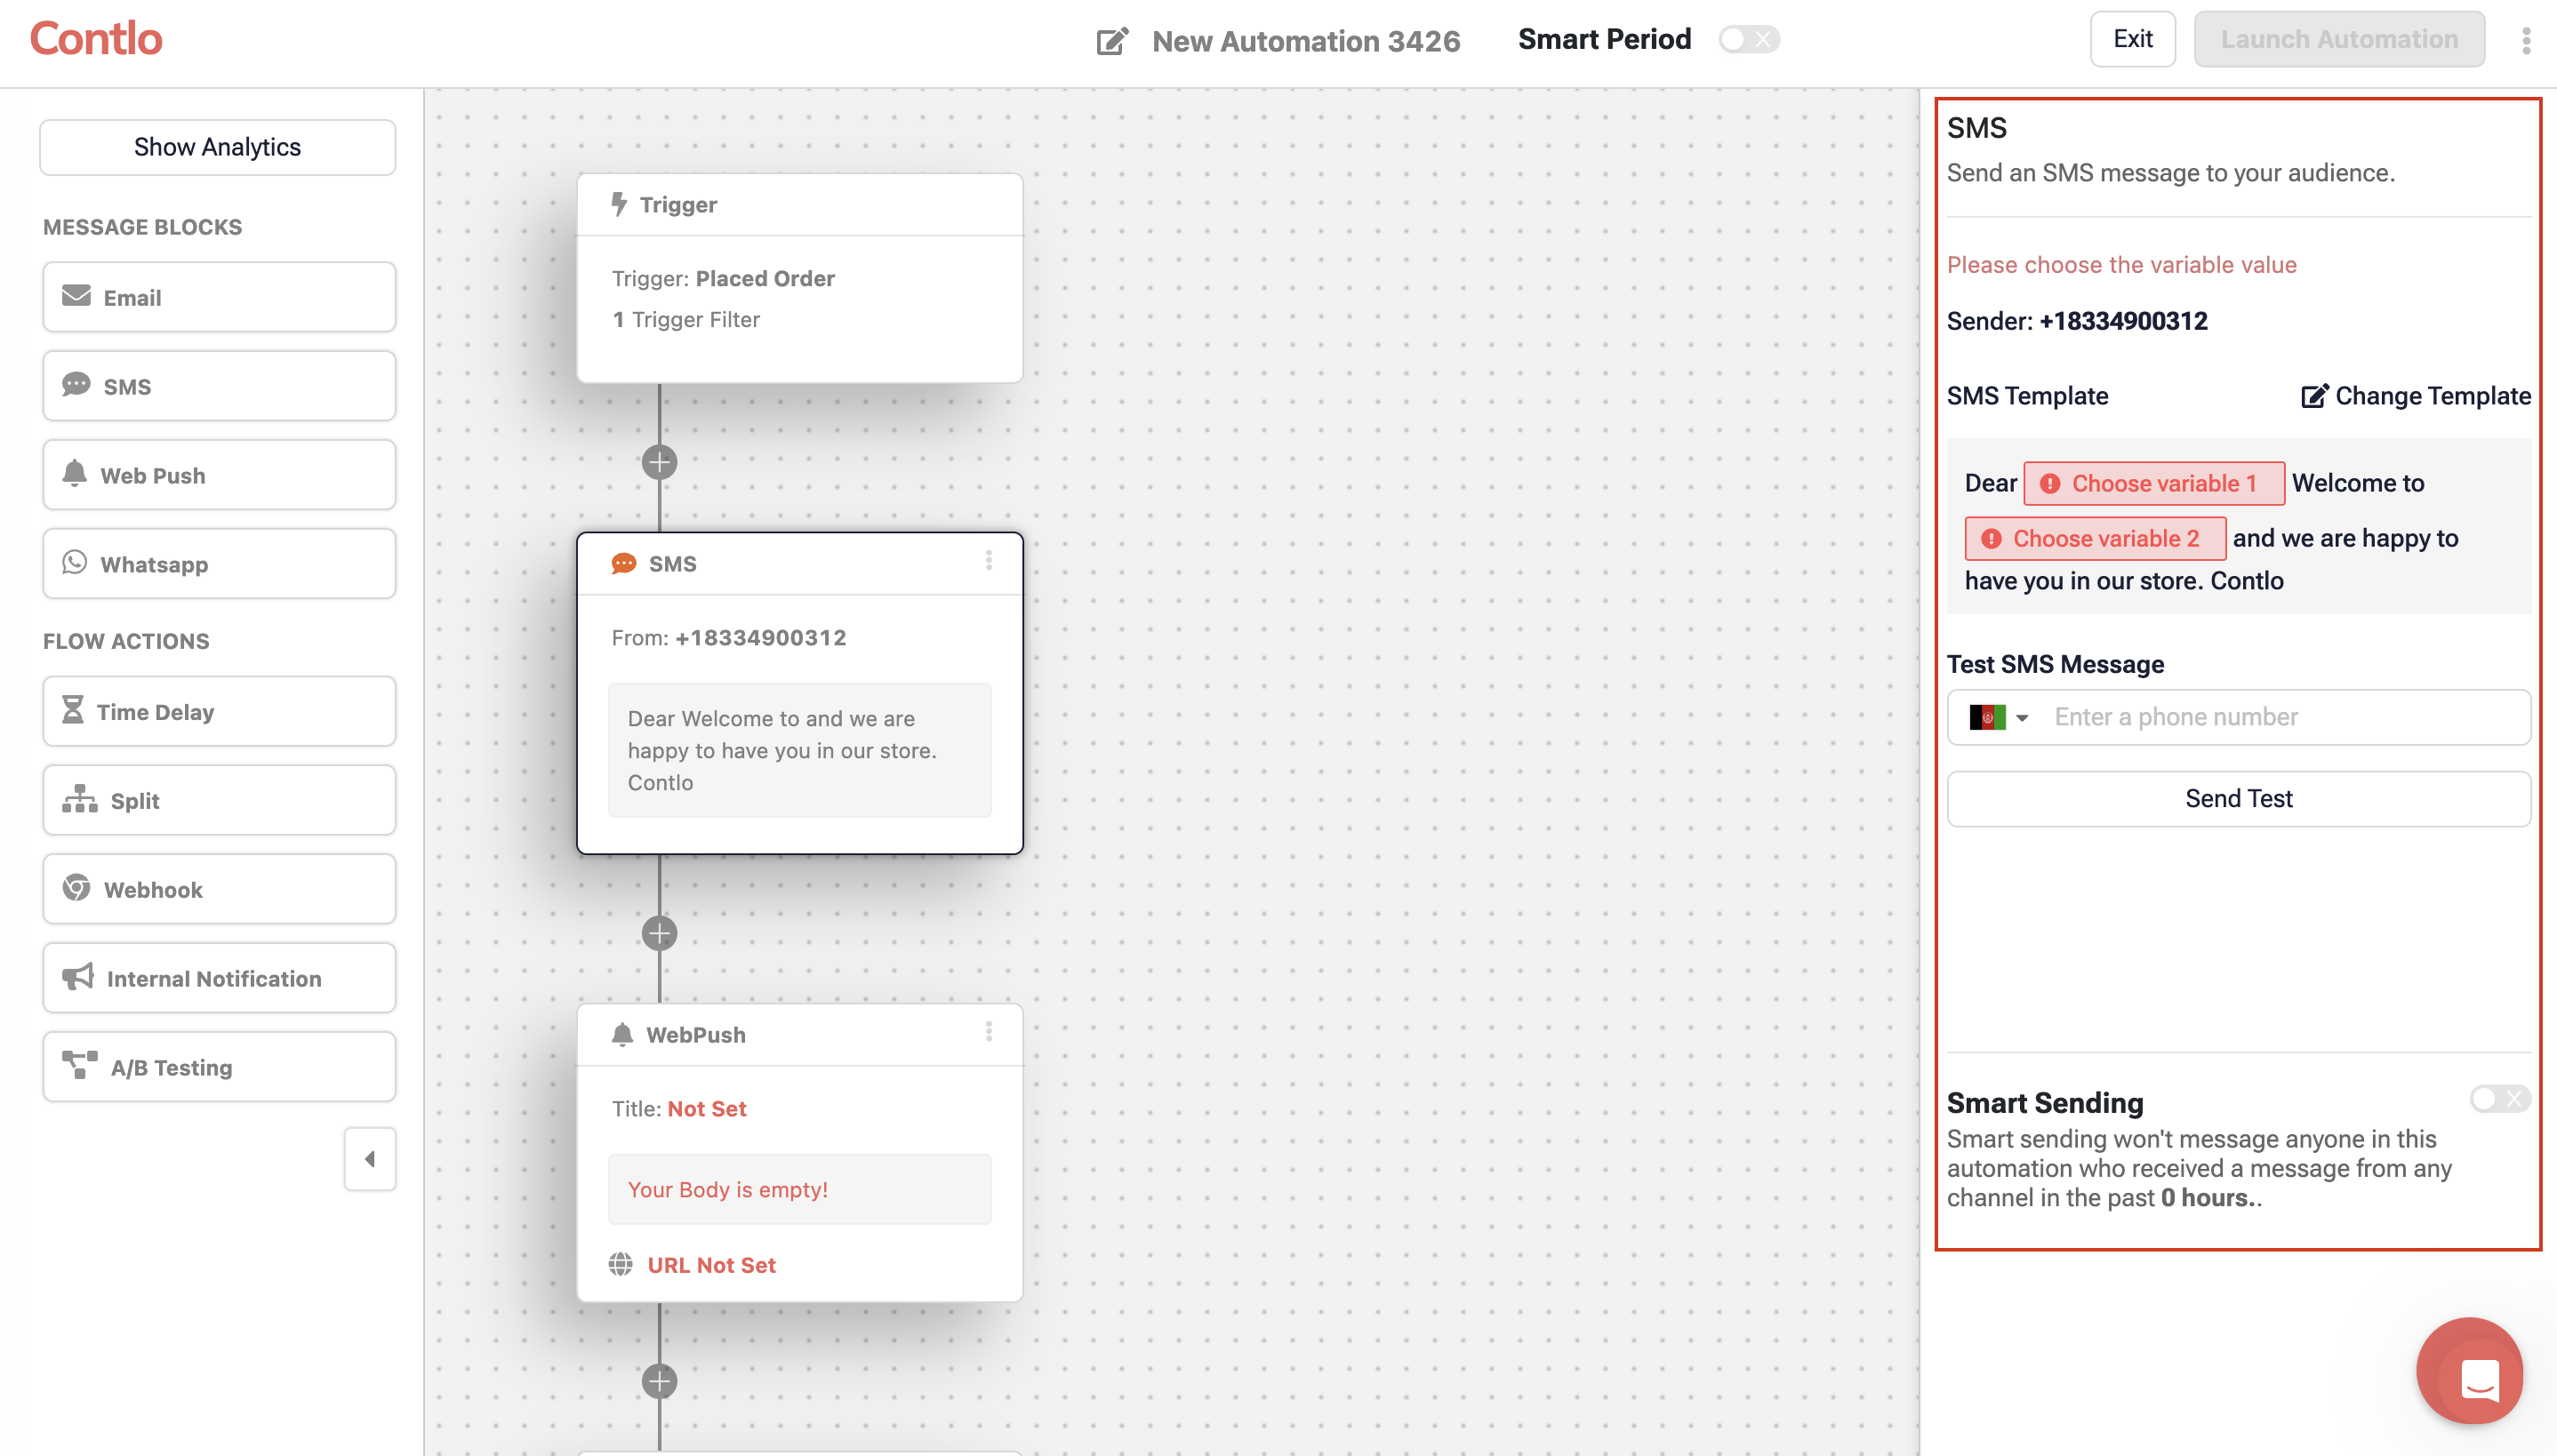
This message block allows you to send an automated SMS to the customer when the automation trigger is fulfilled. The SMS block automatically takes the mobile number you have registered on the SMS channel in Conlto.
When you select the SMS block on the canvas, it opens the SMS settings on the right pane. Configure those settings as follows:
-
SMS Template: Click the Browse Template button and select the SMS template as per your use case. On choosing a template, define the required variables from the available options as shown below:
- Tags: Choose an attribute from the dropdown.
- Custom: Enter a custom value as per requirement.
- URL: Enter a URL you want to appear in the SMS.
-
Send Test Message: This configuration is available after you've selected the SMS template. Enter a number to send a test message.
-
Smart Sending: This is an SMS channel global setting that prevents sending a message from the same channel again until the specified time has elapsed.
Web Push
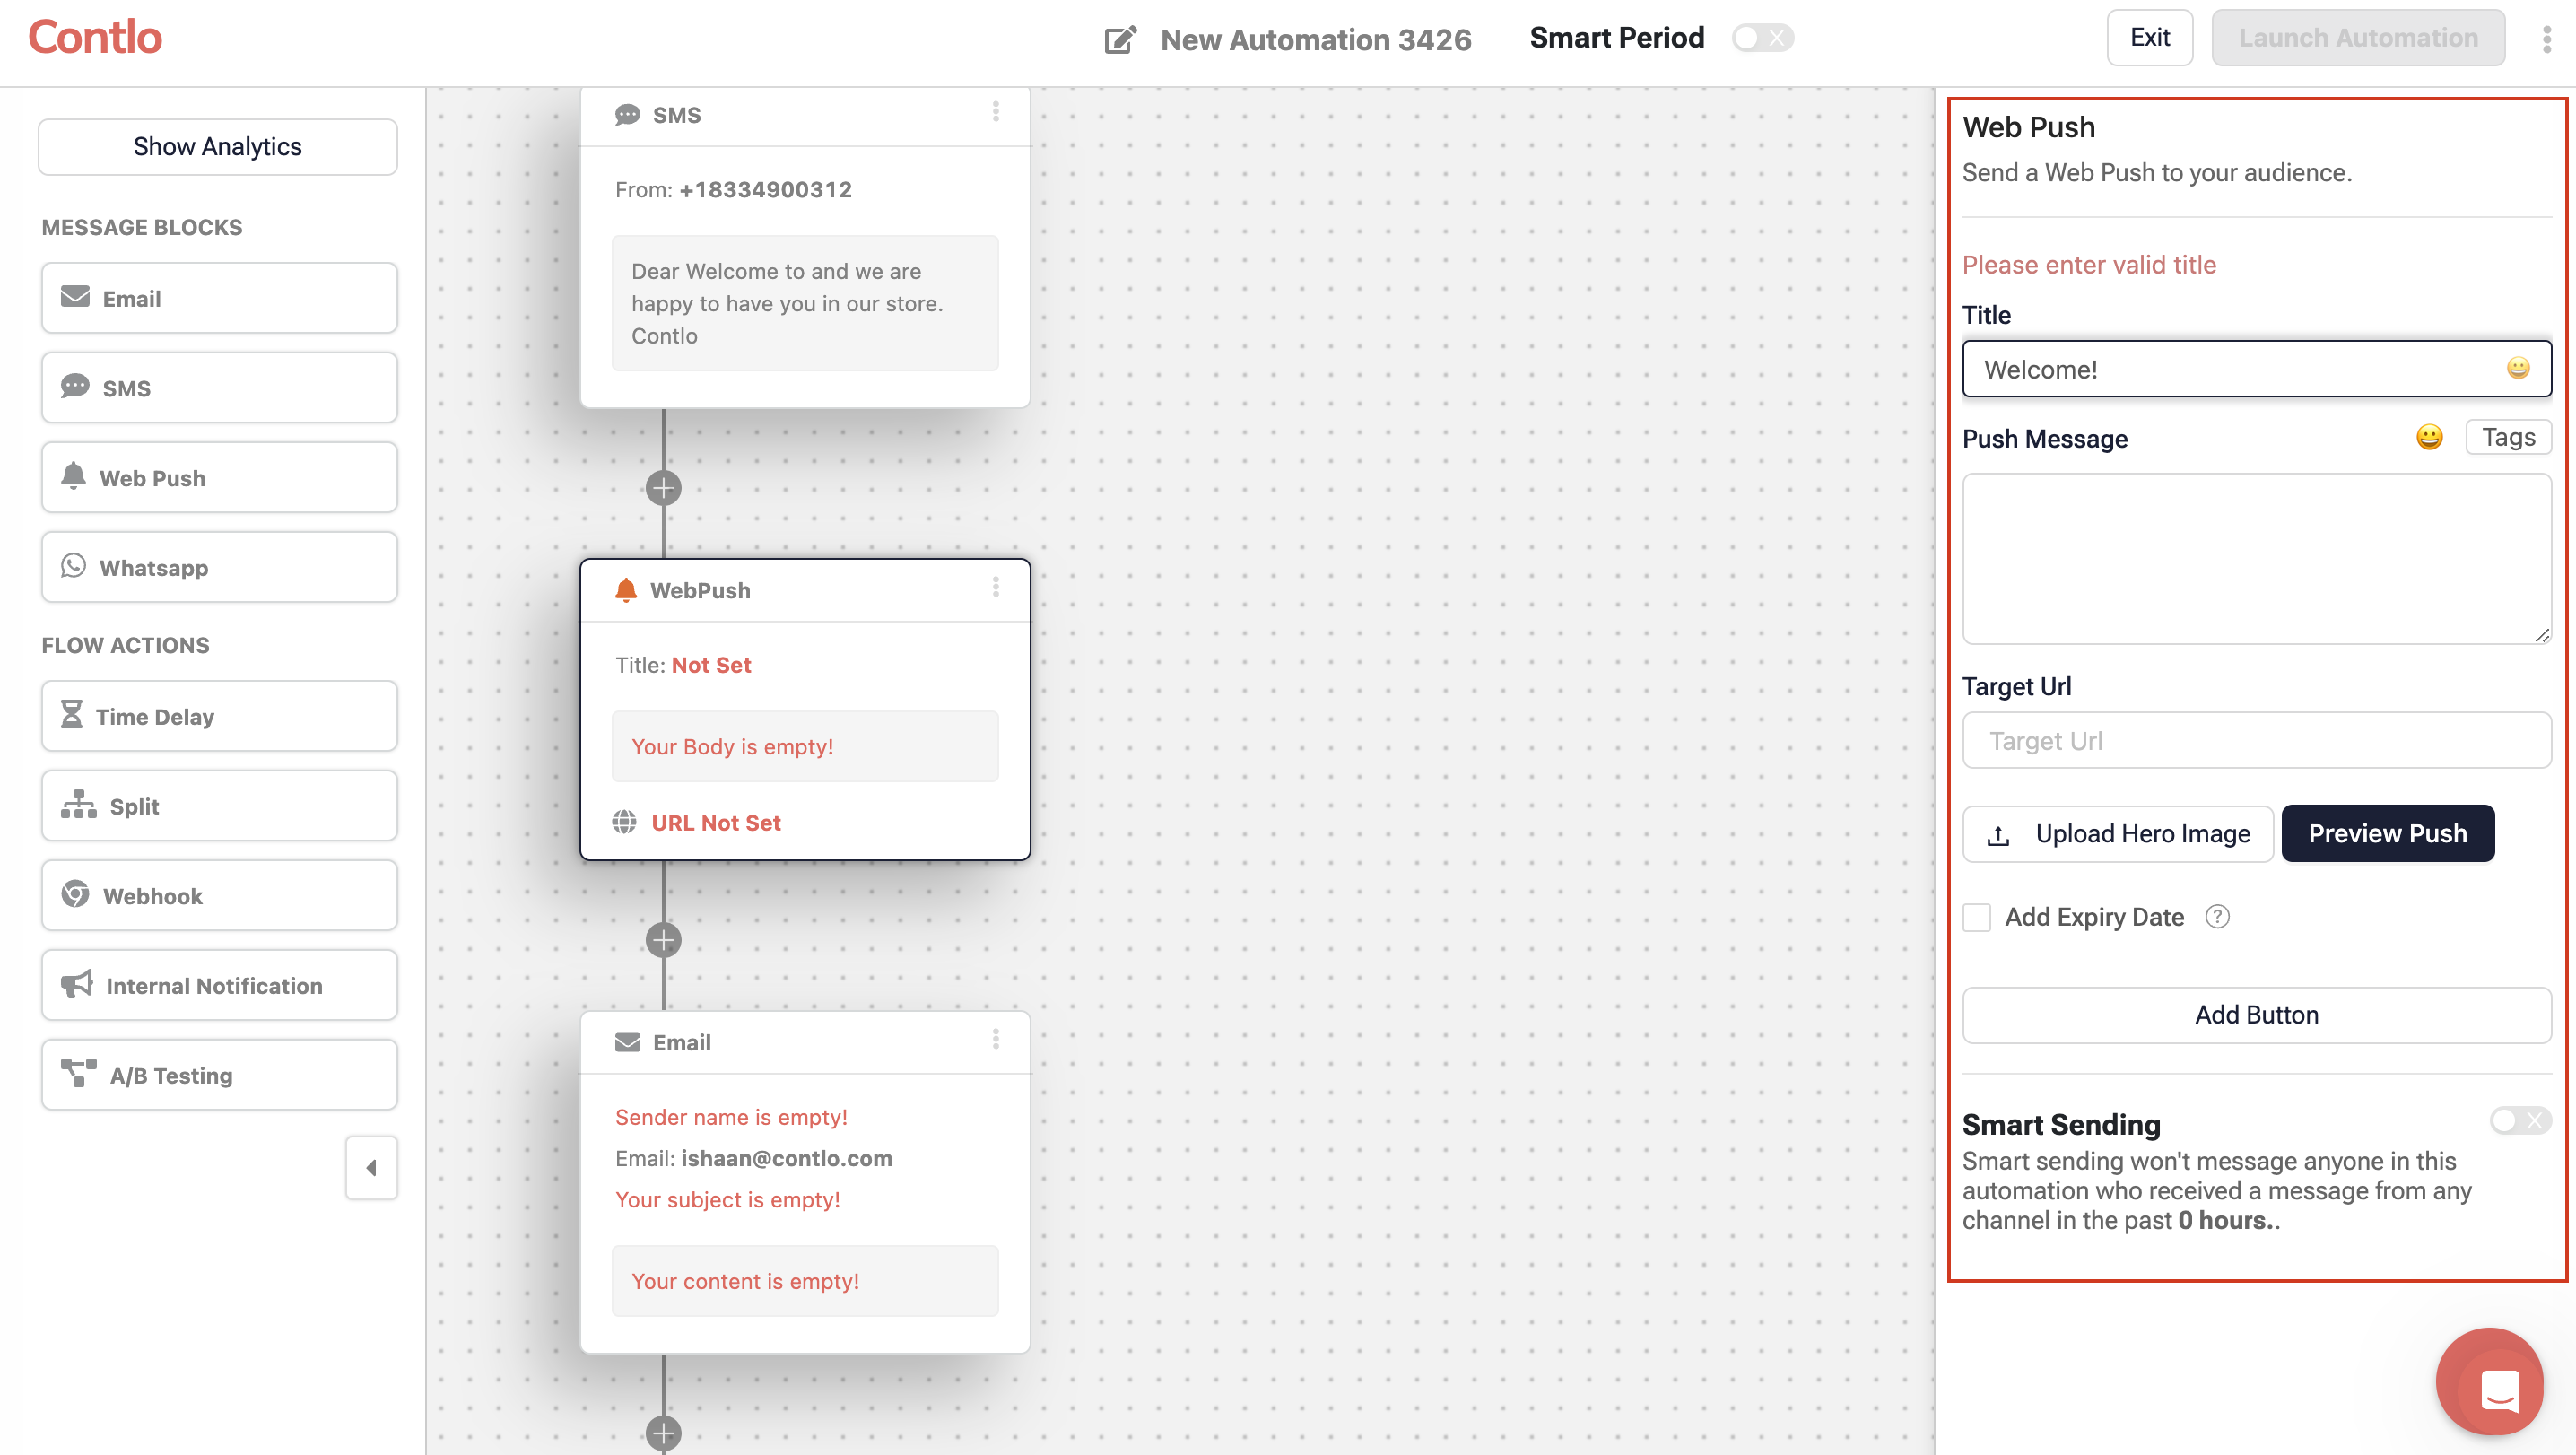
This message block allows you to send Web Push notifications to the customer when the automation trigger is fulfilled. When you drag and select the Web Push block on the canvas, it opens the Web Push settings on the right pane. Configure those settings as follows:
-
Title: Add the title for your web push notification.
-
Push Message: Enter the information that you want to appear on the notification.
-
Target Url: Enter the URL you want to open when the customer clicks the notification.
-
Upload Hero Image: Upload the image that appears on the notification.
-
Preview Push: Click this button to receive a web push notification on your system.
-
Add Expiry Date: Specify the duration until Contlo attempts to deliver the notification.
-
Add Button: Adds buttons to your push notification. You can add up to 2 buttons.
- Button Text: Enter the button text.
- Button Destination Url: Add the URL that opens when the user clicks the button.
-
Smart Sending: This is a Web Push channel global setting that prevents sending a message from the same channel again until the specified time has elapsed.
WhatsApp
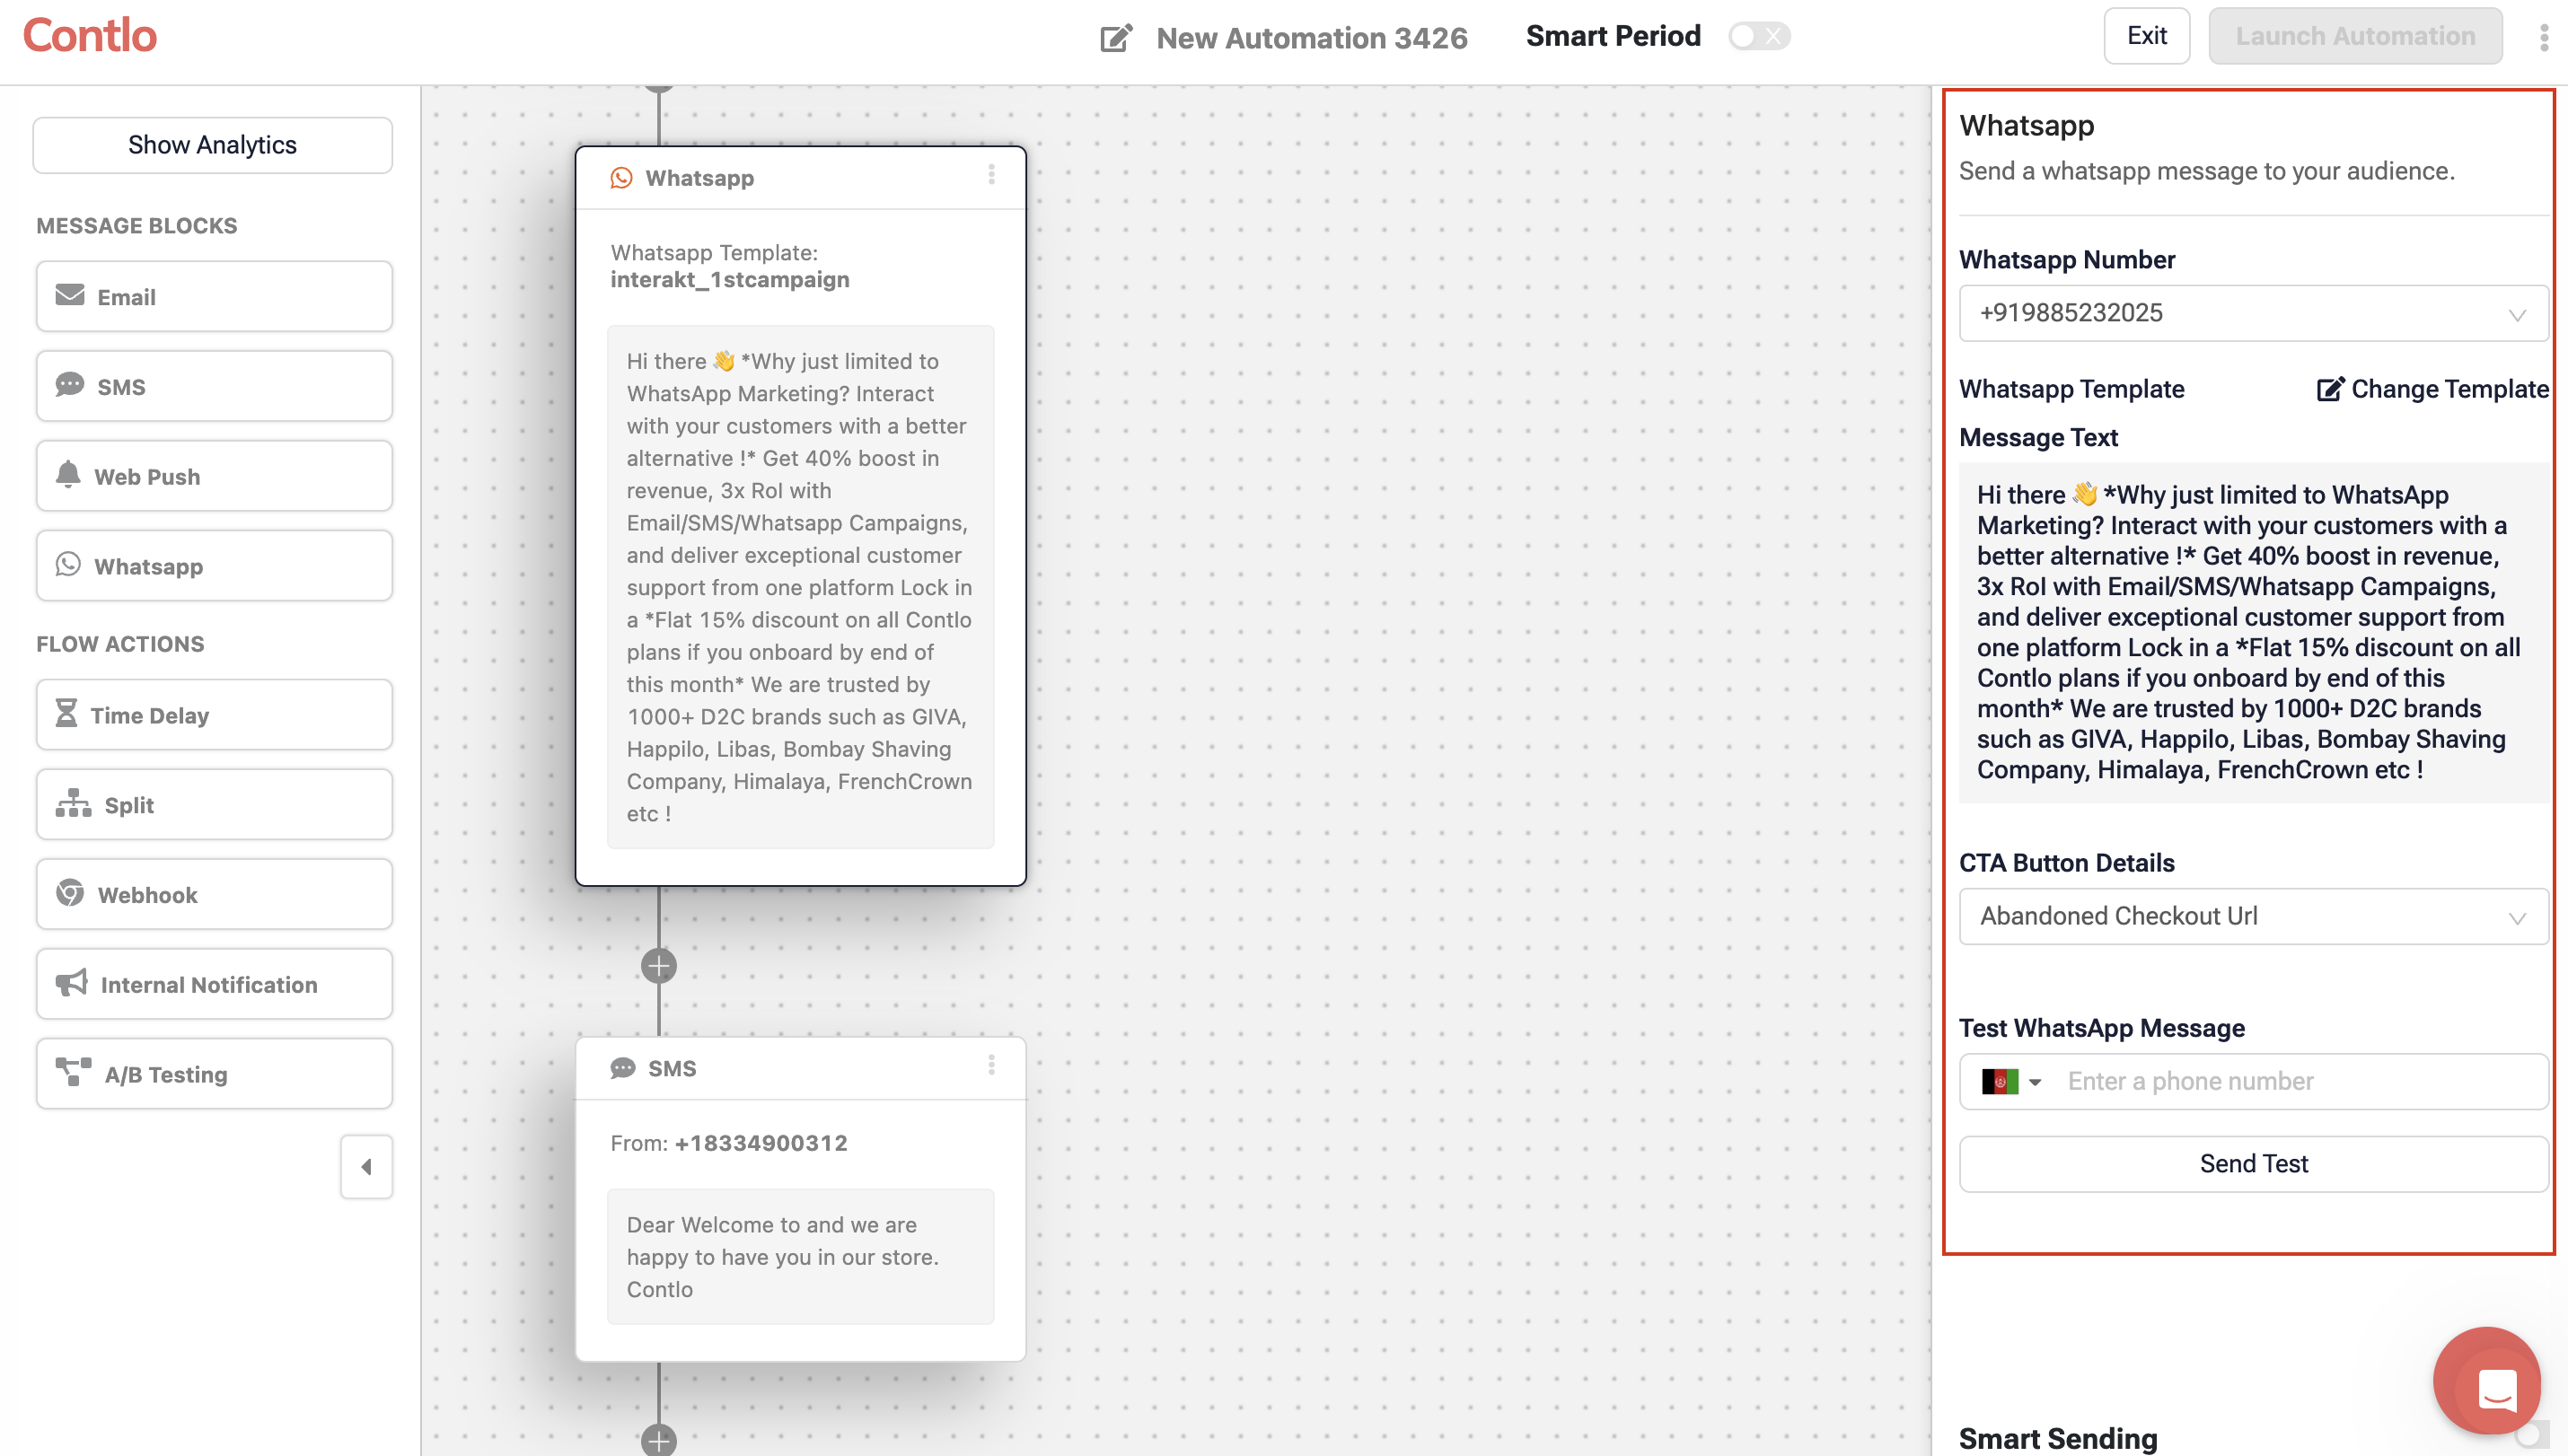
This message block allows you to send automated WhatsApp messages to the customer when the automation trigger is fulfilled. When you drag and select the WhatsApp block on the canvas, it opens the WhatsApp settings on the right pane. Configure those settings as follows:
-
Whatsapp Number: Select the WhatsApp number through which you want to send the message from the given dropdown.
-
Whatsapp Template: Click the Browse Template button and select the WhatsApp message template per your use case. On choosing a template, define the required fields from the available options as shown below:
- CTA Button Details: Select the event you want to activate when the customer clicks the button on WhatsApp.
- Attachment Details: Only valid for templates where you can add an image. Available options:
- Default: When selected, it shows the default image present in the template
- Custom: Select this option if you want to upload an image to be displayed on the WhatsApp message.
- Dynamic Link: If you want to display an image present in an event, select this option and define it as follows:
{{event.attachment_url}}
-
Test WhatsApp Message: This configuration is available after you've selected the WhatsApp template. Enter a valid WhatsApp number to send a test message.
-
Smart Sending: This WhatsApp channel global setting prevents sending a message from the same channel again until the specified time has elapsed.
Updated 2 months ago