
Flow Actions
The Flow Actions are connectors with certain conditions to connect the message blocks. These actions define the automation flow, time of execution, and exit conditions.
Each flow action is explained in detail below.
Time Delay
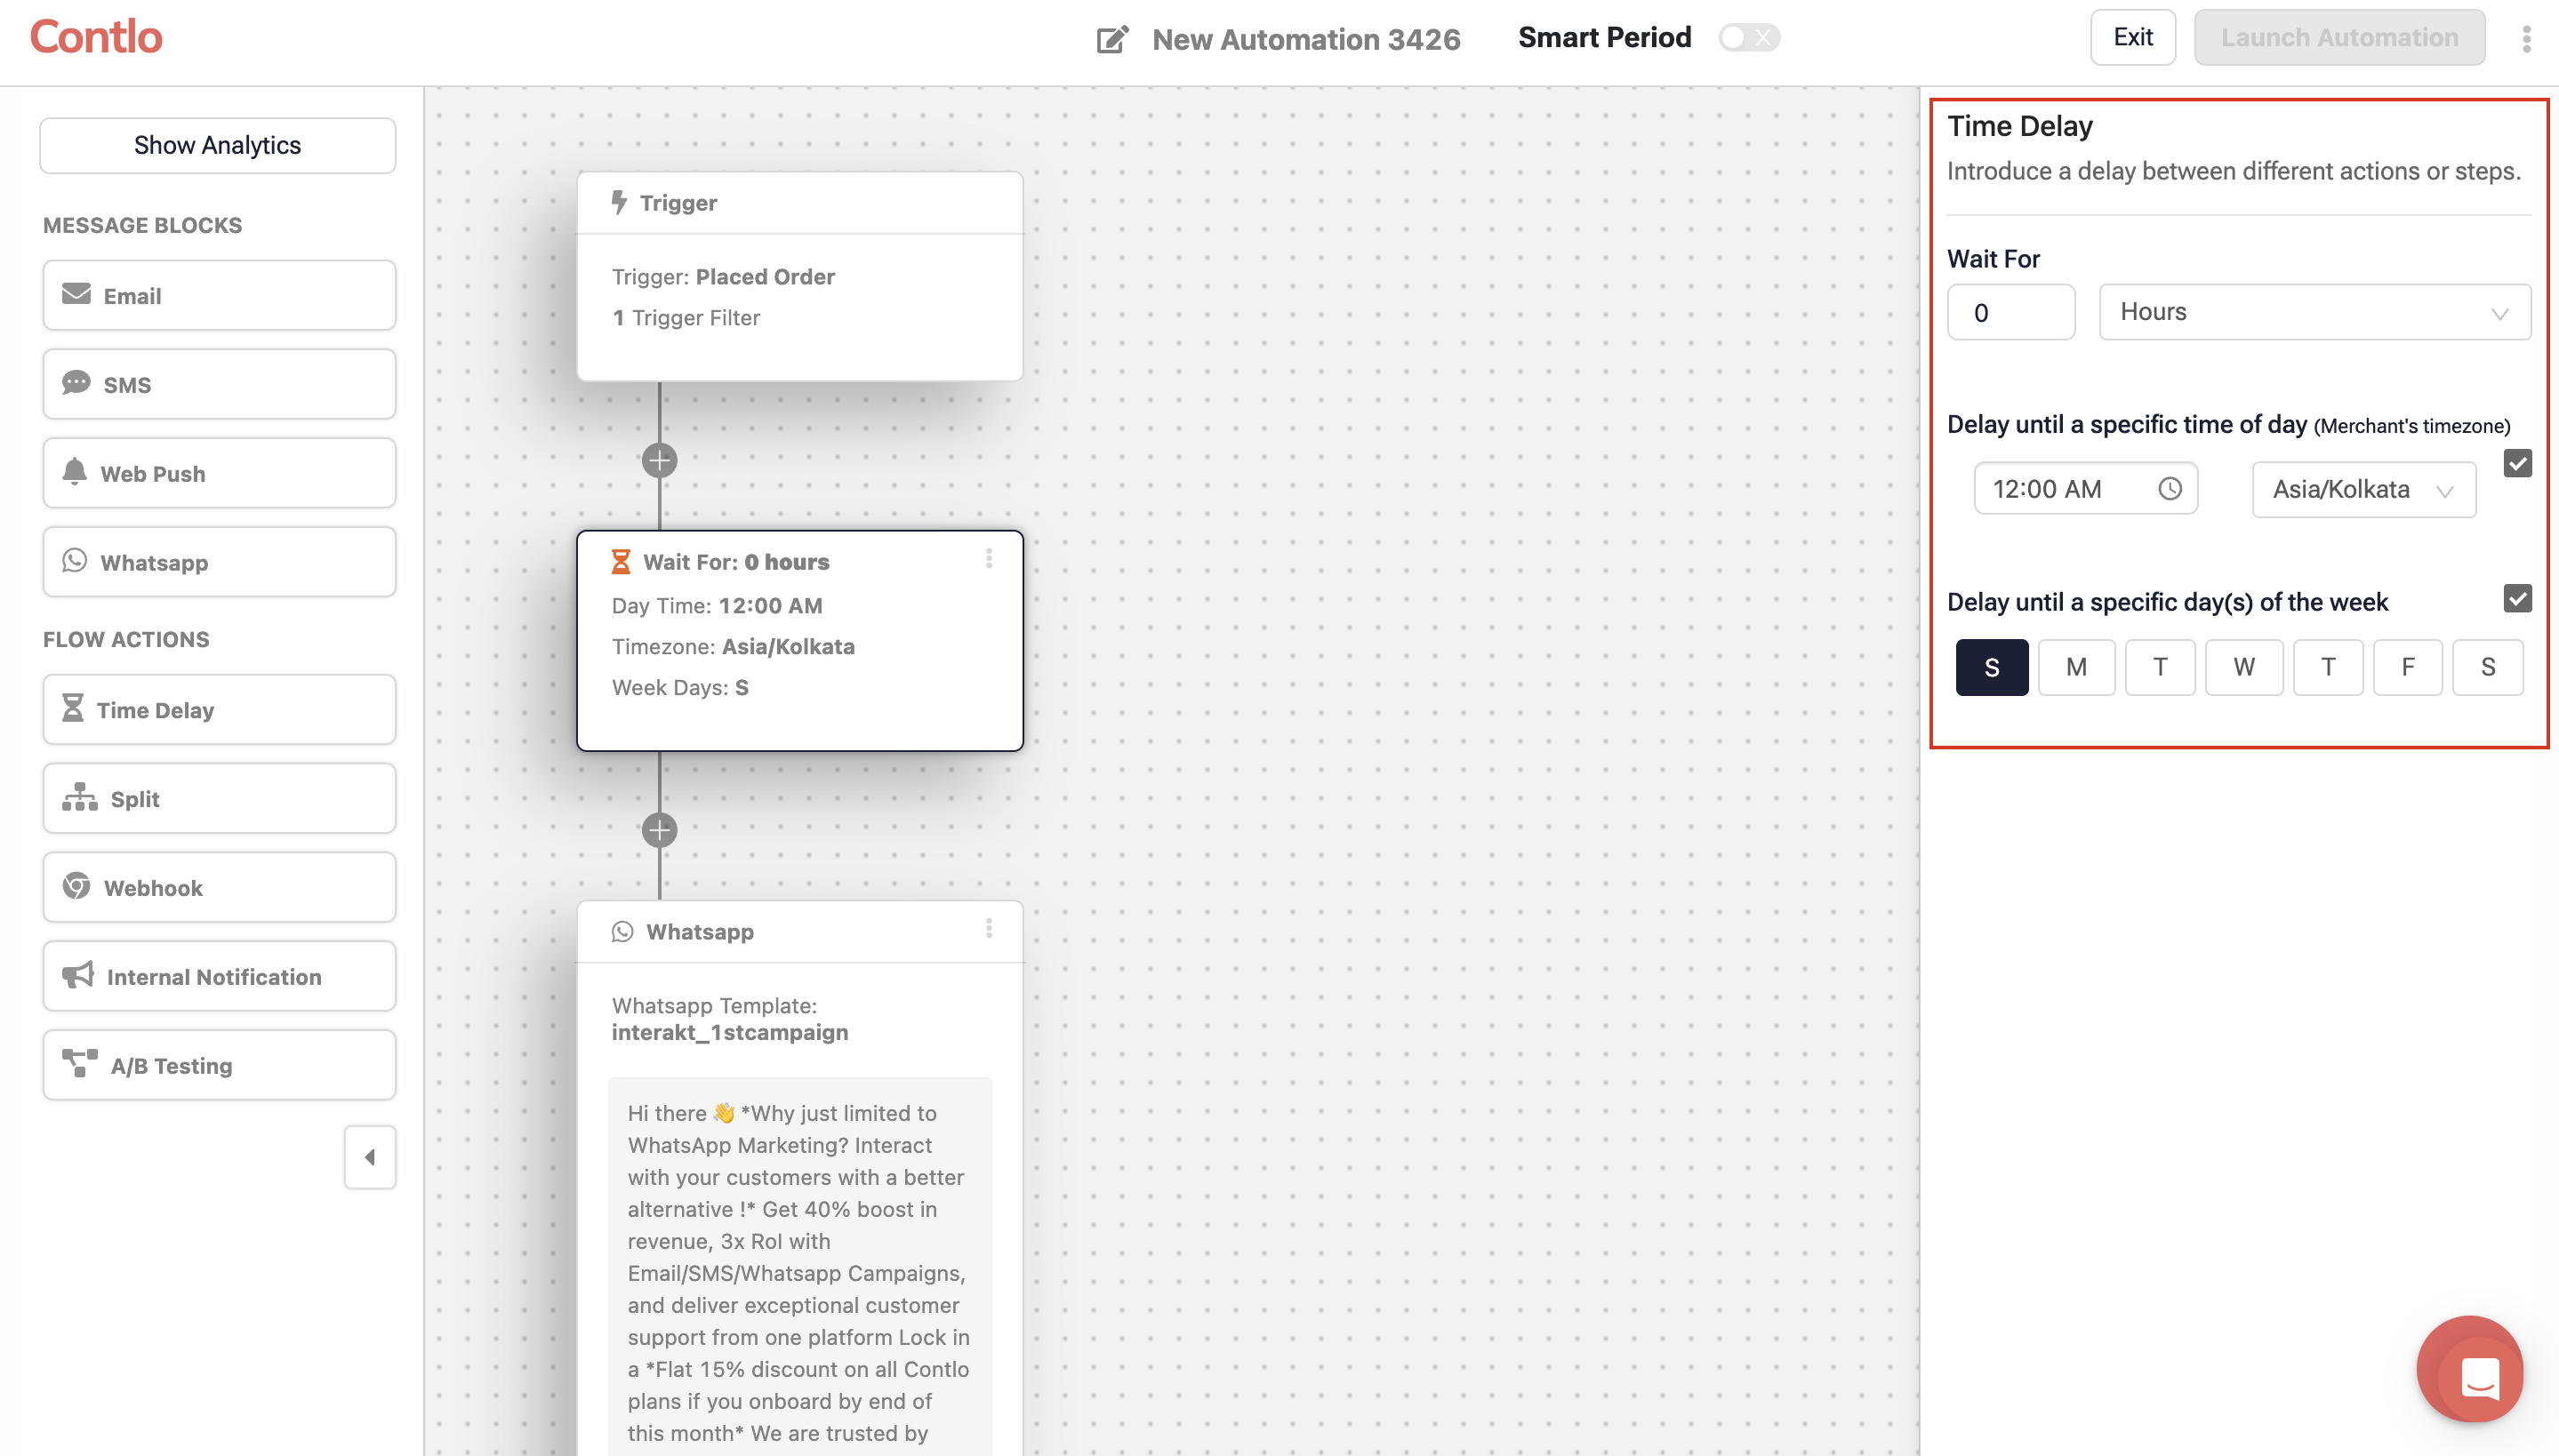
This flow action allows you to add a timer between trigger and message blocks, or between different message blocks. You can choose to have a time delay between stages, as short as minutes or as long as months. The delay is always counted starting from the end of the previous block (Trigger, Email, SMS, Split, etc.). It has the following properties:
- Wait For: Enter the time till which you want to wait before executing the next block.
- Delay until a specific time of day (Merchant's timezone): Enter the merchant's timezone to align it with the time delay.
- Delay until a specific day(s) of the week: Select the days on which you want to delay the upcoming message block.
Split
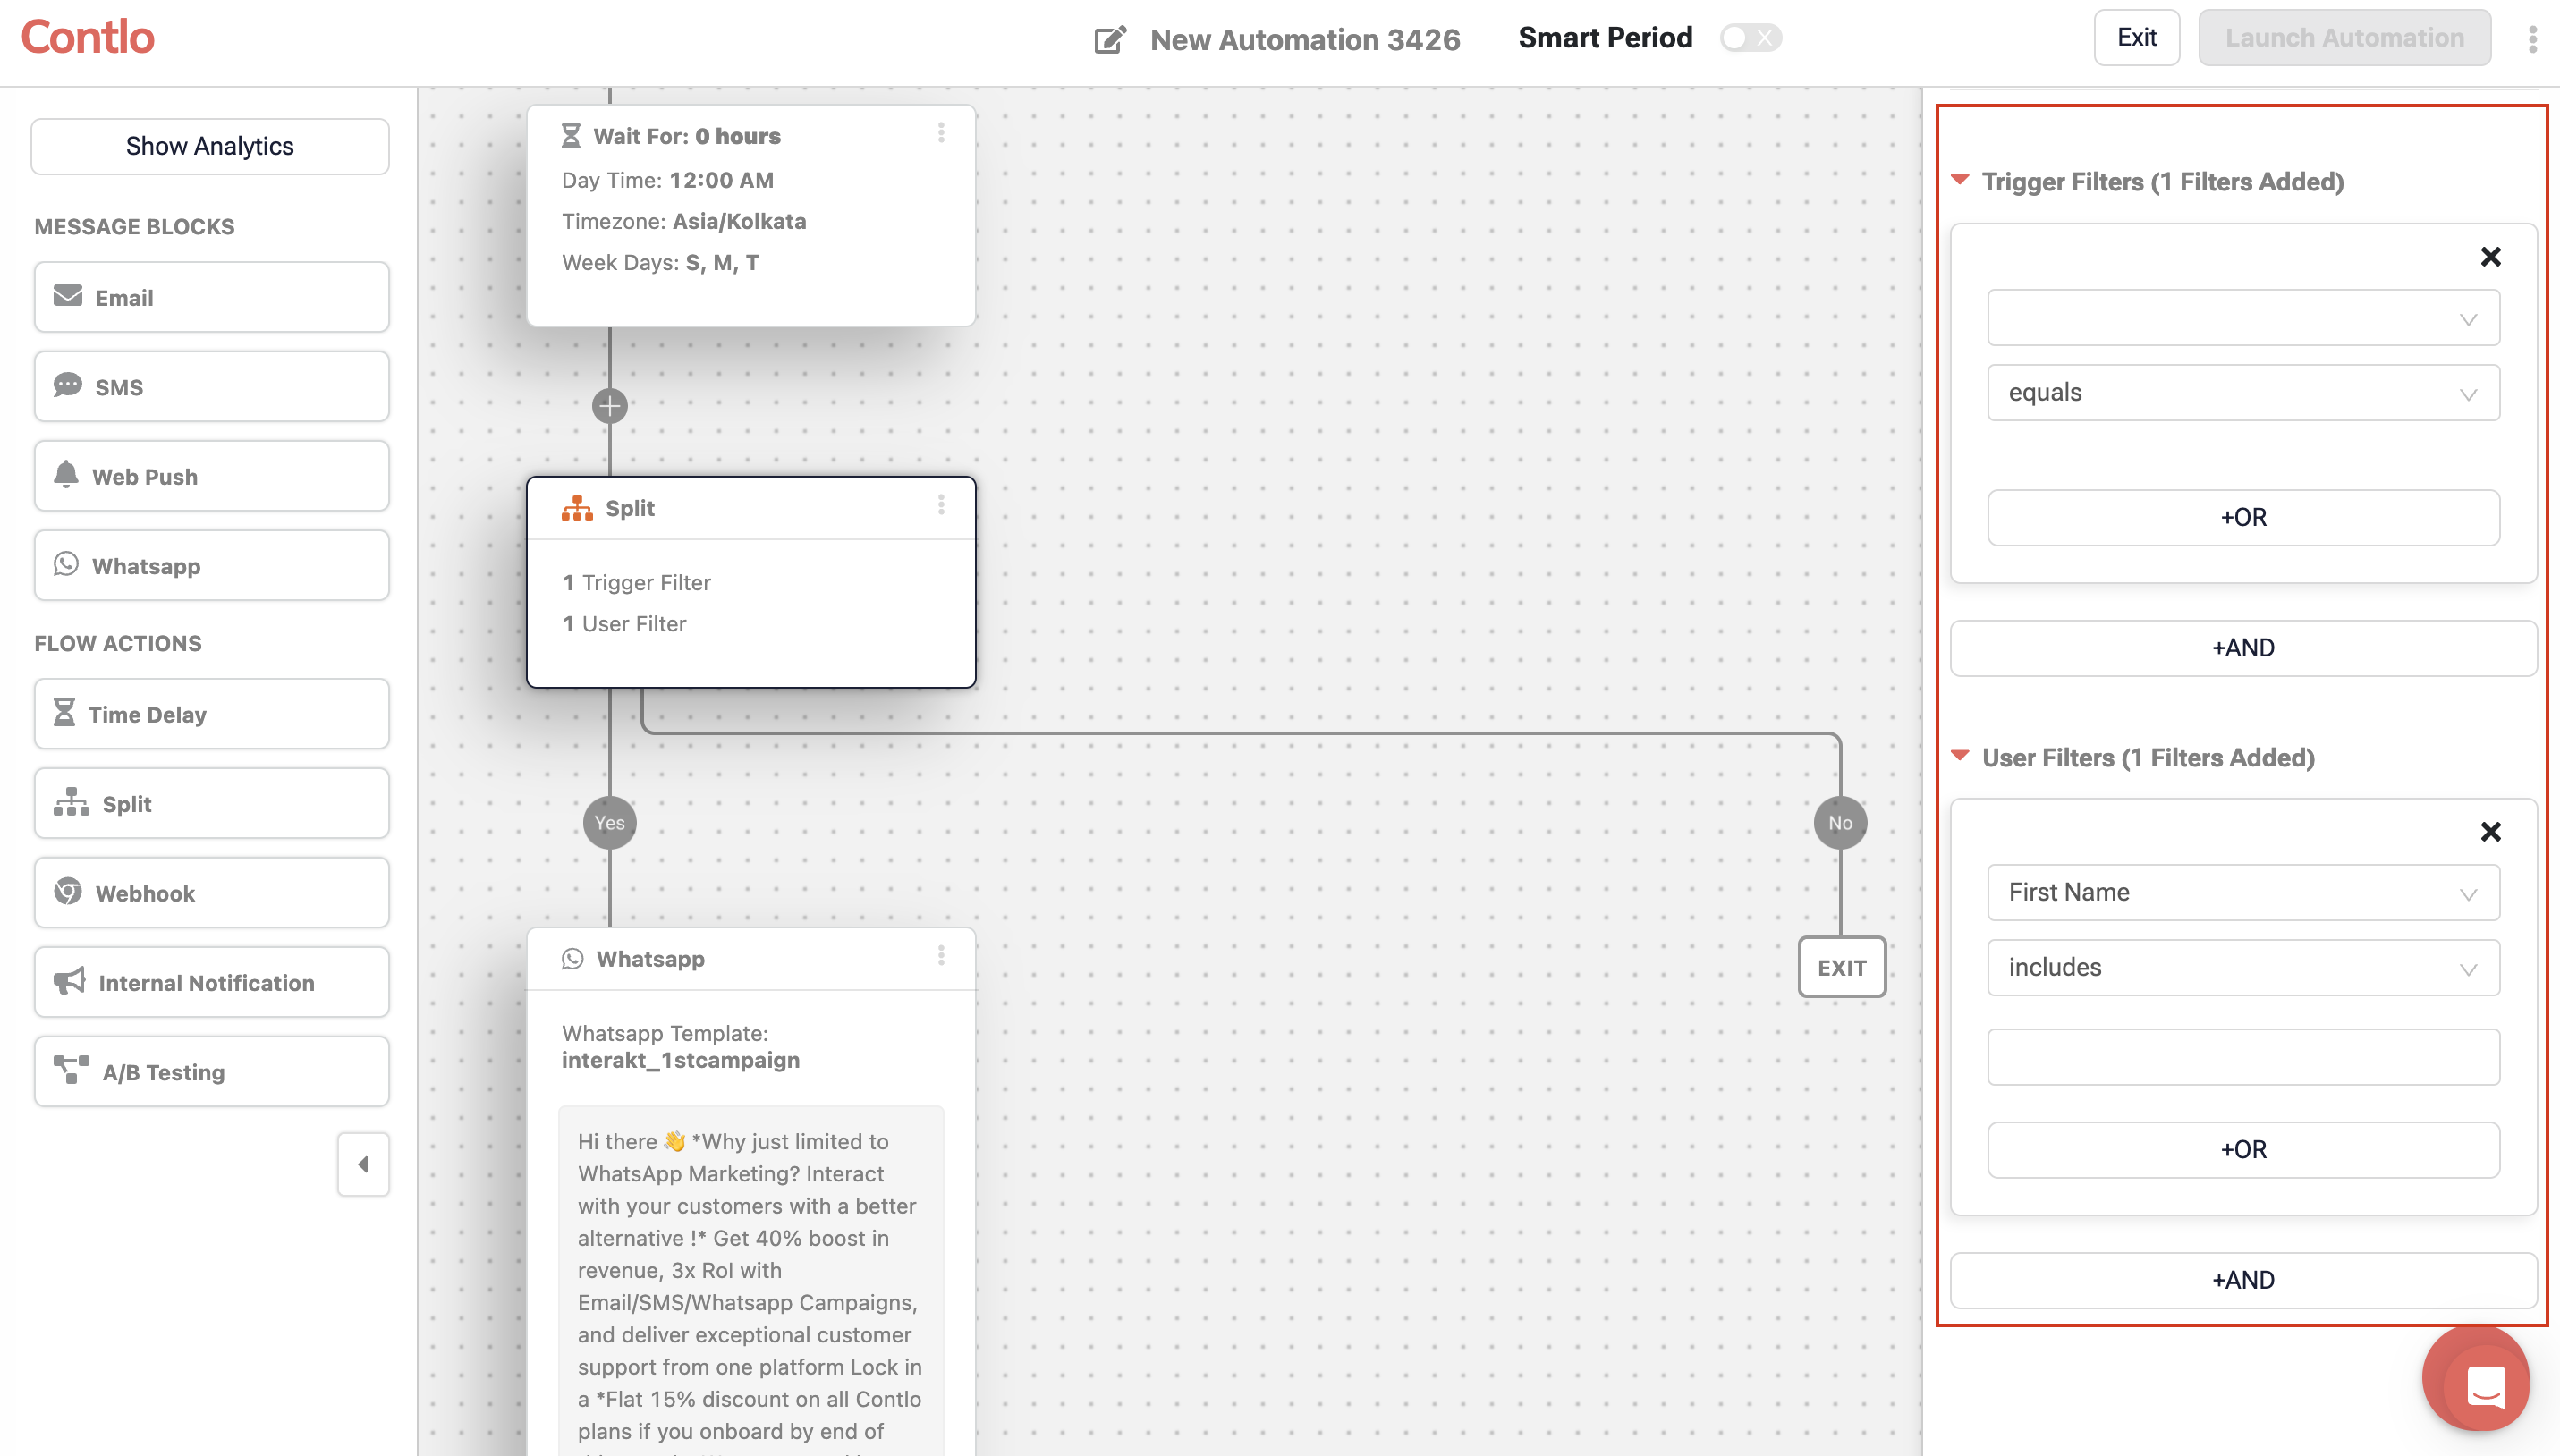
Split is a conditional flow action that returns a boolean value. You can split your Automation based on Trigger Conditions or User Filters. If the defined condition returns True or Yes, the automation follows the respective path. If it returns False or No, it follows the path defined for No. Split has the following properties:
- Add Trigger Filter: Click this button to add a trigger-based condition for the Split.
- Add User Filter: This option enables you to define split conditions based on the user filter. You can create user filters on segments, lists, or user attributes like First Name, State, country, etc.
Webhook
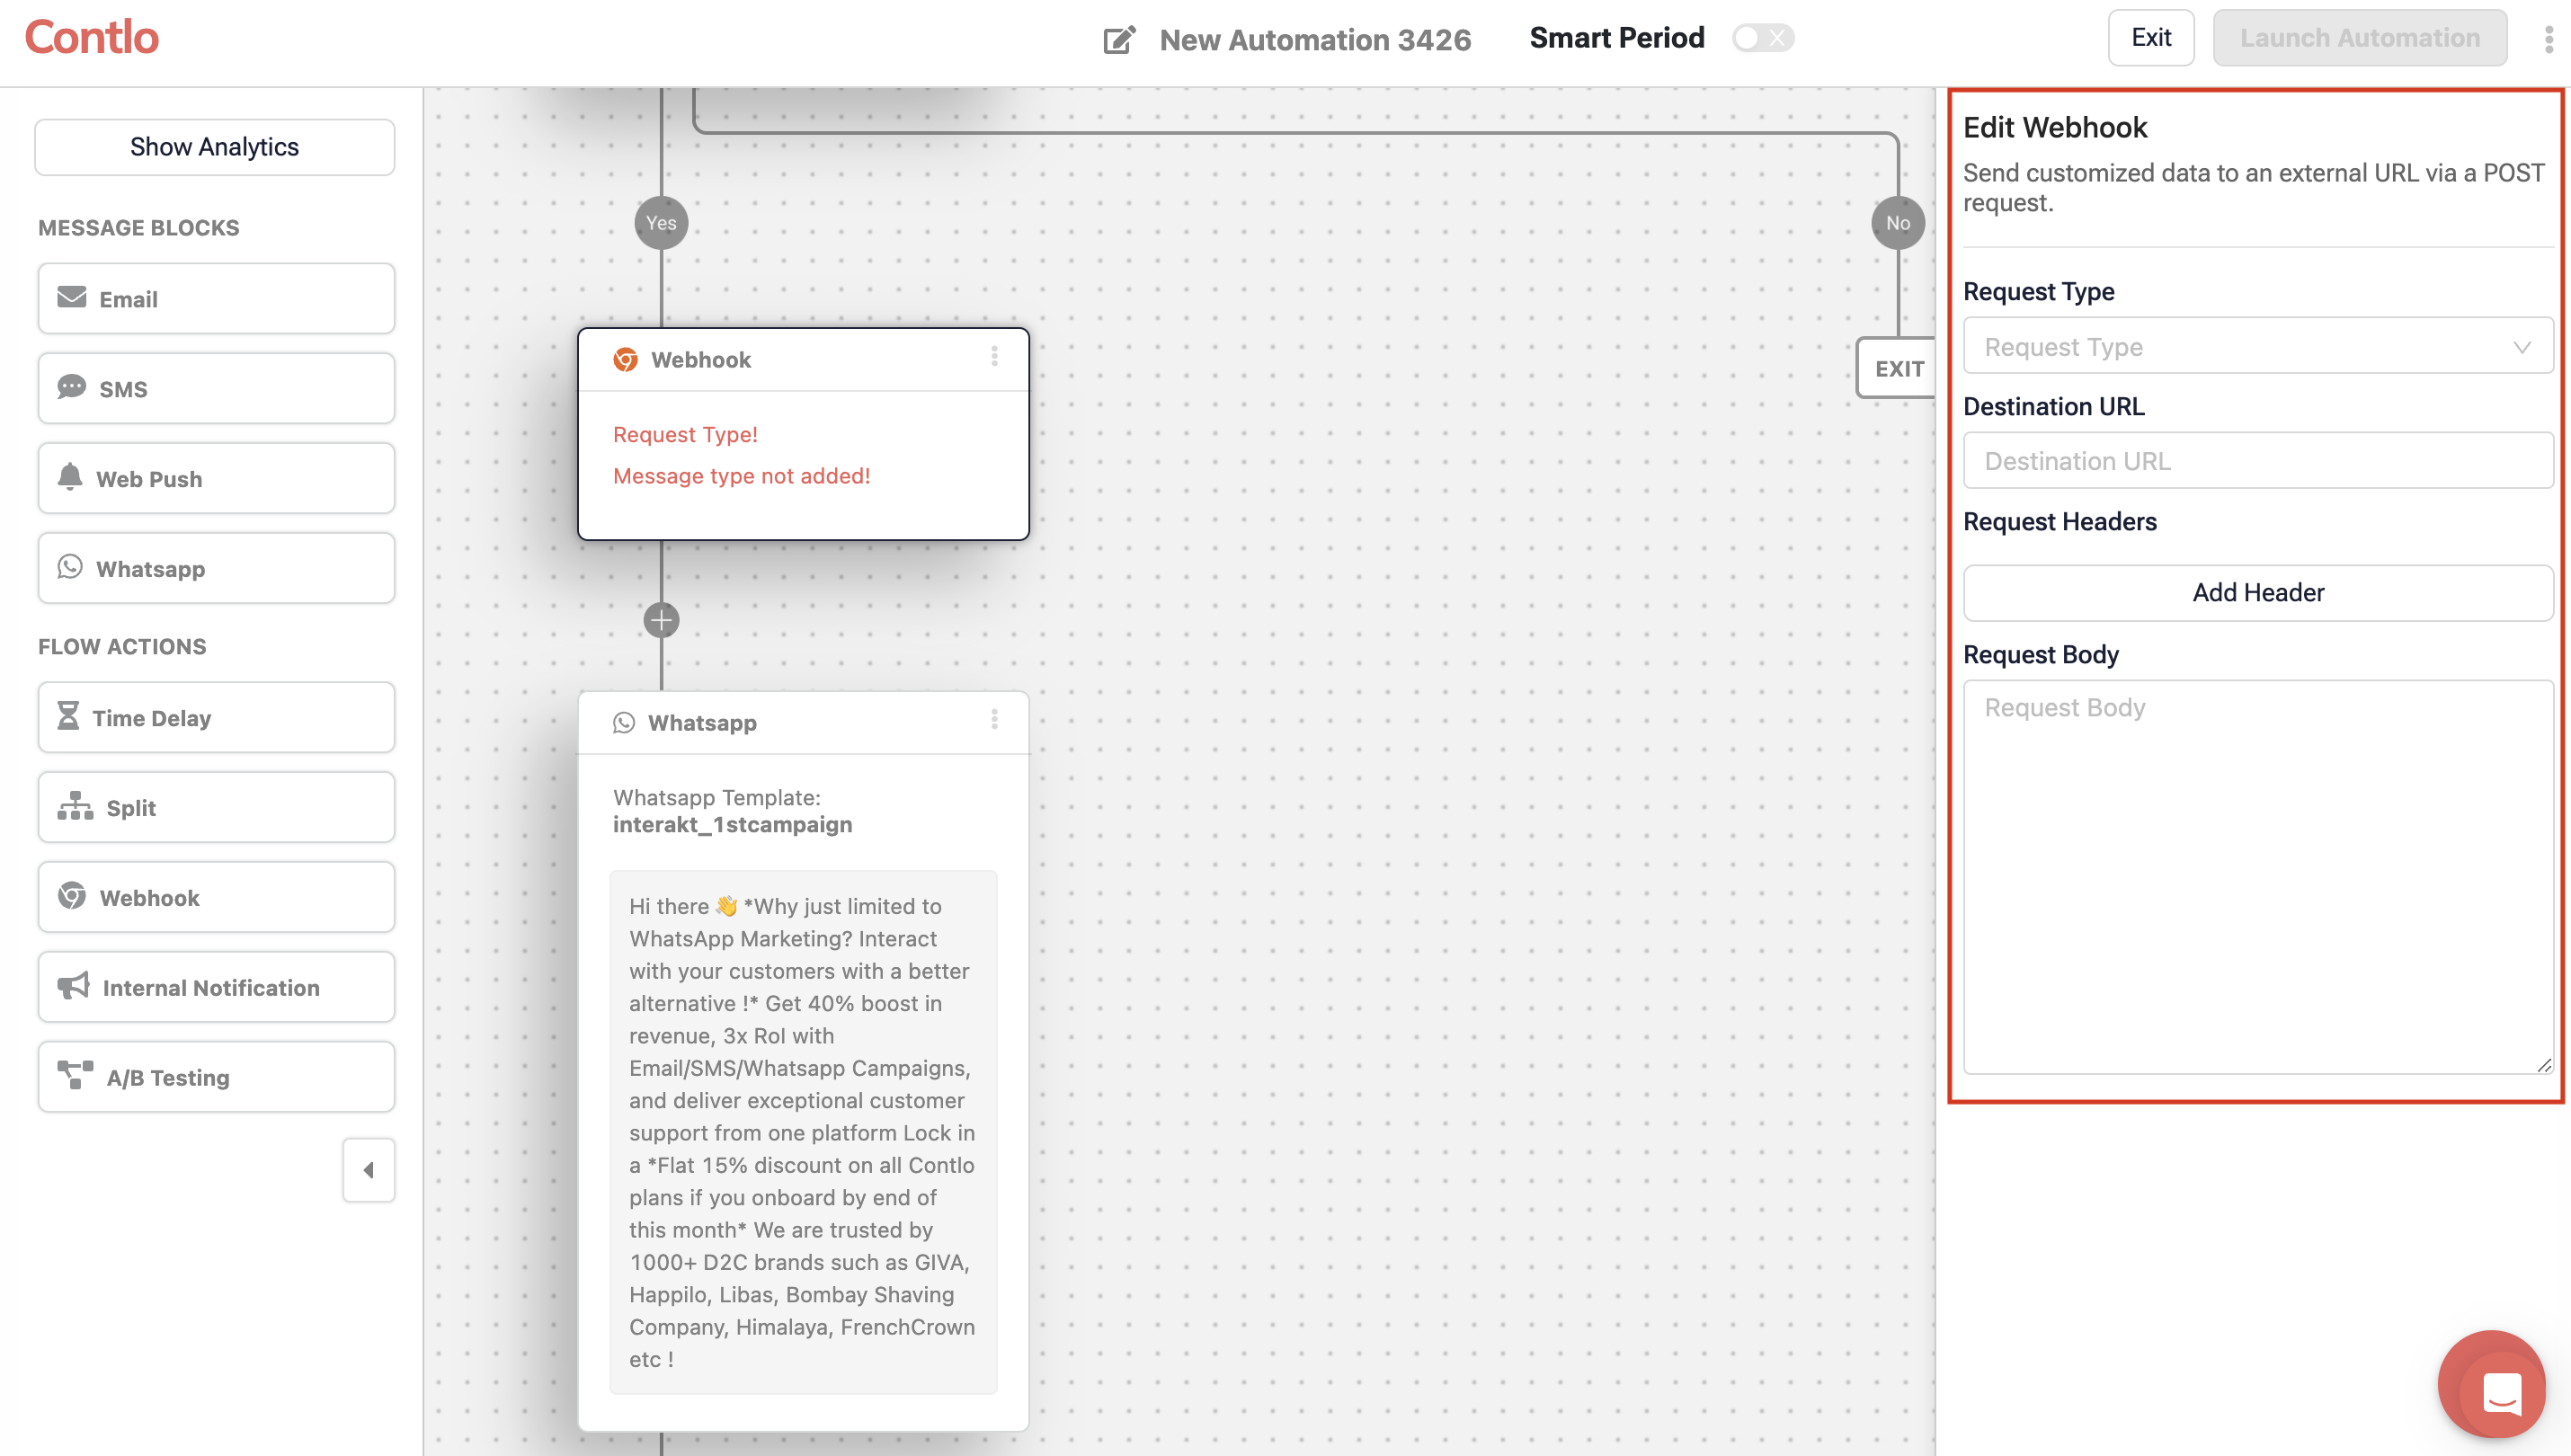
The Webhook allows you to send a POST request to a URL with a header and a request body. It has the following properties:
- Request Type: Select the request type (POST).
- Destination URL: Enter the destination URL for your POST request.
- Request Headers: Add request headers (key-value pairs) to send additional information about the request being made.
- Request Body: Add the body for your POST request based on the data you would want to send.
Internal Notification
With Internal Notifications, you can send emails to your internal teammates regarding an event you want to notify them. It has the following properties:
- Recipients: Enter the recipient's email address.
- Sender Name: Add the sender name.
- Sender Email: Enter the Email ID from which you want to send the mail.
- Subject: Enter the subject of your Email.
- Tags: Select a user attribute like First name, last name, etc. to add it to the subject.
- Body: Add and format the text for the Email body here.
- Tags: Select a user attribute like First name, last name, etc. to add it to the body.

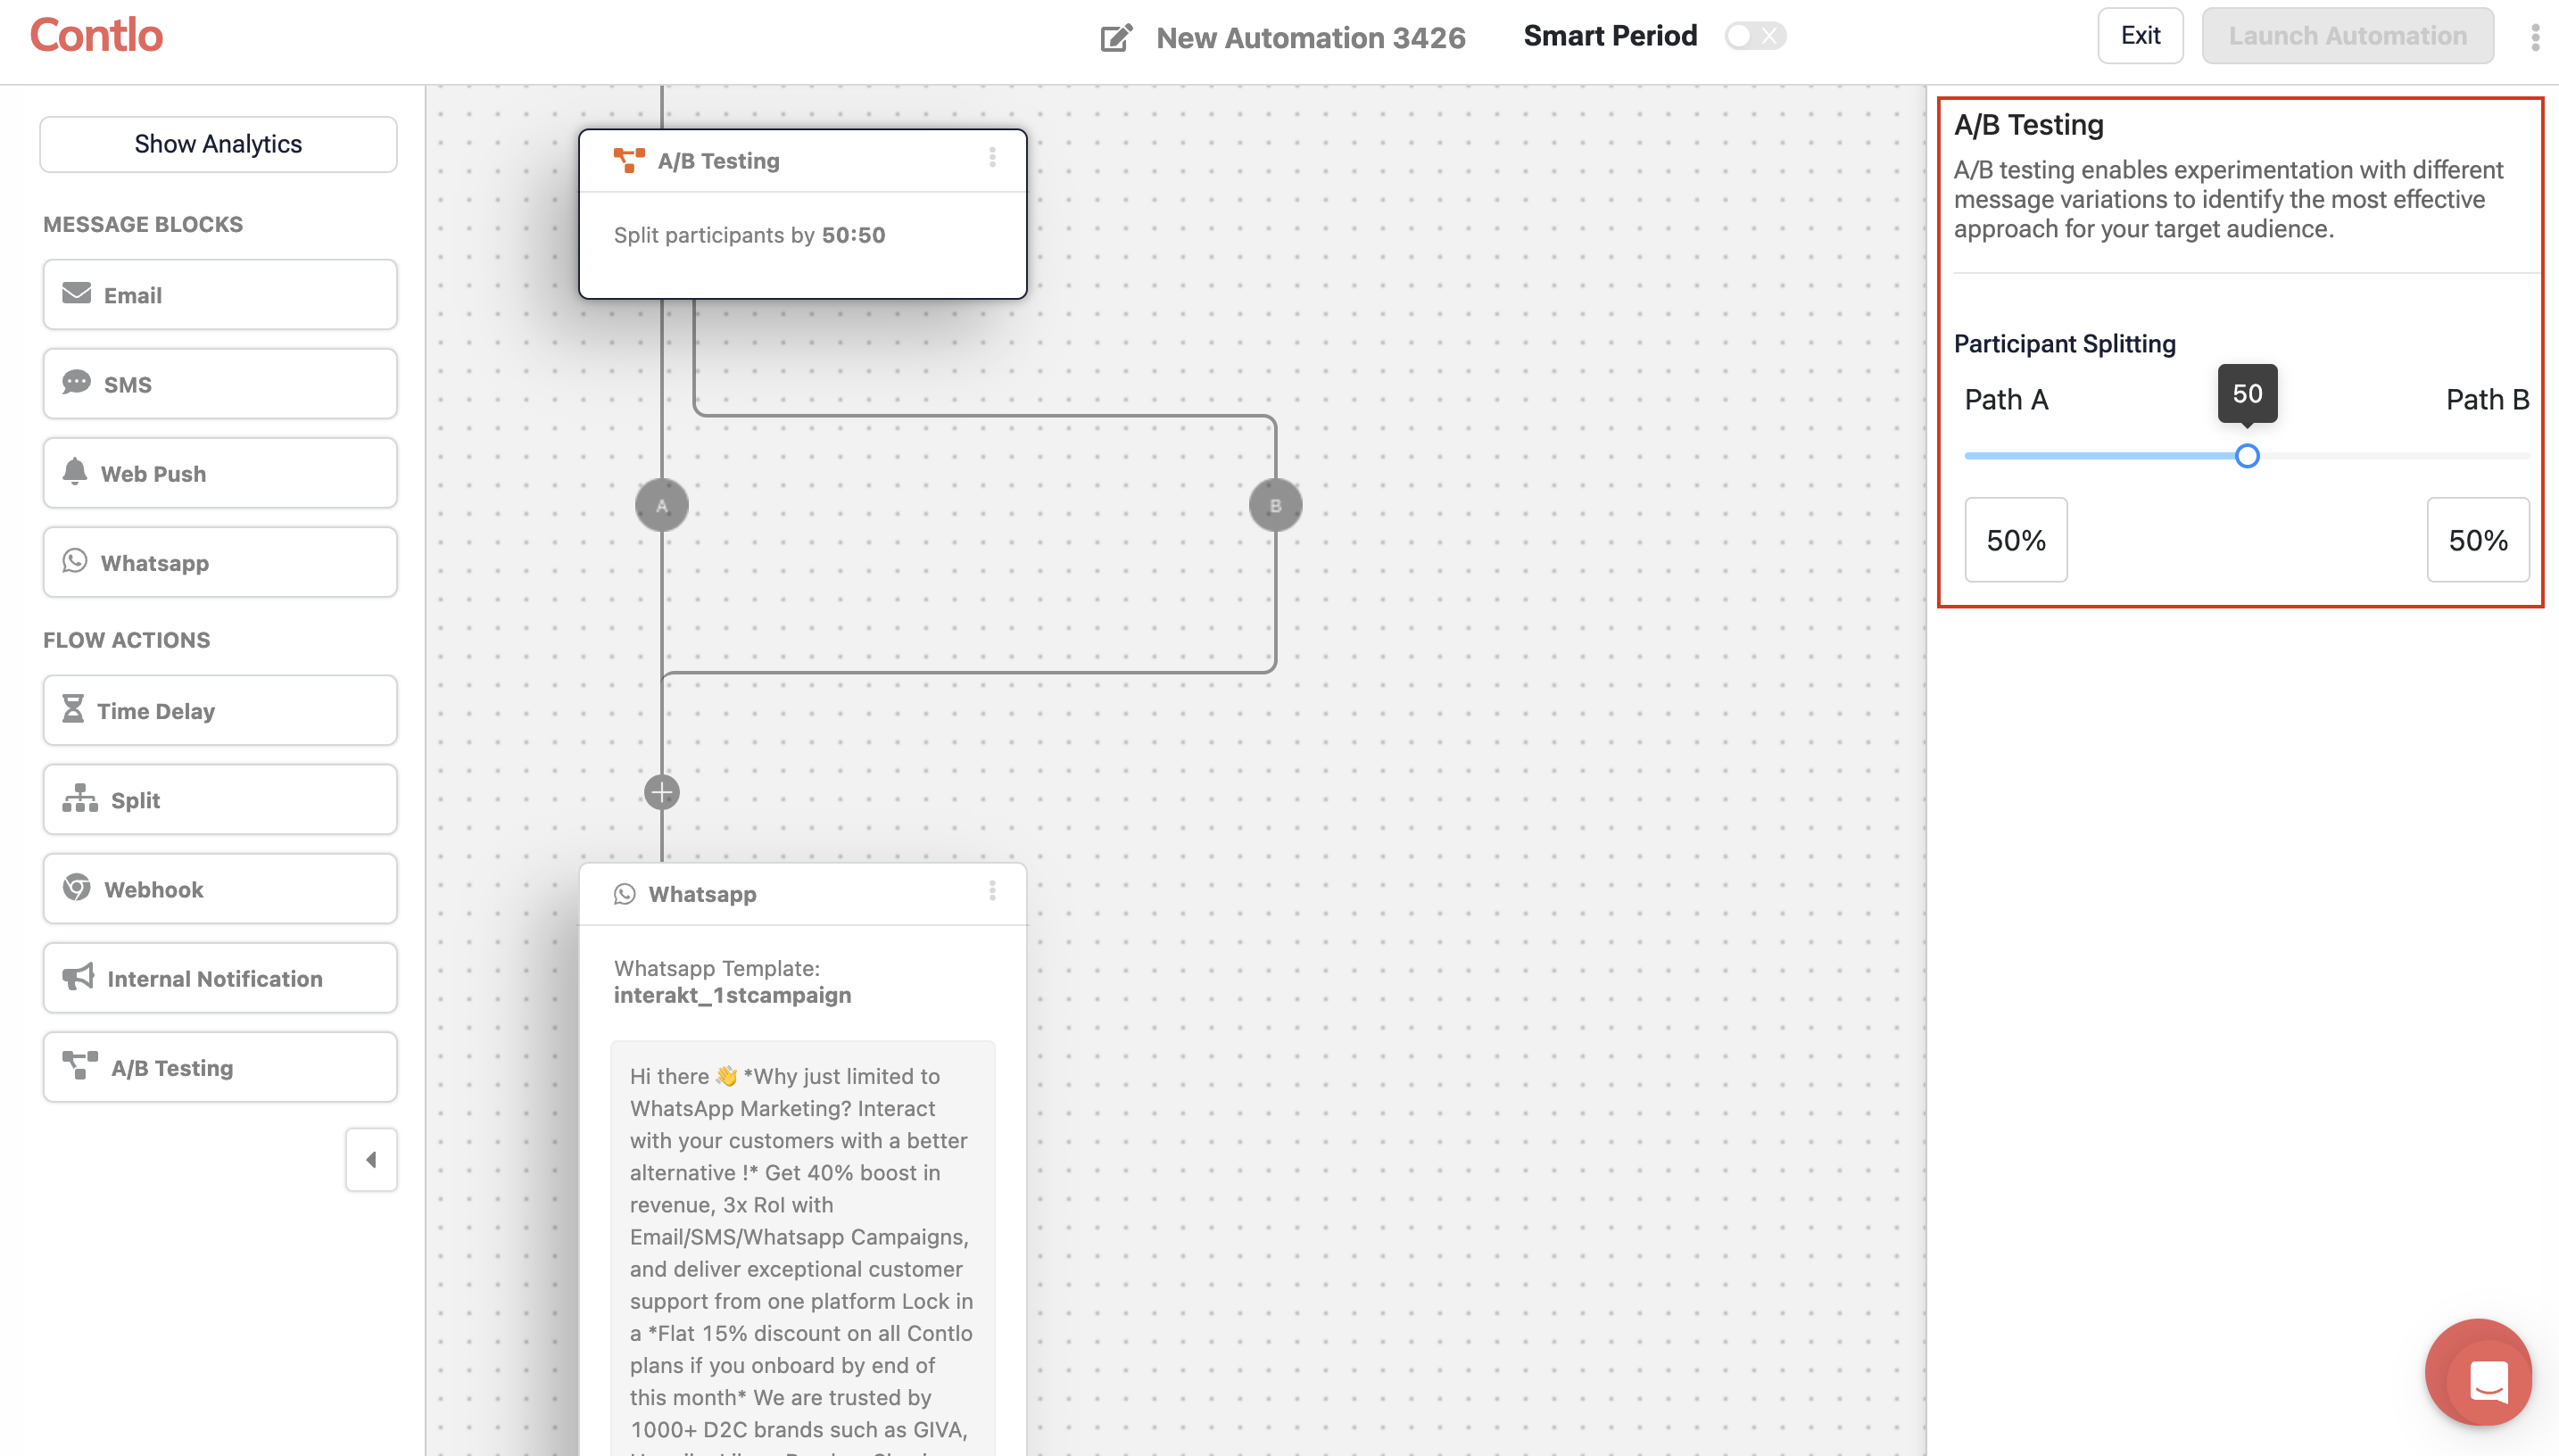
A/B Testing
A/B Testing allows you to divide your targeted audience into two groups, each receiving a different version of your message blocks. This experimentation helps you determine which approach resonates better with your end users. It has the following properties:
- Participant Splitting: Scroll the slider to set the ratio of audience split between the defined path.
- Subject: Enter the subject of your Email.
- Tags: Select a user attribute like First name, last name, etc. to add it to the subject.
Updated about 1 month ago