
Setup an Email domain
Follow the steps below to set the Email sender domain in Contlo:
Add Sender Domains in Contlo
- Go to the profile section on the top right corner and open Settings.
- Go to Accounts > Store Settings from the sidebar on the Settings homepage.
- On the Store Settings, open the Sender Domains tab and click the Add domain.
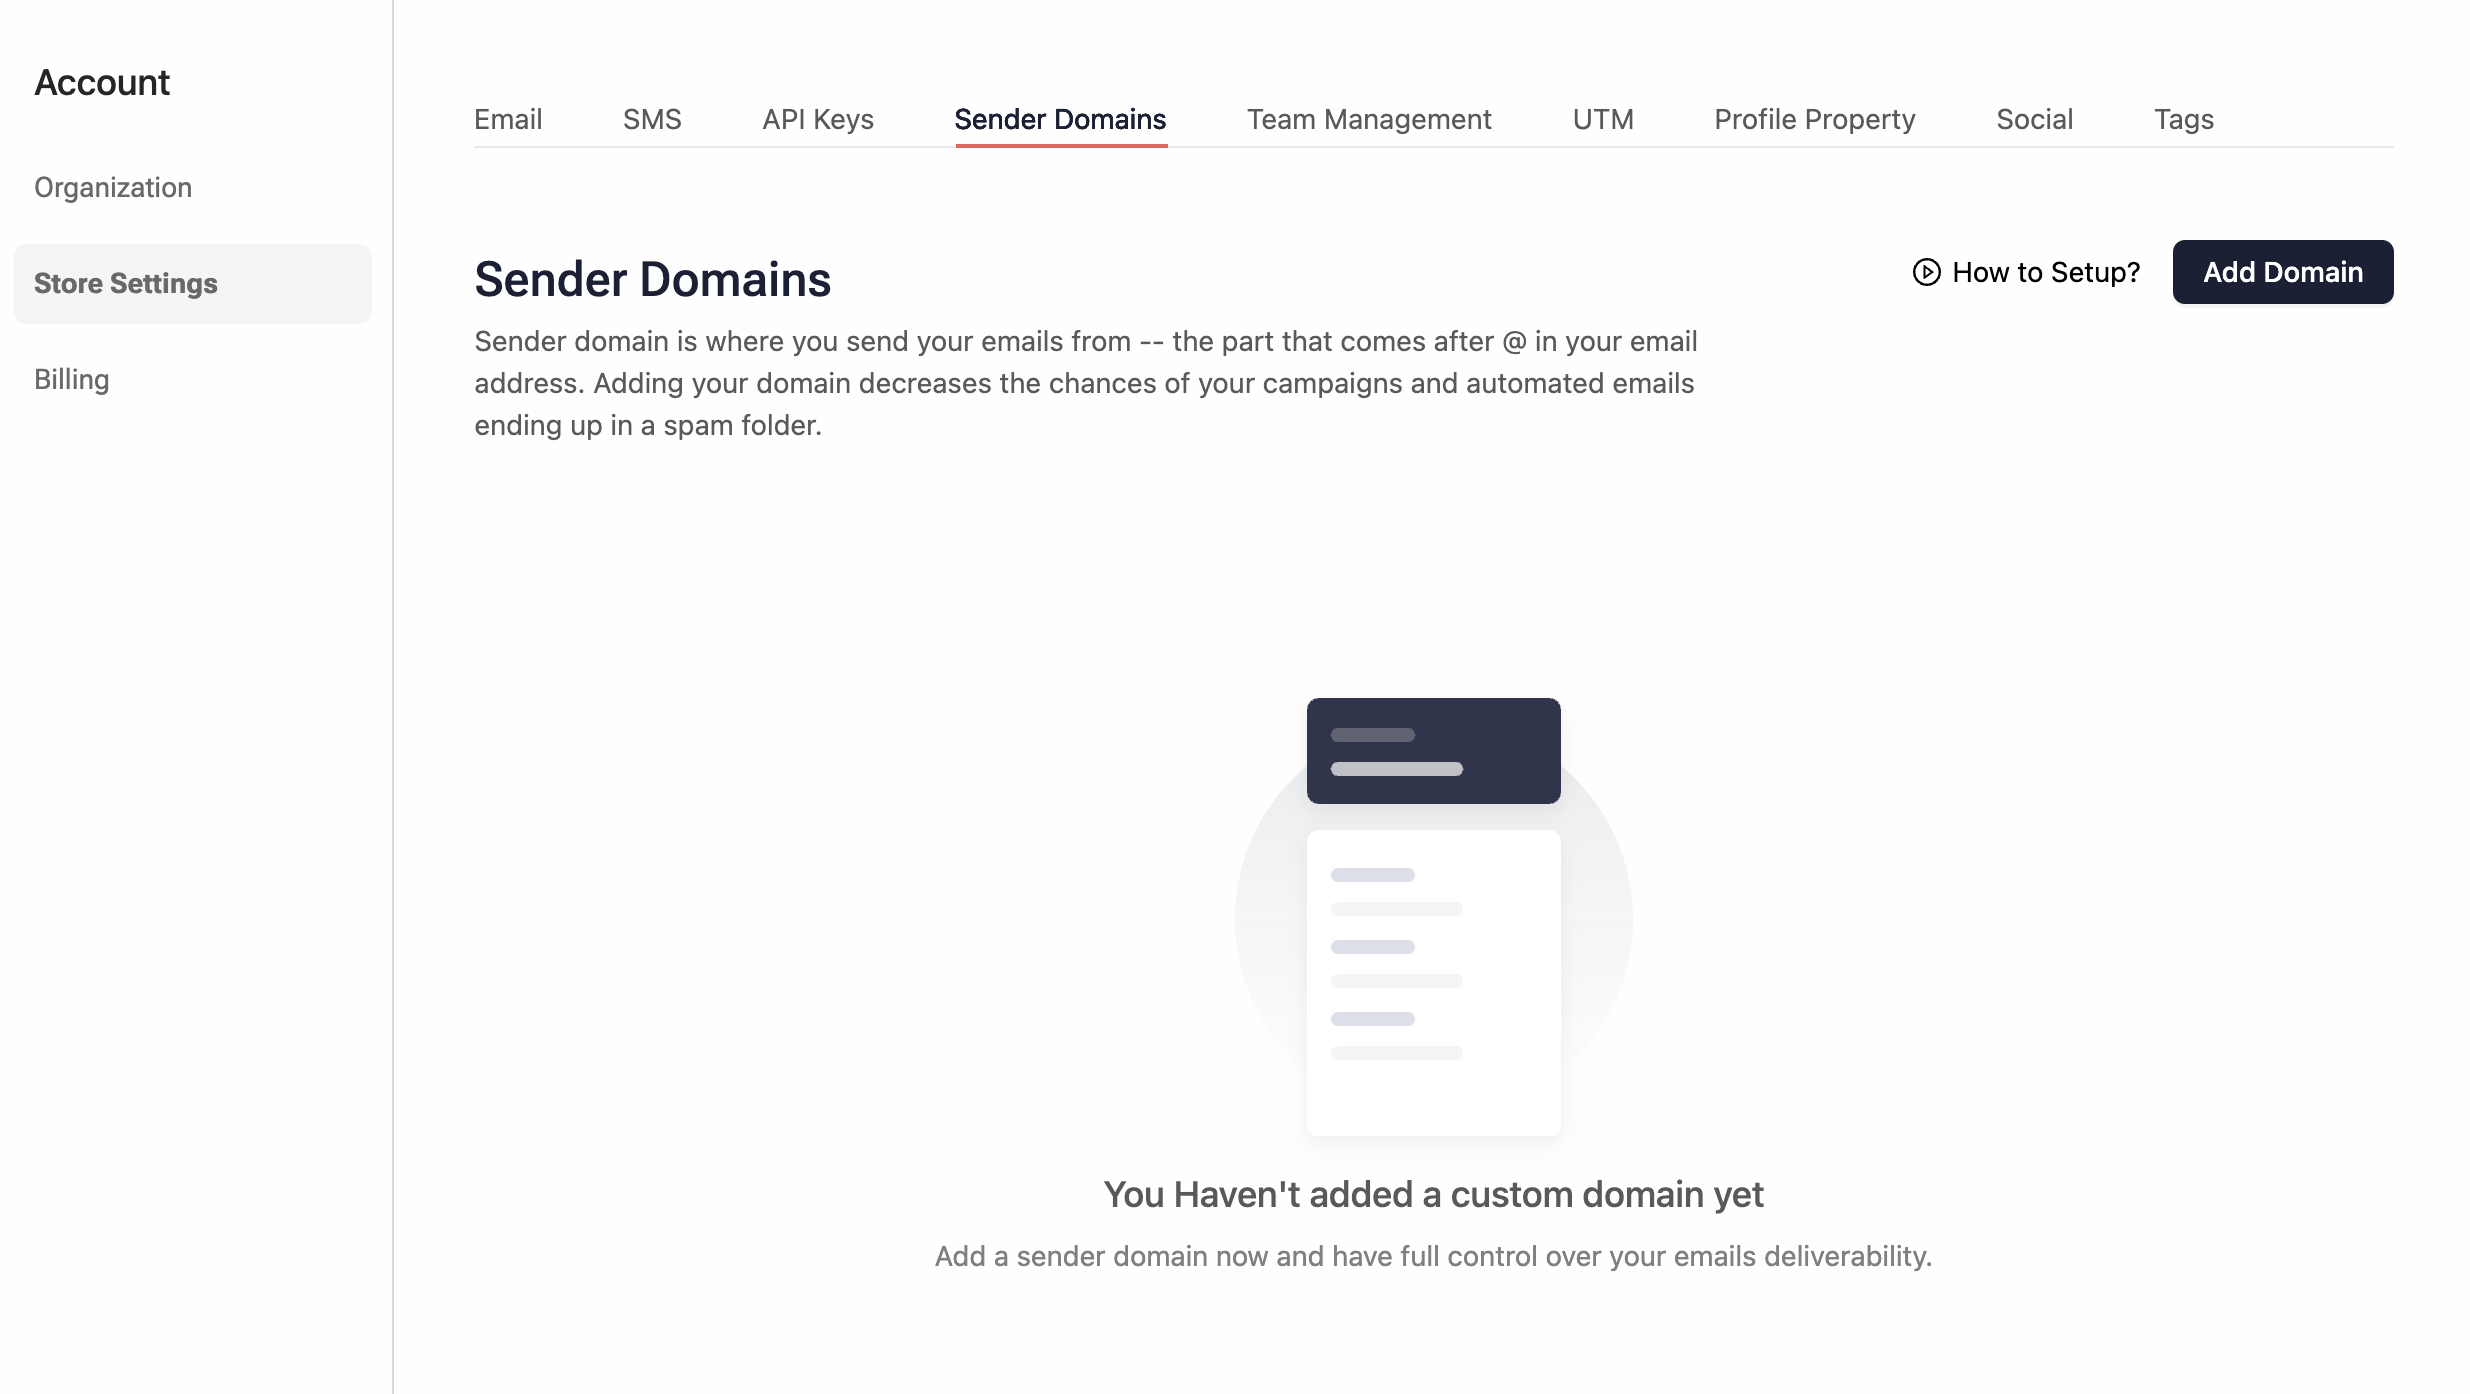
-
On the Add Domain Details modal, add the following details:
- Enter your Domain: Add your email provider domain.
- Enter your Sending Domain: Add your Sending domain.
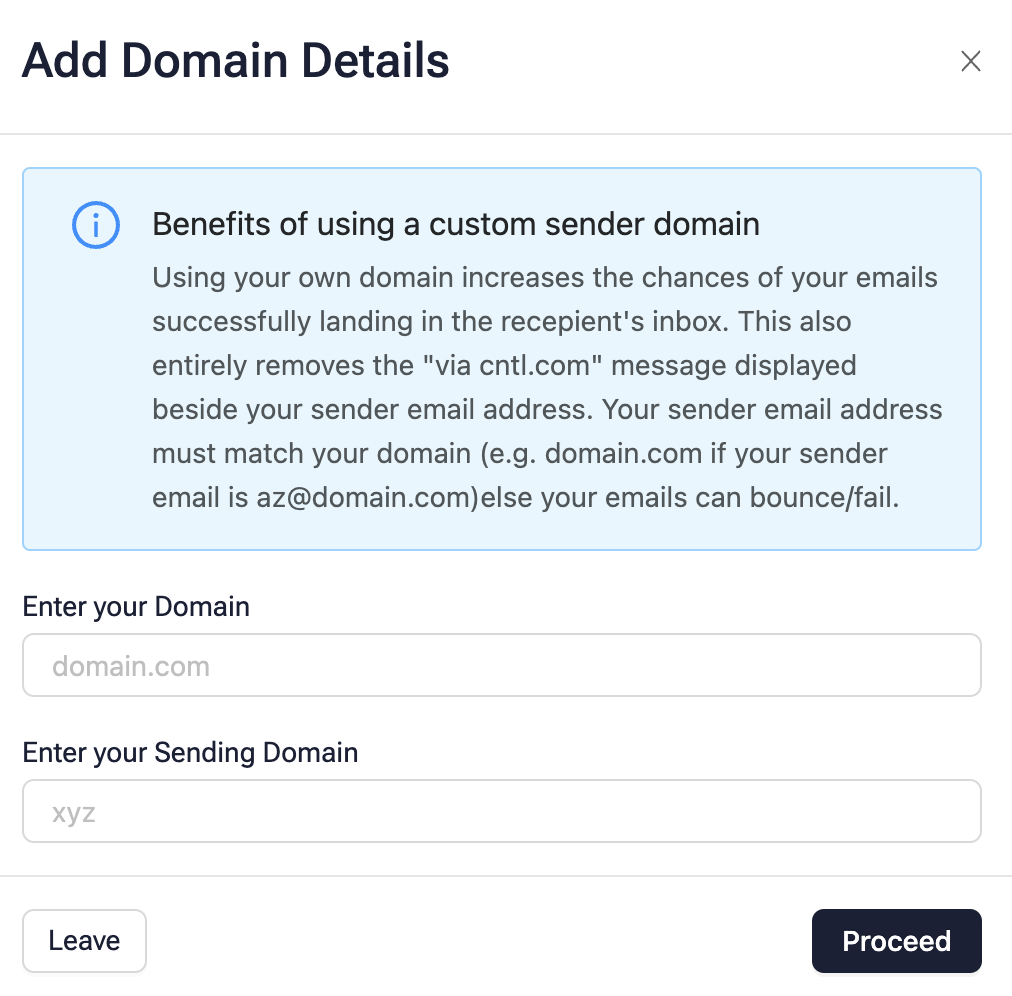
Click Proceed. This generates the DNS Records for your domain.
- You would move to the DNS Records page. It displays the generated DNS records, the hostname, the expected record, the current record, and the status of your Domain verification.
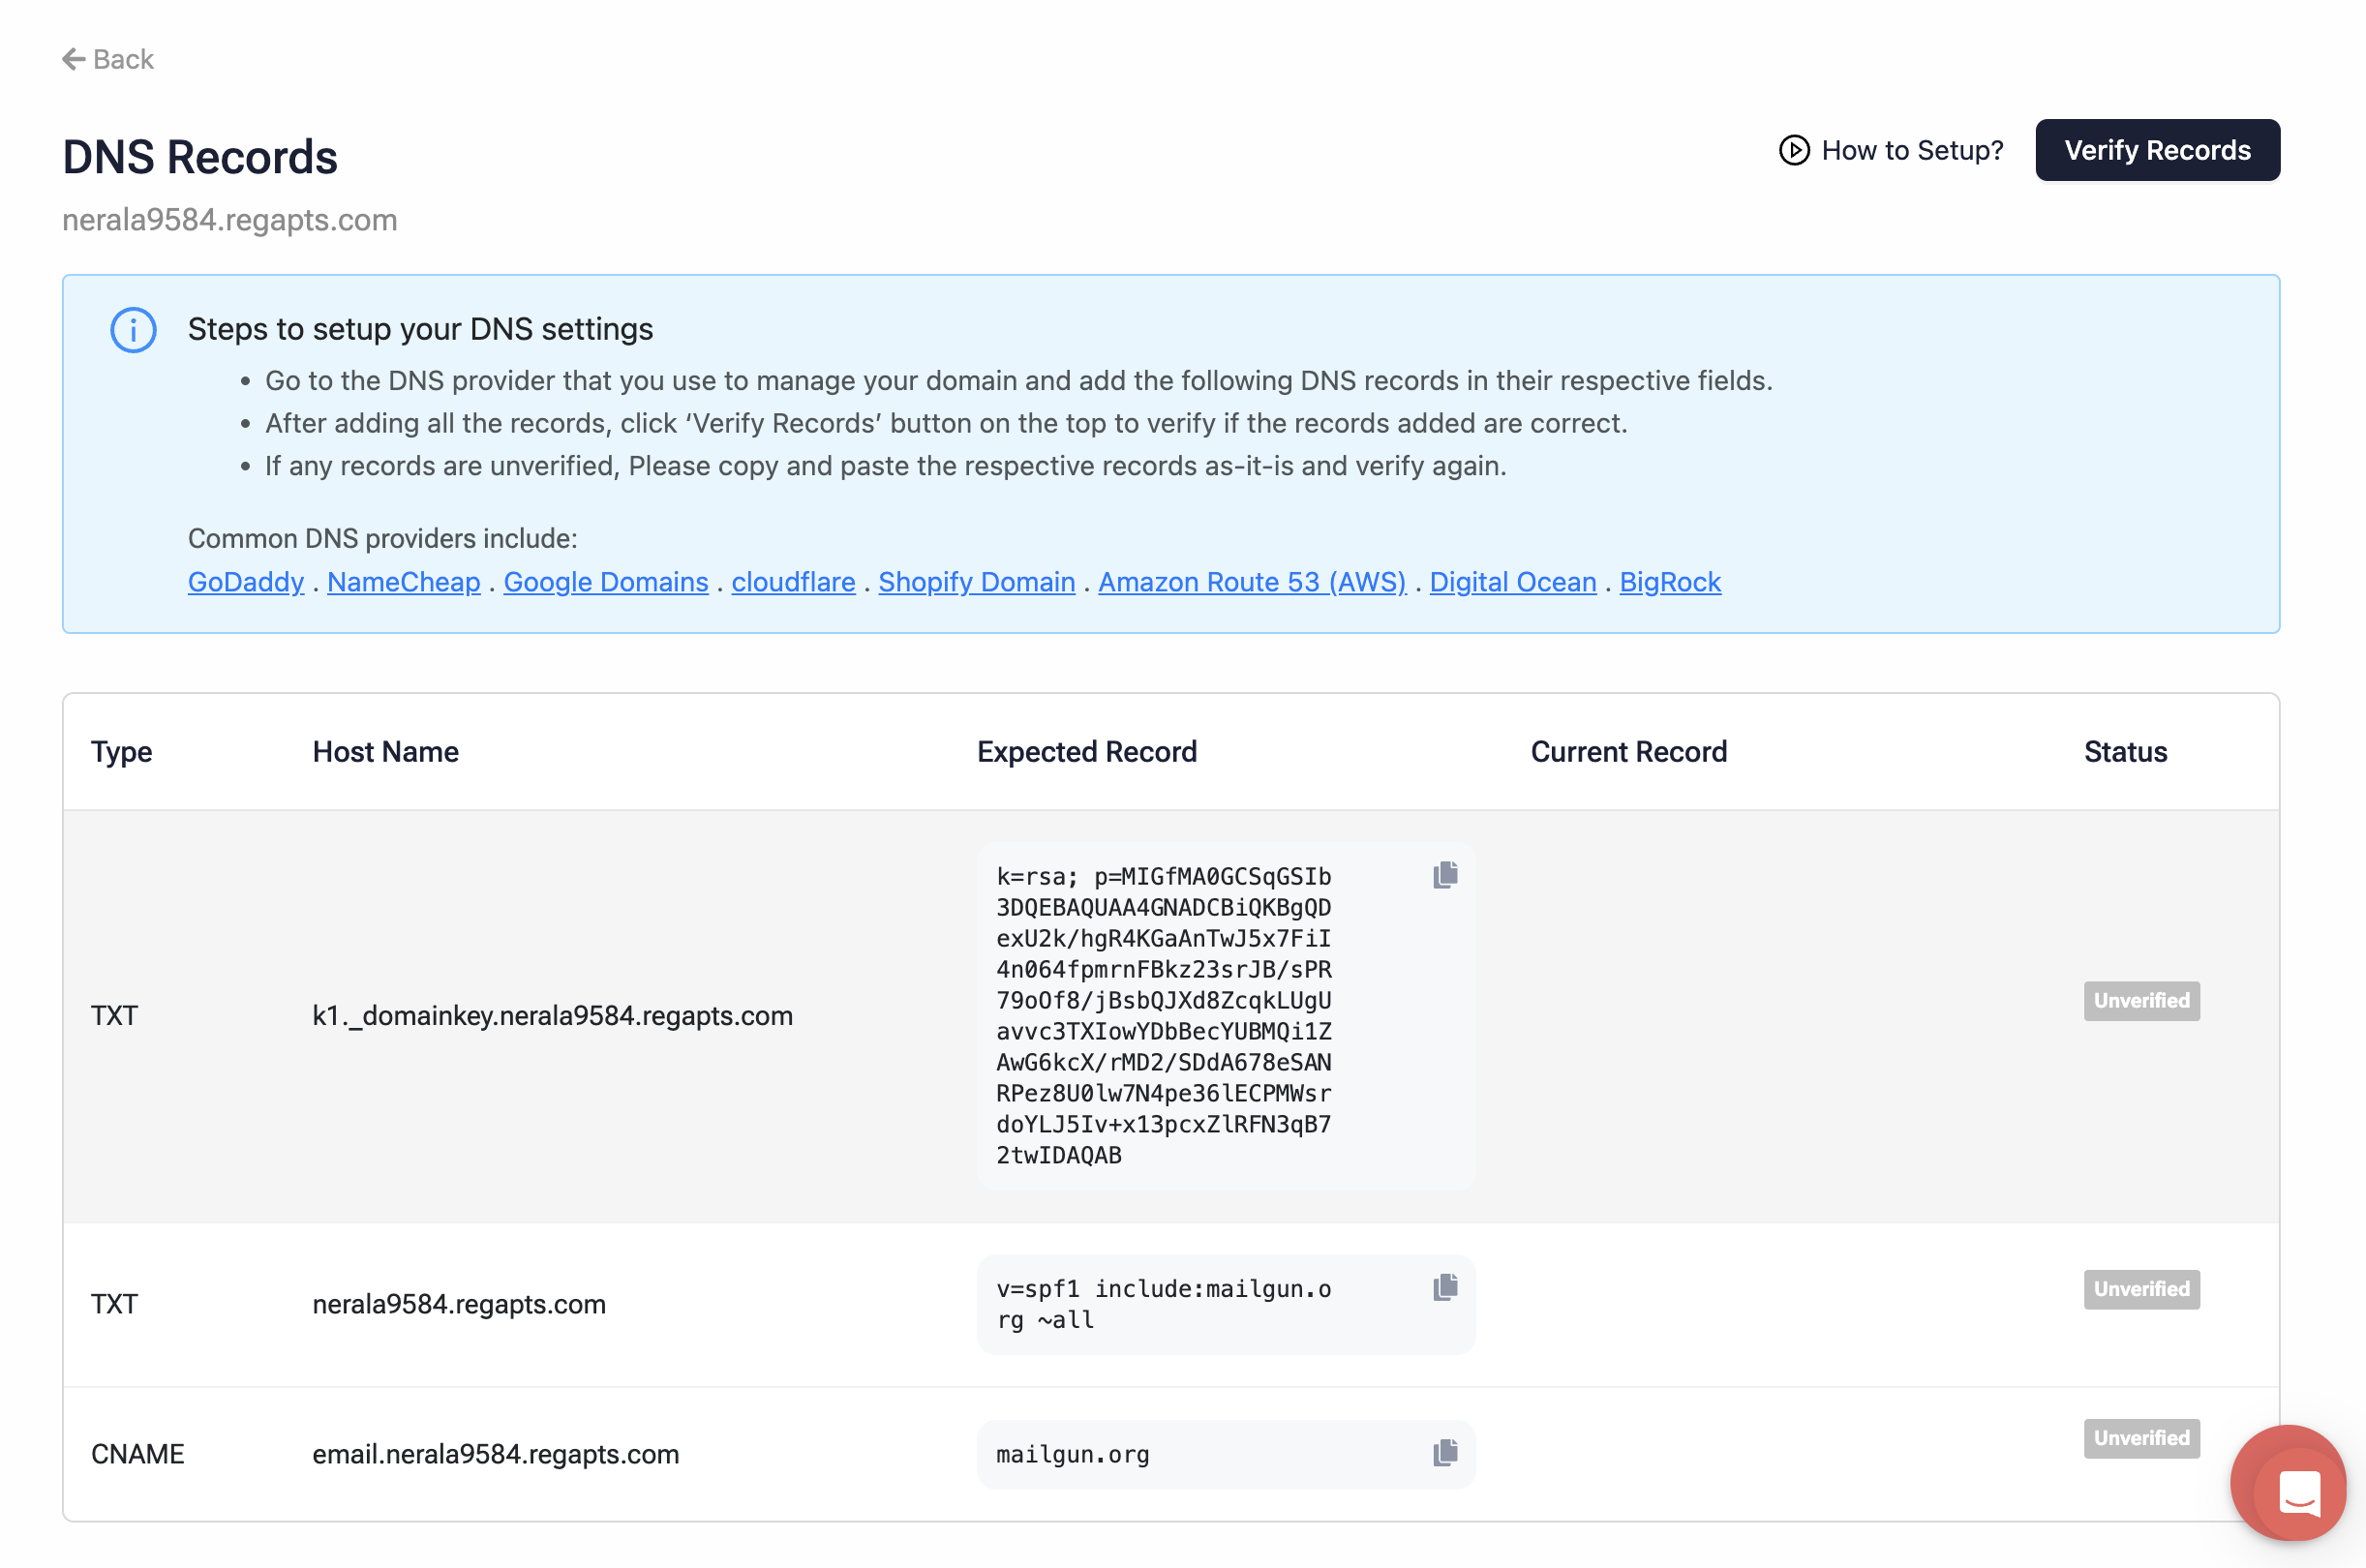
DNS provider Configuration
- Open the DNS provider managing your domain.
- Go to DNS settings and add the DNS details generated from Contlo in the respective fields.
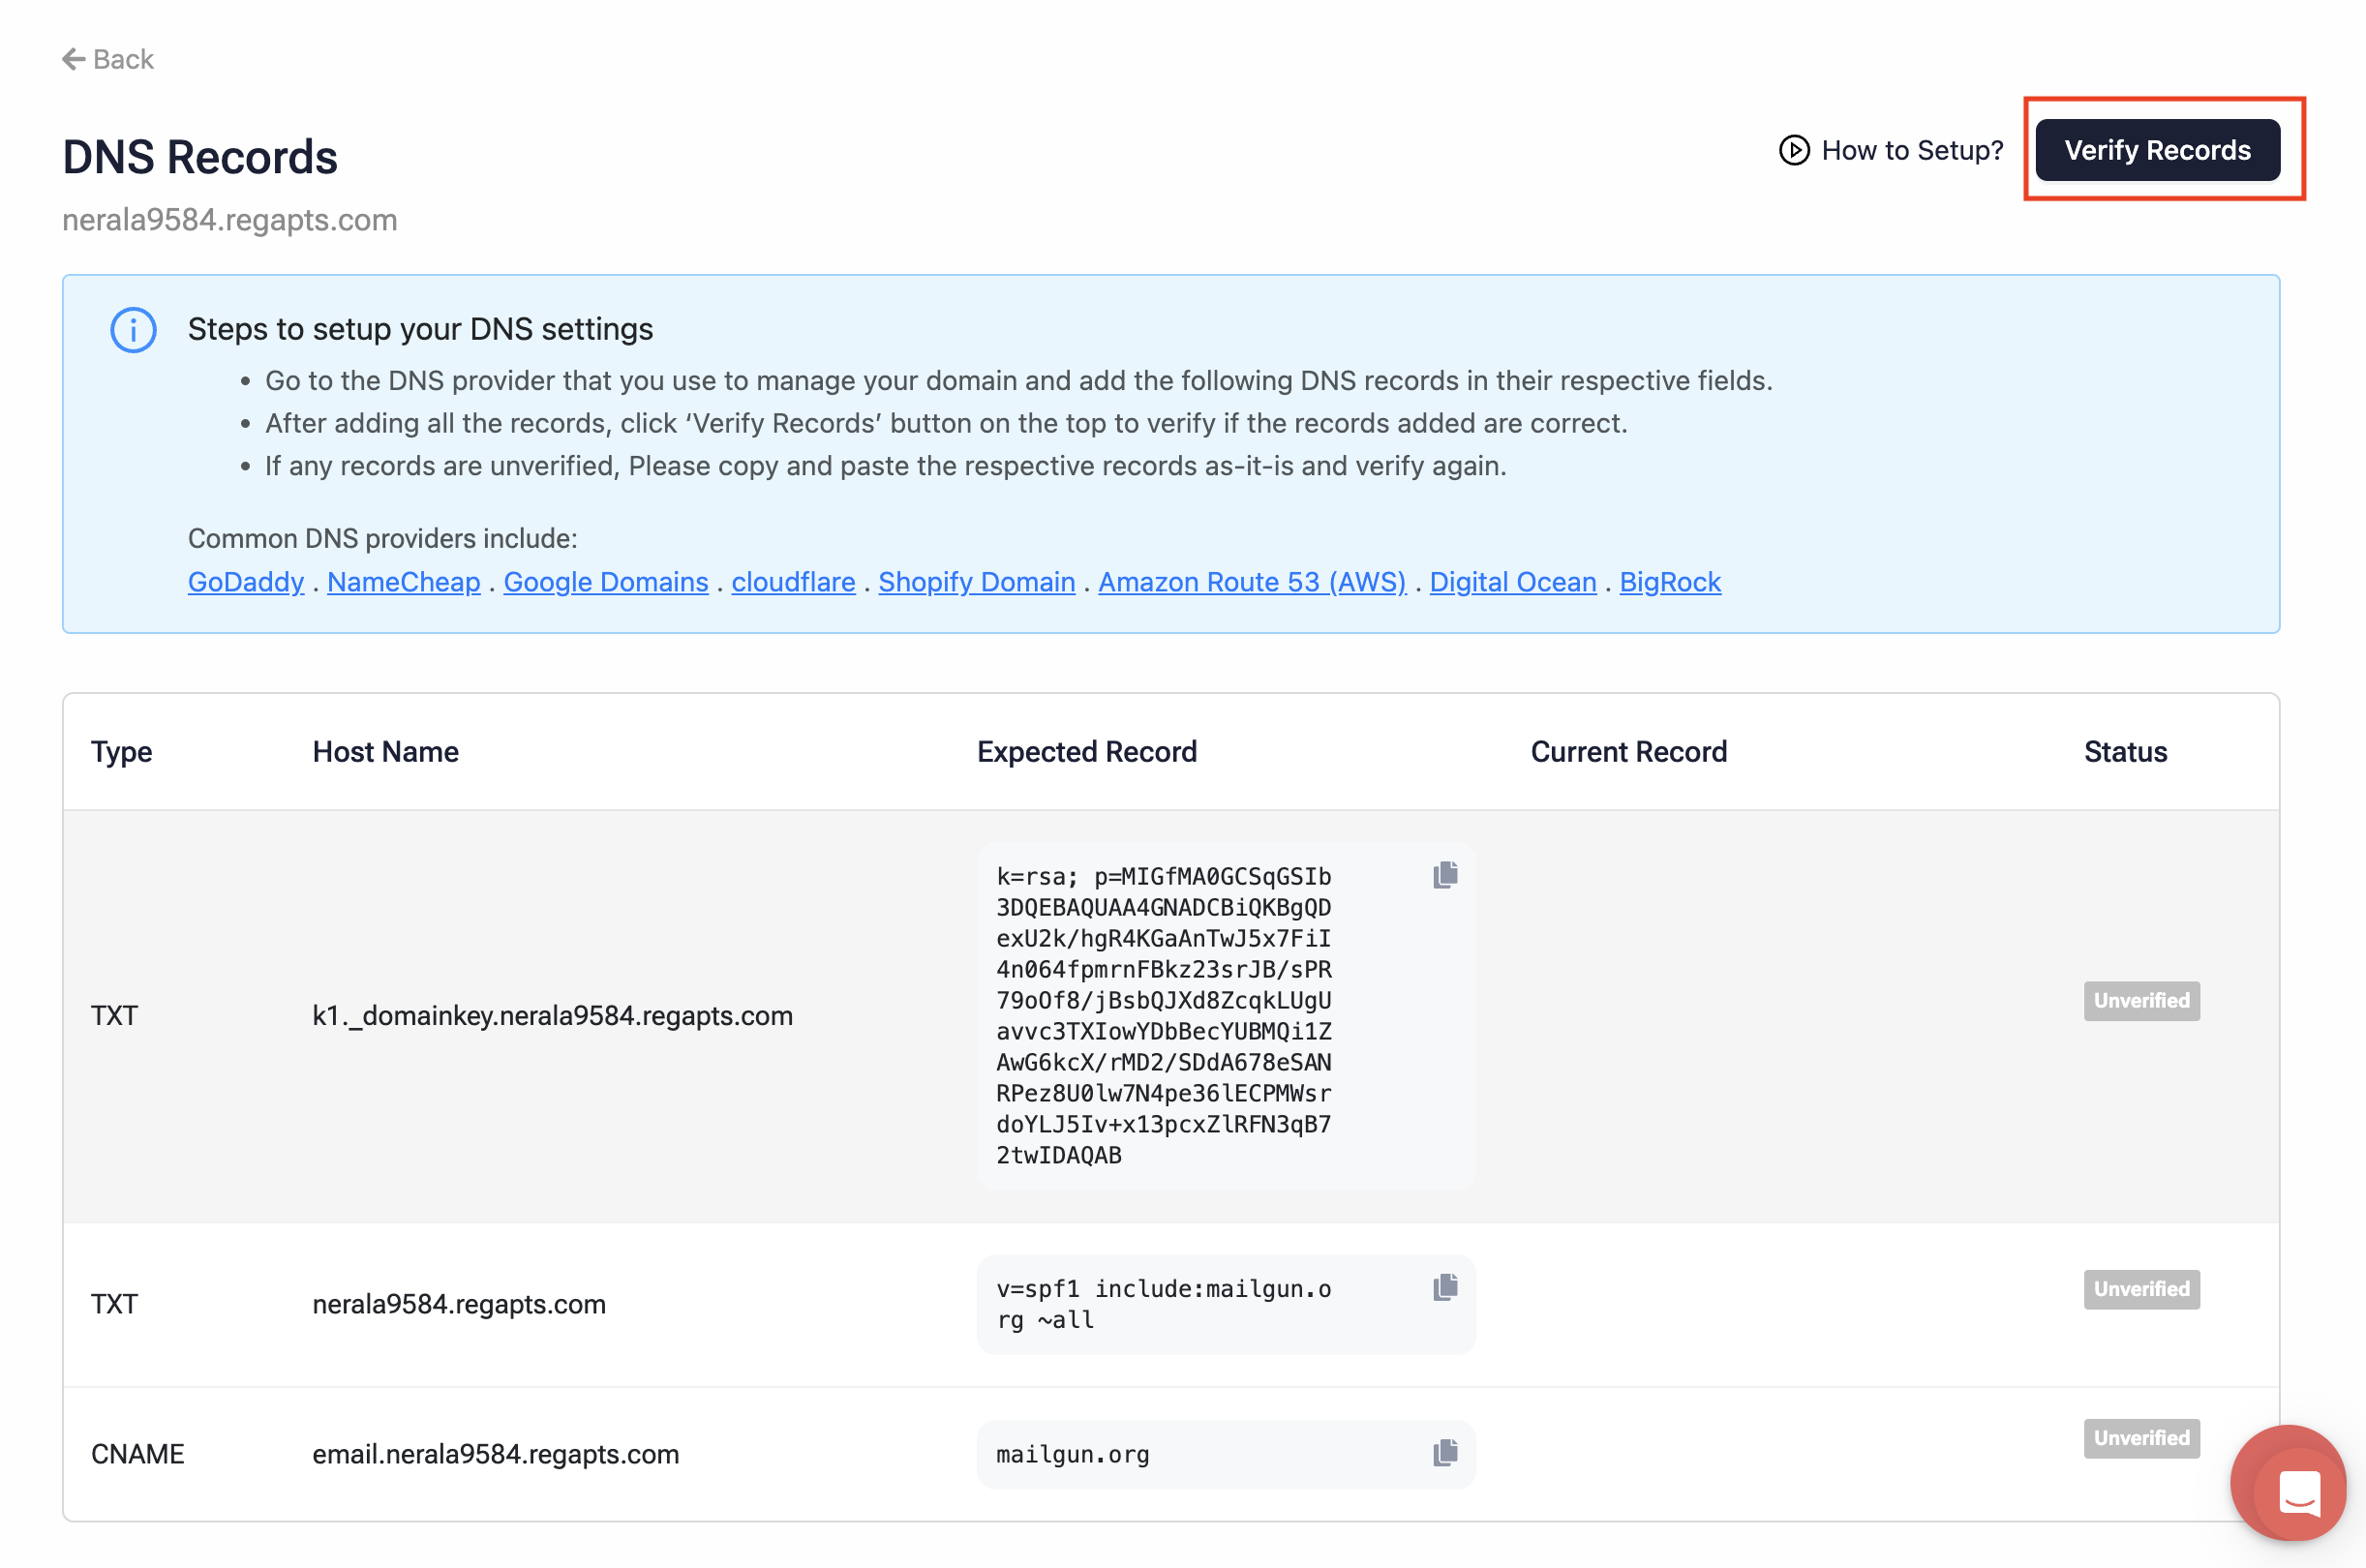
Verification
Follow the steps below to verify the records on Contlo added to the DNS provider:
- On the DNS records page, click Verify records.
- If any record stays unverified, copy and paste it again in your DNS settings and hit the Verify records button again.
Updated 2 months ago
What’s Next