
Setup Web Push on Contlo
Follow the steps below to set up Web Push on Contlo:
-
On the Contlo dashboard, go to App Market > Channels > Web Push and install the Web Push application.
-
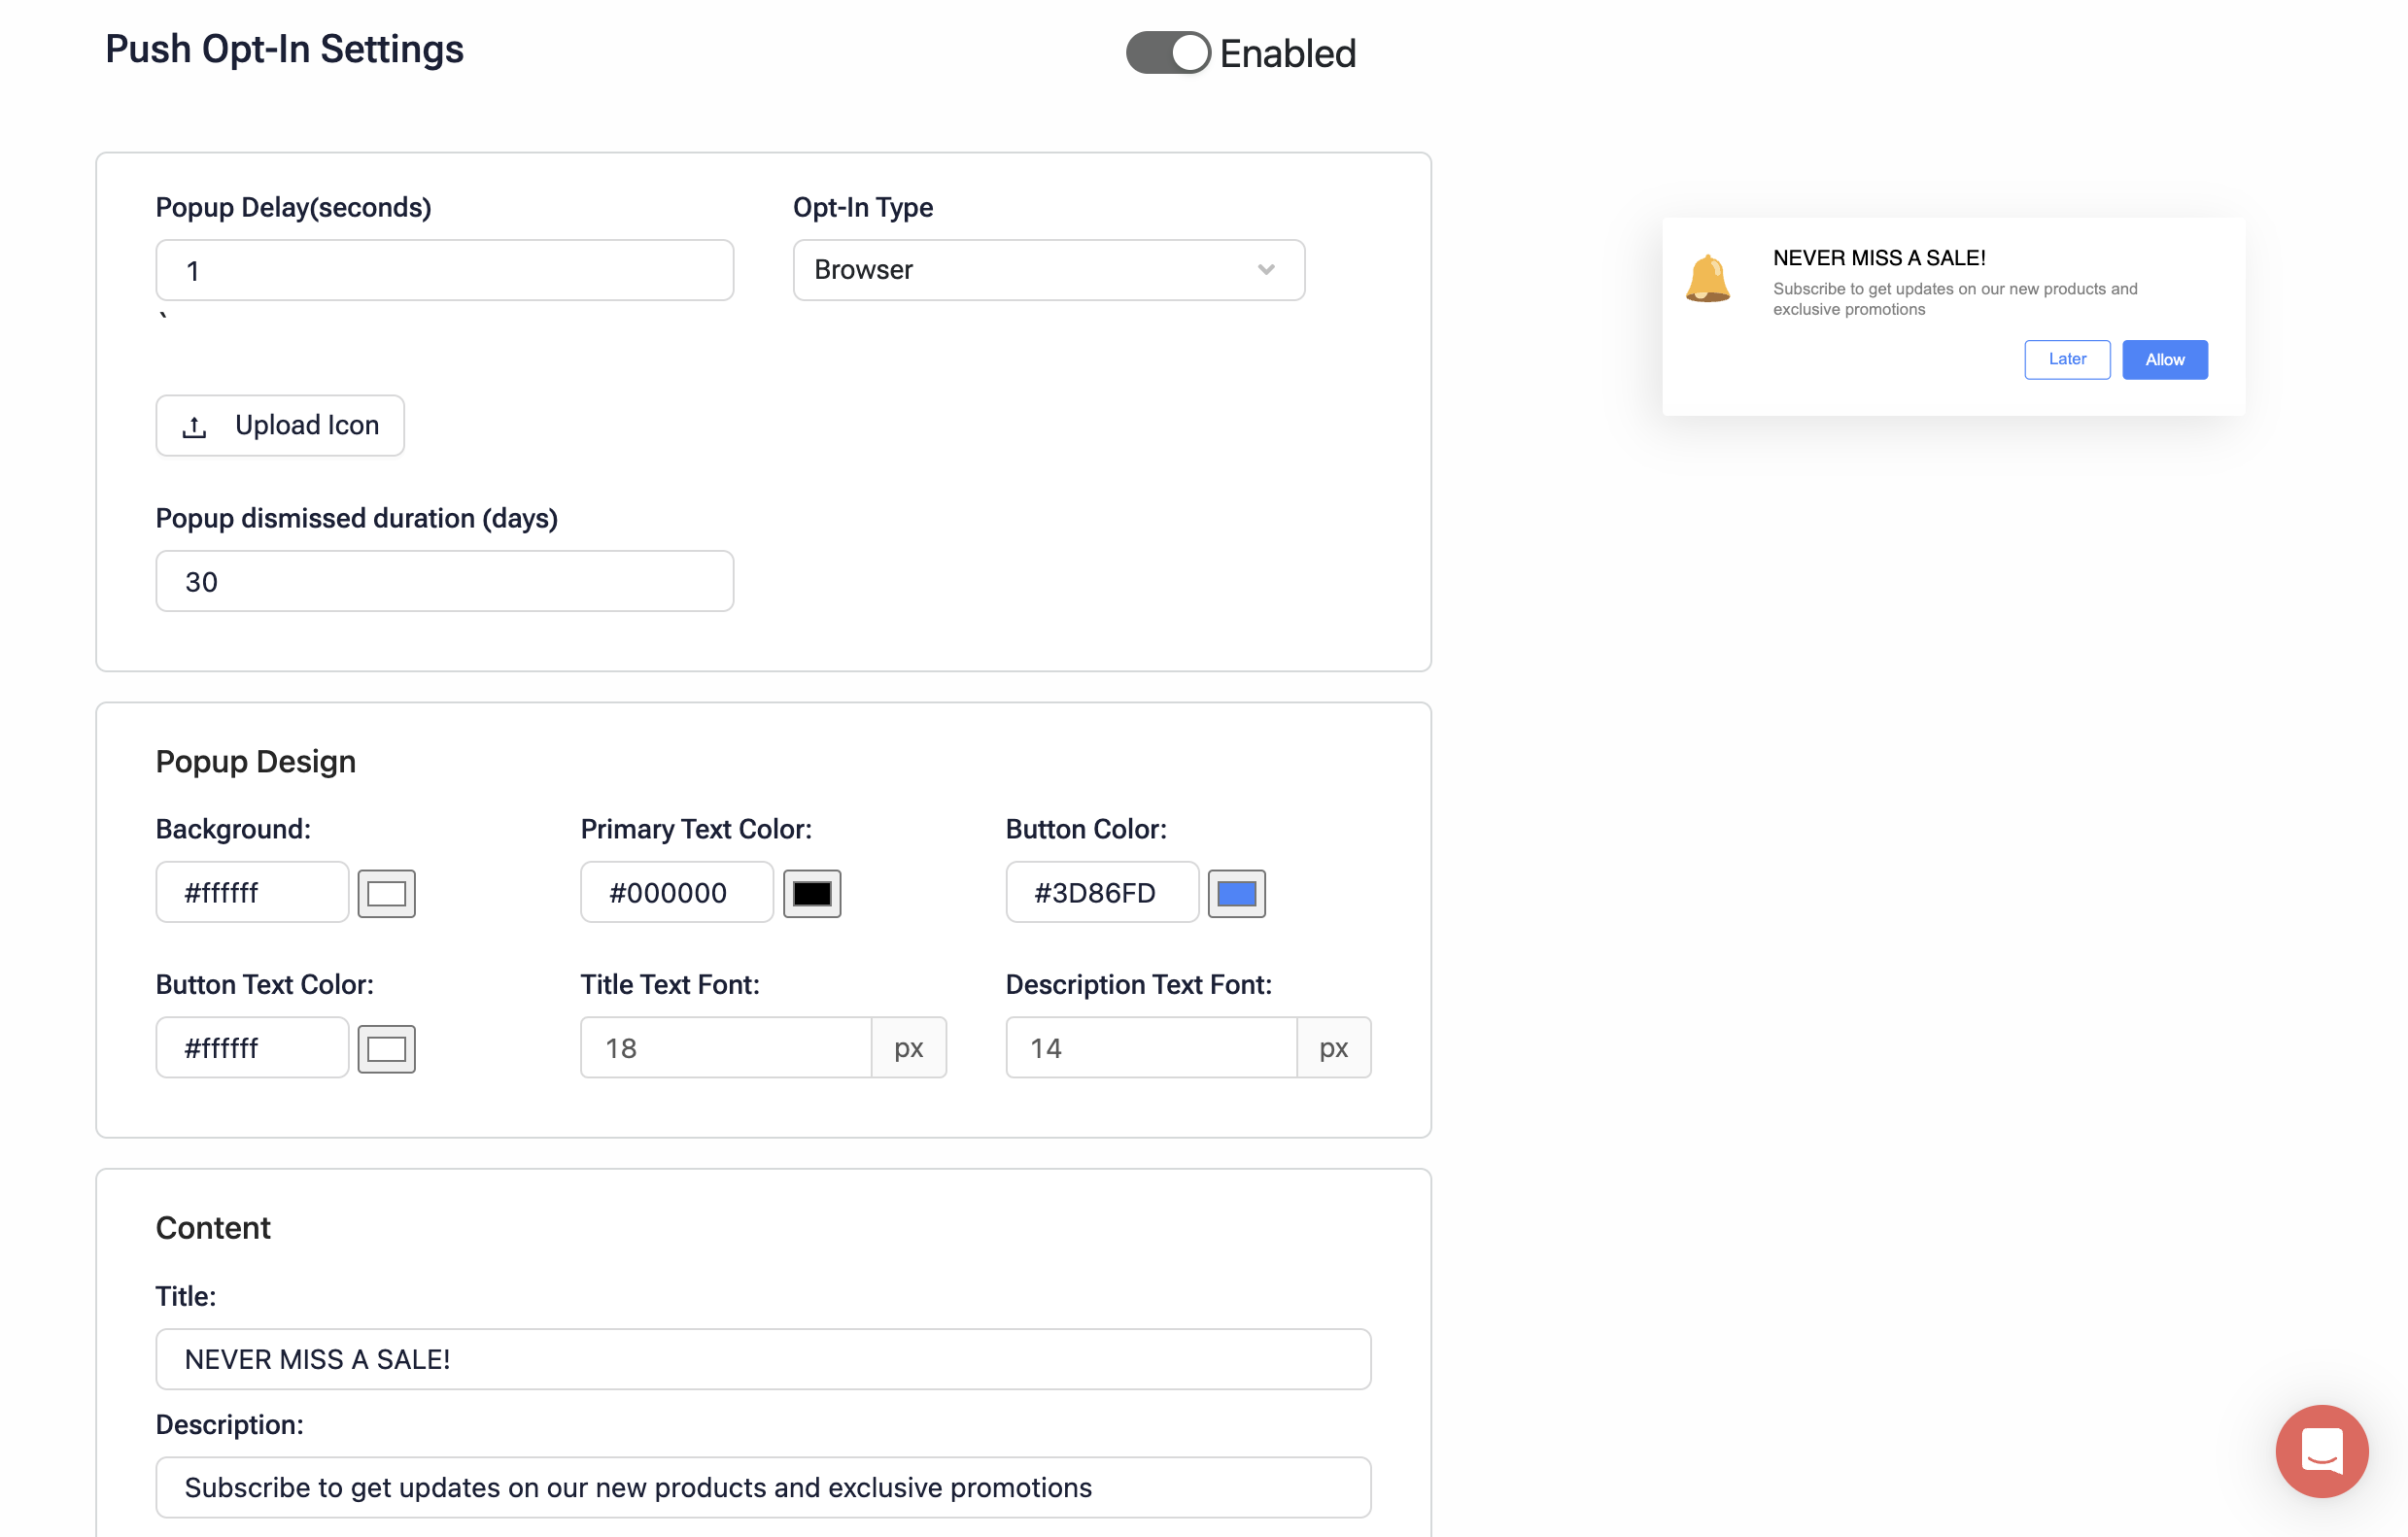
Upon installation, Push Opt-In Settings opens. It contains configurations to design and define the behavior of the Web Push opt-in pop-up as described below:
-
Popup Delay(seconds): Time to display the Web Push opt-in pop-up after the page loads.
-
Opt-In Type: Select the design for the Web Push opt-in pop-up - Browser or Custom
- Browser: Display the opt-in pop-up as the browser's default.
- Custom: Customize the opt-in pop-up as per your requirement.
-
Upload Icon: Add an icon image that would be displayed on the Web Push permission pop-up.
-
Popup dismissed duration (days): The duration to display the opt-in pop-up again if the customer dismisses it.
-
Popup Design: This section enables you to design your custom opt-in pop-up.
- Background: Sets the background color of the pop-up.
- Primary Text Color: Sets the text color of the permission pop-up.
- Button Color: Sets the button color in the Web Push opt-in permission pop-up.
- Button Text Color: Sets the color of the button text.
- Title Text Font: Sets the font of the pop-up title.
- Description Text Font: Sets the font of the description on the permission pop-up.
-
Content: This section allows you to add the content for the opt-in permission pop-up.
- Title: Enter the notification header/title.
- Description: Enter the description for the permission.
- Button Text: Sets the text of the button.
- Close Button Text: Sets the text of the button that closes the opt-in permission pop-up.
-
-
You can preview the Web Push opt-in pop-up you designed on the right side of the configurations.
-
Upon successfully configuring the Web Push, move to the Campaigns section to create a Web Push Campaign.
Updated 2 months ago